The Boxy Icon: Restoring the Rear Vision of Your 2010-2013 Kia Soul
The first-generation Kia Soul, spanning the 2010 to 2013 model years, revolutionized the compact crossover market with its distinctively boxy silhouette, flat roofline, and aggressively vertical rear liftgate. While this unique architectural design maximizes interior cargo space and headroom, it positions the rear hatch glass at an almost perfect 90-degree angle. This upright orientation makes the back glass uniquely vulnerable to direct impacts from backing into unseen obstacles, flying road debris, and even extreme temperature fluctuations. Unlike a sloped windshield that can deflect incoming objects, the vertical glass of the Kia Soul takes impacts head-on. When this tempered safety glass shatters, it compromises not only your rearward visibility and vehicle security but also exposes your cabin to the unpredictable Canadian elements. Restoring this crucial structural and functional component requires the steady hand and deep technical knowledge of a master auto glass technician.
Premier Mobile Auto Glass Replacement Across the GTA
When you are dealing with a blown-out rear window, driving your vehicle to a traditional repair shop is not just uncomfortable—it is highly unsafe and legally risky. That is why AlexWindshield brings the glass shop directly to your driveway. As the leading experts in mobile auto glass services, we proudly serve the entire Greater Toronto Area (GTA). Whether you have discovered a shattered rear window while parked at your home in Vaughan, need an emergency replacement during your workday in Richmond Hill, or are stranded with a broken hatch glass at a shopping center in Markham, our fully equipped mobile service vehicles are ready to dispatch. We carry the specialized tools, premium materials, and OEM-equivalent glass required to perform a flawless, factory-standard replacement wherever you are located, ensuring minimal disruption to your daily routine.
Understanding the Tempered Back Glass of the Kia Soul
To properly execute a back glass replacement on a 2010-2013 Kia Soul, one must understand the anatomy of the glass itself. Unlike the laminated glass used for windshields, which holds its shape when cracked, the back glass is constructed from tempered safety glass. Through a process of extreme heating and rapid cooling during manufacturing, tempered glass is designed to instantly shatter into thousands of small, granular, dull-edged cubes upon impact. This engineering prevents large, guillotine-like shards from injuring passengers during a collision. Furthermore, the back glass of the Kia Soul is a complex component. It features an integrated thermal defroster grid essential for melting snow and ice during harsh Ontario winters, and it houses a centralized pass-through for the rear wiper motor assembly.
The Mess of Tempered Glass: Why Expert Intervention is Mandatory
Because of its tempered nature, a shattered Kia Soul back window is a spectacular mess. The explosive force of the break sends thousands of granular glass pieces violently throughout the vehicle. These fragments embed themselves deep into the rear cargo carpet, slip between the folding rear seats, and, most problematically, drop down into the hollow cavity of the rear liftgate door. If a technician simply slaps a new piece of glass on without addressing this debris, you will be plagued by an infuriating rattling noise every time you open or close the hatch, and worse, stray shards can jam the mechanical liftgate latch, causing the door to fail to lock. At AlexWindshield, debris mitigation is treated as a critical, non-negotiable step of our replacement protocol.
Master Technician's Step-by-Step Back Glass Replacement Process
Achieving a safe, leak-proof, and factory-quality installation requires a rigorous, methodical approach. As a Master Technician at AlexWindshield, I execute the following comprehensive A-to-Z procedure to guarantee your 2010-2013 Kia Soul is returned to pristine condition.
Step 1: Vehicle Assessment and Interior Protection
Before any tools touch your vehicle, a thorough pre-installation inspection is conducted. We verify the exact glass specifications, ensuring the replacement glass perfectly matches the tint and defroster grid layout of your original 2010-2013 model. Next, we meticulously prepare the vehicle to prevent any collateral damage. Heavy-duty drop cloths and protective blankets are draped over the rear seats, cargo floor, and exterior bumper. We also apply low-tack automotive painter’s tape around the exterior painted edges of the liftgate to protect the clear coat from accidental tool scratches during the extraction process.
Step 2: Liftgate Panel Removal and Extensive Vacuuming
This is a defining step that separates a true professional from an amateur. Using specialized, non-marring nylon trim pad removers, I carefully disengage the hidden retaining clips to completely remove the interior plastic trim panels covering the inside of your Kia Soul's rear hatch. With the inner cavity of the metal liftgate fully exposed, I deploy a high-powered industrial shop vacuum fitted with micro-crevice attachments to extract every single shard of broken glass. I simultaneously use a compressed air blowgun to blast trapped glass cubes out of the intricate locking latch mechanism and wiper motor housing. We also thoroughly vacuum the rear cargo area, the tracks of the rear seats, and the trunk floorboard, ensuring your vehicle is 100% free of hazardous glass debris.
Step 3: Disconnecting Electrical and Mechanical Components
The first-generation Kia Soul features vital rear hardware that must be carefully uninstalled. I use a specialized puller to safely remove the rear wiper arm from the exterior. Inside, I disconnect the wiring harness leading to the rear wiper motor to ensure it is not damaged during the glass removal. I then carefully unplug the electrical spade connectors that supply power to the thermal defroster grid. Handling these electrical connections with precision ensures that your rear visibility systems will function perfectly once the new glass is installed.
Step 4: Removing the Remaining Glass and Old Urethane
Although the center of the glass has shattered, the outer perimeter of tempered glass remains firmly glued to the vehicle's pinchweld by the original factory adhesive. Using a specialized cold knife and an advanced wire cutting system, I carefully slice through the incredibly tough polyurethane bead. This releases the remaining glass ring from the frame. Once the frame is clear of large pieces, I use a razor-sharp scraper to meticulously trim the old, hardened urethane bead down to a uniform thickness of 1 to 2 millimeters. This thin base layer serves as an optimal foundation for the new adhesive to bond with.
Step 5: Surface Cleaning and Primer Application
A flawless bond requires an immaculately clean surface. The trimmed pinchweld and the surrounding bare metal are thoroughly scrubbed using a specialized, fast-flashing auto glass chemical cleaner to remove dirt, grease, and microscopic contaminants. If the scraping process exposed any bare metal on the liftgate frame, I apply a premium, chemically active black glass primer. This highly specialized primer performs two critical functions: it absolutely prevents the formation of structural rust on the vehicle's frame, and it creates a permanent molecular bridge between the metal and the new urethane adhesive.
Step 6: High-Quality Urethane Adhesive Application
The structural integrity of your newly installed back glass relies entirely on the quality of the adhesive. At AlexWindshield, we exclusively utilize OEM-grade, rapid-curing polyurethane adhesive. Using a high-ratio electric caulking gun, I lay down a perfectly consistent "V-bead" of hot urethane directly onto the prepared pinchweld. The triangular shape of the V-bead is specifically engineered to collapse evenly when the glass is pressed into place, eliminating the risk of air pockets, water leaks, or wind whistling.
Step 7: Precision Installation of the New Back Glass
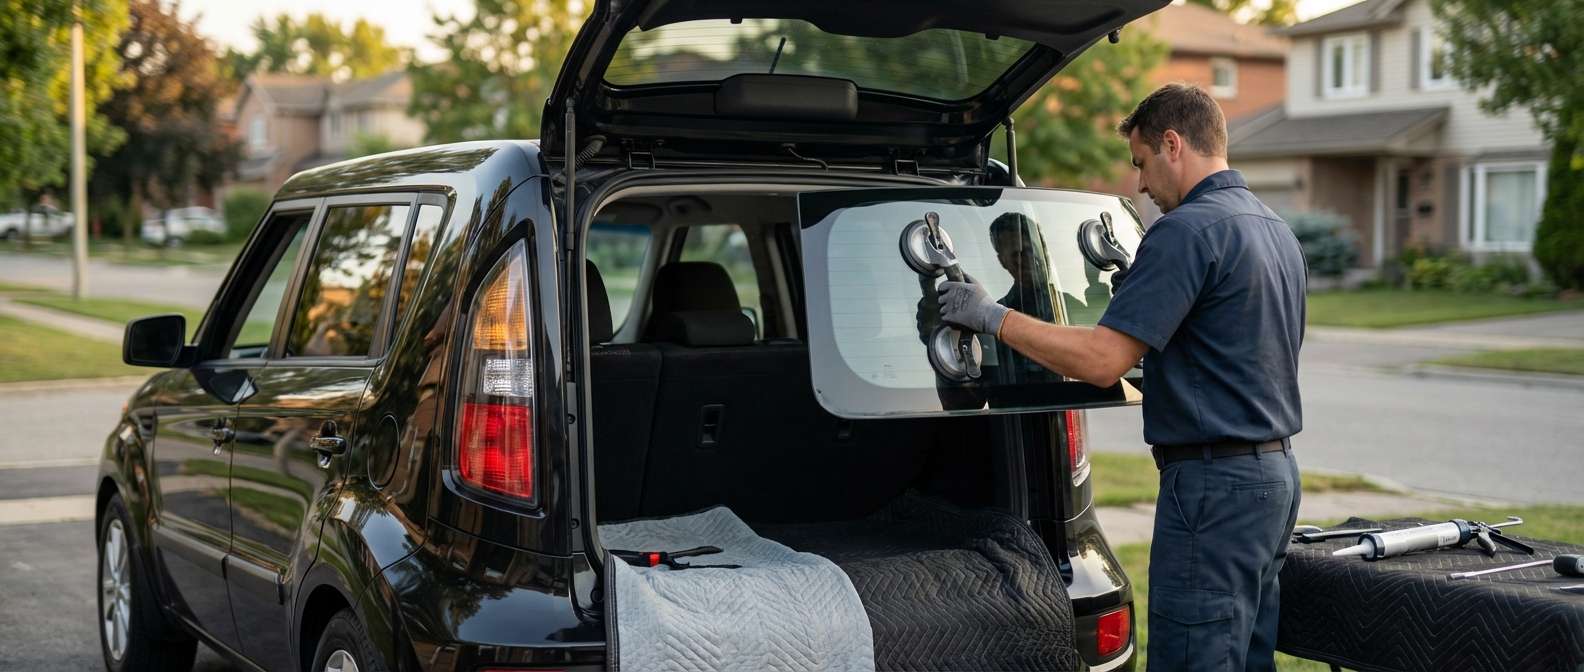
With the fresh urethane applied, time is of the essence. Using heavy-duty pneumatic suction cups, I lift the new, OEM-quality Kia Soul back glass into position. This process requires absolute precision to ensure the glass is perfectly centered within the liftgate frame, maintaining even gaps on all sides. Once the glass is meticulously aligned, firm and even pressure is applied around the entire perimeter to seat the glass deeply into the urethane V-bead. Specialized retention tape is temporarily applied to the upper edge of the glass, securing it to the roofline to prevent any micro-shifting while the urethane undergoes its initial chemical cure.
Step 8: Reassembly, Reconnection, and Final Cleanup
As the adhesive begins to cross-link and cure, I reverse the disassembly process. The interior liftgate trim panels are carefully snapped back into place, ensuring a tight, factory-fresh fit. The defroster electrical tabs are securely reconnected, and the rear wiper motor assembly and wiper arm are precisely reinstalled and tested for correct resting alignment. Finally, the interior of the cargo area is given one last inspection and vacuum, and the newly installed back glass is polished with an ammonia-free cleaner to a brilliant, streak-free shine.
Post-Installation Care for Your Kia Soul
To guarantee the longevity and safety of your newly installed back glass, it is vital to follow these master technician guidelines for the first 24 to 48 hours following your service:
- Observe the Safe Drive-Away Time: Do not drive the vehicle until the fast-curing polyurethane has achieved safe structural strength. Your technician will inform you of the exact wait time based on ambient temperature and humidity.
- Avoid High-Pressure Washes: Refrain from taking your Kia Soul through an automatic car wash or using a high-pressure power washer for at least 48 hours to prevent water from penetrating the curing urethane seal.
- Leave the Tape Intact: Keep the temporary retention tape on the exterior of the glass for at least 24 hours to ensure the glass remains perfectly aligned.
- Crack a Window: For the first 24 hours, leave a side door window rolled down slightly (about an inch) when closing the doors or the rear hatch. This prevents the buildup of sudden cabin air pressure, which could forcefully push the newly set back glass outward and break the absolute seal.
Trust AlexWindshield: Your Mobile Auto Glass Experts
Dealing with a shattered rear window on your 2010-2013 Kia Soul is incredibly stressful, but the replacement process does not have to be. As the premier mobile auto glass specialists in the Greater Toronto Area (GTA), AlexWindshield is dedicated to delivering dealership-level quality directly to your doorstep in Vaughan, Richmond Hill, Markham, and beyond. We combine the convenience of total mobile service with the rigorous technical standards of certified master technicians. Every back glass replacement we perform is backed by our comprehensive Lifetime Warranty, protecting you against leaks, wind noise, and manufacturer defects for as long as you own your vehicle. Do not compromise your safety or settle for incomplete cleanups. Contact AlexWindshield today to restore the security, visibility, and integrity of your Kia Soul with confidence.


