Restoring the Structural Integrity of Your First-Generation Family Hauler
The Kia Sedona 2002-2005 represents an era of robust, first-generation family minivans built to withstand the rigors of daily commuting, cross-country road trips, and heavy cargo hauling. These vehicles were engineered with a focus on passenger safety and cabin insulation. However, when a piece of side glass, such as the vent glass, is shattered by road debris, extreme temperature fluctuations, or an unfortunate break-in, that carefully engineered sanctuary is instantly compromised. You are left dealing with howling wind noise, water leaks, and a significant security vulnerability. As a Master Technician at AlexWindshield, I have spent years servicing these specific vehicles, understanding the unique brittle nature of their aging interior trim and the precise curvature of their factory auto glass. When you need a vent glass replacement for your Kia Sedona 2002-2005, you require more than just a quick patch job; you need a technically flawless restoration.
Why Immediate Vent Glass Replacement is Crucial for Your Kia Sedona
Many drivers mistakenly believe that because the vent glass is one of the smallest panes on the vehicle, its replacement can be delayed. This is a critical error. The vent glass on the 2002-2005 Kia Sedona plays a vital role in the overall aerodynamics and weatherproofing of the vehicle's cabin. Driving with a broken or temporarily taped vent glass exposes your vehicle's interior to moisture, which can rapidly lead to mold growth and electrical issues within the door or side panel wiring harnesses. Furthermore, compromised glass reduces the overall structural rigidity of the vehicle's side profile. By choosing professional replacement, you restore the original Noise, Vibration, and Harshness (NVH) standards that Kia intended for this reliable minivan.
AlexWindshield: Your Premier Auto Glass Experts in the Greater Toronto Area (GTA)
Finding a trusted auto glass technician who understands the specific nuances of early 2000s vehicles can be challenging. At AlexWindshield, we pride ourselves on delivering dealership-level expertise directly to your driveway. We understand that our clients lead busy lives, which is why we offer comprehensive mobile service across the Greater Toronto Area (GTA). Whether you are parked at a shopping plaza in Vaughan, at your home driveway in Richmond Hill, or at an office building in Markham, our fully equipped mobile service vans come to you. You do not need to risk driving a compromised vehicle on Highway 400 or the 407; our Master Technicians bring the auto glass shop directly to your location.
Master Technician's A-to-Z Guide: The Kia Sedona Vent Glass Replacement Process
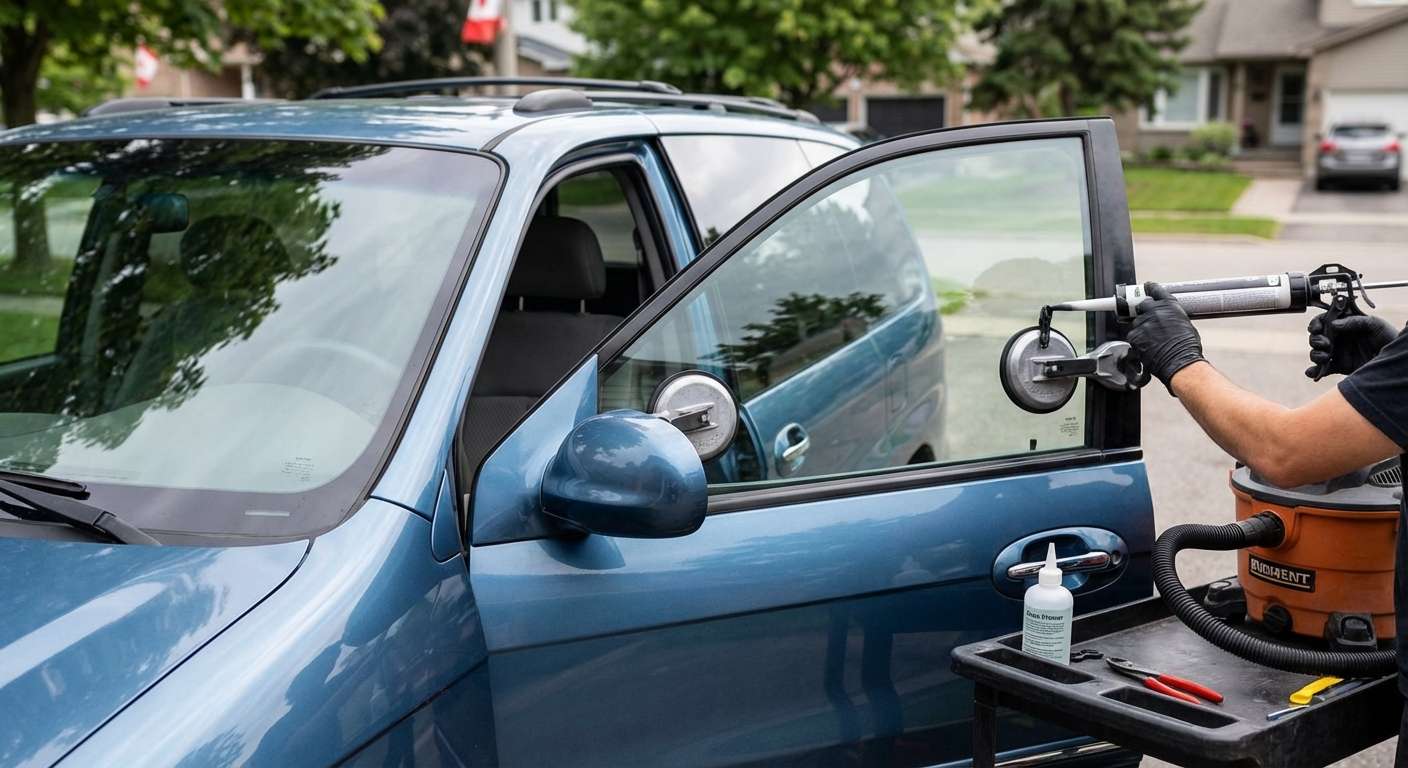
Replacing the vent glass on a Kia Sedona 2002-2005 is a highly technical procedure that requires precision, patience, and professional-grade materials. Because this is a side glass component, it often shatters into thousands of tiny, sharp tempered glass pieces. Here is the rigorous, step-by-step process we execute at AlexWindshield to ensure a flawless installation.
Step 1: Vehicle Preparation and Interior Protection
Before any tools are lifted, we secure the vehicle's interior. We lay down heavy-duty protective drop cloths over the Sedona's seats, center console, and floor mats. We also apply automotive-grade protective tape to the exterior paint surrounding the window frame to prevent any accidental scratches during the extraction and installation process. Protecting your vehicle is always our first priority.
Step 2: Interior Door Panel and Trim Removal
To properly access the mounting points and the lower track of the vent glass, the interior trim must be removed. Using specialized nylon pry tools, we carefully unclip the aging interior plastic panels and door cards of your 2002-2005 Kia Sedona. Older plastics can be exceptionally brittle, so this step is performed with meticulous care by our seasoned technicians. We disconnect any power window switches or speaker harnesses to fully expose the internal door cavity and window regulator assembly.
Step 3: Comprehensive Shattered Glass Vacuuming
When a vent glass or door glass breaks, tempered glass shards fall deep into the door cavity, window tracks, and the vehicle's cabin. If left behind, these shards will cause a persistent, irritating rattling sound every time you drive or close the door, and they can even damage the new glass or window regulator mechanisms. We utilize a high-powered industrial shop vacuum with flexible micro-attachments to extract every single piece of broken glass. We vacuum the interior seats, the floorboards, the weather stripping, and deep inside the metal door frame. This deep-cleaning process is mandatory for all our side and rear glass replacements at AlexWindshield.
Step 4: Removal of the Old Glass Frame and Residual Urethane
Depending on the specific trim level of the Sedona, the vent glass may be fully encapsulated in a urethane bed or bolted within a modular frame. For urethane-bonded vent glass, we use professional cold knives and specialized wire cutting tools to slice through the original factory polyurethane adhesive. We extract the remaining broken glass edge and the old encapsulation frame, ensuring the vehicle's pinch weld remains completely undamaged.
Step 5: Surface Cleaning and Pinch Weld Preparation
A new piece of glass will not bond properly to a dirty surface. We meticulously trim down the old, existing urethane bead to a thickness of approximately 1-2 millimeters, creating an ideal base for the new adhesive. The entire pinch weld area is then cleaned using an ammonia-free, professional auto glass cleaner. We remove all dirt, road grime, and moisture to guarantee a sterile bonding surface.
Step 6: Primer Application for Maximum Adhesion
This is a critical step that many budget auto glass shops skip. We apply a high-quality, scientifically formulated glass primer to the frit band (the black painted edge) of the new vent glass. Additionally, we apply an anti-corrosion pinch weld primer to any microscopic scratches on the vehicle's metal frame that may have occurred during the removal process. The primer acts as a chemical bridge, ensuring the urethane adhesive cross-links perfectly with both the glass and the vehicle body, while permanently preventing future rust.
Step 7: Application of High-Quality Polyurethane Adhesive
Using a battery-operated, high-torque caulking gun, we lay down a precise, continuous, V-shaped bead of high-quality urethane adhesive. At AlexWindshield, we exclusively use premium, fast-curing OEM-grade adhesives that meet or exceed federal safety standards. This ensures that the glass will hold securely in place, maintaining the structural integrity of your Kia Sedona even in the event of an accident or rollover.
Step 8: Precision Installation of the New Vent Glass
With the adhesive perfectly applied, the new vent glass is carefully guided into the frame. We use suction cups and manual dexterity to press the glass firmly into the urethane bed. We ensure the glass is perfectly aligned with the exterior molding, maintaining consistent gap lines and flush fitment that perfectly matches factory specifications. Retention tape is temporarily applied to hold the glass firmly in place while the chemical curing process begins.
Step 9: Reassembly and Final Quality Control Inspection
Once the glass is securely set, we reverse the disassembly process. We re-install the interior vapor barrier, carefully snap the door panels and interior trim back into place, and reconnect all electrical components. We then perform a rigorous final inspection, checking for a watertight seal and ensuring all electronic switches function properly. Finally, we clean the new vent glass until it is crystal clear, wiping away any fingerprints or smudges.
Navigating Auto Glass Hazards in the GTA
Driving in the Greater Toronto Area (GTA) presents unique challenges for your vehicle's auto glass. From the heavy construction zones in Vaughan that kick up sharp gravel, to the icy winter road treatments in Richmond Hill, and the congested commuter traffic in Markham, your Kia Sedona 2002-2005 is constantly exposed to environmental hazards. Because these older vehicles often have worn weather stripping, installing the new vent glass with absolute precision and premium sealants is essential to keep the harsh Canadian elements out of your cabin.
Why Our Process Guarantees Longevity
The difference between a mediocre auto glass replacement and a master-level installation lies entirely in the details. Our strict adherence to the correct chemical processes—specifically the mandatory use of auto glass primer and high-quality urethane—guarantees that your new vent glass will never leak, whistle, or unexpectedly detach. We respect the engineering of the Kia Sedona, treating your older vehicle with the same respect and technological care as a brand-new luxury car.
Contact AlexWindshield Today
Do not let a broken vent glass compromise the safety, security, and comfort of your daily drive. Whether you have suffered a break-in or accidental damage, our mobile units are ready to dispatch directly to your home or workplace. We bring premium auto glass solutions directly to residents across Vaughan, Richmond Hill, Markham, and the wider GTA.
- Mobile Convenience: We come to your location, saving you time and towing fees.
- Master Technicians: Highly trained experts specializing in exact-fit installations.
- Premium Materials: Only OEM-quality glass and industry-leading polyurethane adhesives are used.
- Comprehensive Cleanup: We guarantee a glass-free interior with our deep vacuuming process.
At AlexWindshield, we stand behind the quality of our craftsmanship. That is why every vent glass replacement we perform comes backed by our comprehensive Lifetime Warranty against leaks, wind noise, and manufacturer defects. Protect your vehicle and your family by choosing the top-rated auto glass experts in the region. Contact AlexWindshield today to schedule your mobile Kia Sedona 2002-2005 vent glass replacement and experience true professional automotive care.


