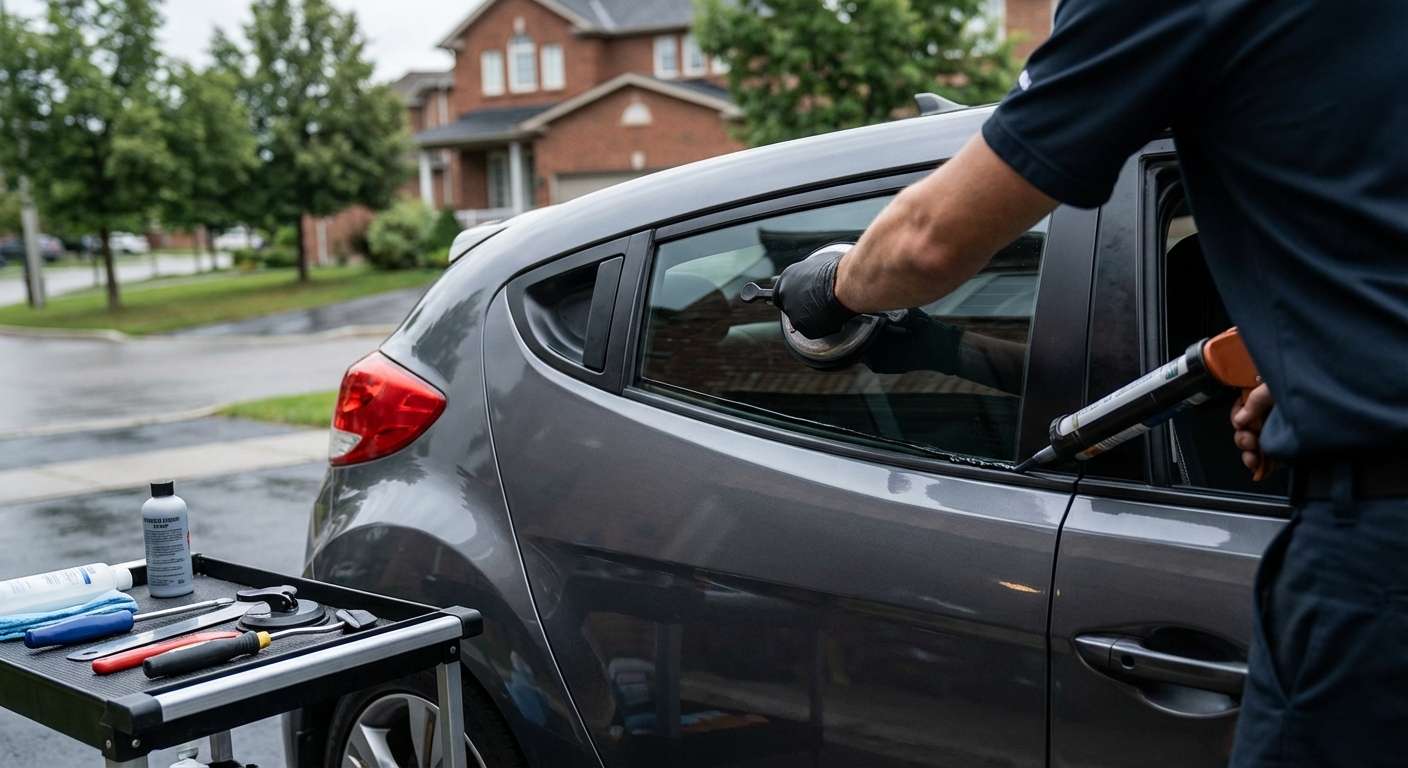
The Quirky Asymmetry of the 2012-2017 Hyundai Veloster: A Unique Challenge for Vent Glass Replacement
The 2012-2017 Hyundai Veloster is legendary in the automotive world for its incredibly unique, asymmetrical three-door configuration. Featuring a single, elongated door on the driver's side and two conventional doors on the passenger side, the Veloster breaks all the rules of standard vehicle design. However, this striking aesthetic also means that its auto glass—specifically the vent and quarter glass sections—requires a highly specialized approach when replacement is necessary. Whether you have suffered a break-in, road debris damage, or an unexpected collision, replacing the vent glass on a first-generation Veloster is not a run-of-the-mill job. It demands the precision, localized expertise, and unwavering attention to detail that only a Master Technician can provide.
At AlexWindshield, we do not just replace glass; we restore the structural integrity, safety, and distinct style of your beloved Veloster. Vent glass is uniquely positioned, often glued directly into the body frame or integrated intimately with the rear door assembly. Because this glass is tempered, an impact does not just cause a crack—it causes the entire pane to explode into thousands of tiny, sharp cubes. Navigating this complex cleanup and executing a flawless installation is where our deep technical expertise truly shines.
Premium Mobile Vent Glass Replacement Across the GTA
A shattered vent glass leaves your vehicle exposed to the elements, theft, and wildlife. Driving with a missing window is not just uncomfortable; it is fundamentally unsafe and puts your vehicle's interior at serious risk of irreversible weather damage. That is why AlexWindshield brings our state-of-the-art auto glass shop directly to your driveway, office, or parking garage.
We provide rapid, reliable, and premium mobile auto glass services across the Greater Toronto Area (GTA). Our specialized mobile units are fully equipped to service the unique needs of Hyundai Veloster owners specifically in Vaughan, Richmond Hill, and Markham. You do not need to take time out of your busy schedule to sit in a waiting room or risk driving a compromised vehicle on the 401. Our Master Technicians arrive with all the specialized tools, OEM-quality glass, and premium adhesives required to perform a factory-grade vent glass replacement right on the spot.
Comprehensive Step-by-Step Replacement Process for Hyundai Veloster Vent Glass
Replacing the vent glass on a 2012-2017 Hyundai Veloster requires meticulous step-by-step execution. Because vent glass is typically made of tempered safety glass, a breakage means dealing with extensive debris before any installation can even begin. Below is the exact, A-to-Z technical process utilized by the Master Technicians at AlexWindshield to ensure a flawless, safe, and permanent repair.
Step 1: Vehicle Pre-Inspection and Interior Protection
Before any physical work begins, our technicians conduct a thorough walk-around of your Veloster. We inspect the vehicle's paintwork, weather stripping, and interior trim surrounding the broken vent glass to document any pre-existing damage. Because shattered tempered glass is incredibly abrasive, we immediately deploy heavy-duty protective coverings. We drape the exterior paint below the window with specialized fender covers and meticulously cover the interior seats, floor mats, and center console with drop cloths. Protecting your vehicle's interior from rogue glass shards and chemical adhesives is our absolute first priority.
Step 2: Deep Extraction and Vacuuming of Shattered Glass
Unlike laminated windshields that hold together when struck, your Veloster's vent glass shatters into countless tiny, sharp pieces. Leaving even a few shards behind can cause rattling noises, damage to window regulators, or potential injury to passengers. Our technicians use high-powered, industrial-grade vacuums equipped with specialized crevice tools to meticulously extract every piece of broken glass. We vacuum the seats, the floorboards, the track systems, and the hidden gaps between the seats. Vacuuming all broken glass shards from the vehicle's interior is a mandatory, non-negotiable step in our premium service protocol.
Step 3: Interior Trim and Door Panel Removal
To properly access the mounting points of the vent glass and to remove the deepest glass debris, we must carefully disassemble the interior components. Depending on whether the broken vent glass is on the unique driver-side quarter or the passenger-side rear door, this process varies:
- Panel Detachment: We use specialized, non-marring nylon pry tools to safely unclip the interior door panels or rear quarter trim without scratching the plastics or breaking the fragile retaining clips.
- Hardware Removal: All hidden bolts, screws, and wiring harnesses (such as power window switches or speaker connections) are safely disconnected and stored.
- Internal Cavity Cleanup: With the panel removed, we gain access to the bottom cavity of the door or quarter panel. We thoroughly vacuum out the "glass trap" at the bottom to ensure no rattling occurs when you drive your Veloster over bumps.
Step 4: Removal of the Old Glass Frame and Residual Urethane
Vent glass on the Hyundai Veloster is often encapsulated and bonded to the vehicle's pinch weld using high-strength polyurethane adhesive. Removing the remnants of the broken glass and the old glue requires extreme precision.
- Cutting the Bead: We utilize advanced cold-knife technology and specialized auto glass cut-out wire to slice through the old urethane bead holding the broken vent glass frame in place.
- Protecting the Pinch Weld: We maintain a controlled cutting angle to ensure the underlying steel pinch weld is not scratched, which is vital to preventing future rust.
- Trimming the Urethane: We trim the old adhesive down to a thin, uniform baseline of about 1-2 millimeters. This "close-cut" provides the perfect foundational bonding surface for the new adhesive.
Step 5: Surface Preparation and Primer Application
The secret to a leak-proof, factory-quality seal lies entirely in the chemical preparation of the bonding surfaces.
- Cleaning the Surface: We clean the pinch weld and the edges of the new OEM-quality vent glass using an alcohol-based, lint-free cleaning agent to remove all dirt, grease, and finger oils.
- Applying Frit Primer: We apply a specialized black glass primer to the ceramic frit band of the new vent glass. This primer acts as a chemical bridge, ensuring the adhesive aggressively bites into the glass.
- Rust Prevention and Pinch Weld Primer: If any bare metal was exposed during the removal of the old glass, we immediately treat it with a high-grade automotive metal primer. This step is crucial to prevent oxidation and rust, ensuring the structural integrity of your Veloster for years to come.
Step 6: Precision Adhesive Application
With the surfaces properly prepped and primed, we proceed to the adhesive phase. At AlexWindshield, we never cut corners on materials. We exclusively use premium, fast-curing polyurethane adhesive that meets or exceeds original manufacturer safety standards.
- V-Bead Extrusion: Using a professional-grade powered caulking gun, we extrude a perfectly uniform "V-shaped" bead of high-quality adhesive directly onto the vehicle's pinch weld. The V-shape guarantees that when the glass is pressed into place, the urethane collapses perfectly, eliminating any chance of air bubbles or water leaks.
- Curing Time: The advanced urethane we use is designed to cure rapidly, ensuring a safe drive-away time that gets you back on the road securely and promptly.
Step 7: Installation of the New Vent Glass
Before the urethane begins to skin over, our technicians expertly maneuver the new vent glass into position. This step requires a steady hand and an incredibly accurate eye.
- Seating the Glass: We align the vent glass with the intricate body lines of the Veloster, gently pressing it into the fresh urethane bead.
- Depth Calibration: We ensure the glass sits perfectly flush with the adjacent body panels and weather stripping, guaranteeing an aerodynamic fit that prevents wind noise.
- Retention Taping: We apply specialized, auto-body safe retention tape to hold the glass firmly in its exact position while the primary curing process takes place.
Step 8: Reassembly and Final Quality Check
Once the glass is securely bonded, we begin the reassembly phase. The interior door panels, quarter trims, moisture barriers, and electronic connections are meticulously put back into their original factory positions. We conduct a final operational check of all nearby components, such as power windows and door locks, to ensure our work did not disrupt the vehicle's electrical systems. Finally, we clean the newly installed vent glass with a streak-free, ammonia-free foaming glass cleaner, leaving your Hyundai Veloster looking as pristine as the day it rolled off the assembly line.
The Hidden Dangers of Improper Vent Glass Replacement
It is easy to underestimate the importance of the small vent glass on your 2012-2017 Veloster. However, improper installation by inexperienced technicians can lead to a host of frustrating and costly issues. If the old urethane is not trimmed correctly, or if inferior adhesive is used, you will almost certainly experience severe water leaks during the heavy rainstorms common in the GTA. Furthermore, wind whistling at highway speeds can ruin the driving experience of your sporty hatchback. Additionally, failing to apply pinch-weld primer to scratched metal will cause hidden rust to rot your vehicle's frame from the inside out. By trusting a Master Technician who follows a strict, scientifically backed replacement protocol, you are protecting your investment and your peace of mind.
Choose AlexWindshield: Your Trusted Mobile Auto Glass Experts in the GTA
When the unique vent glass on your 2012-2017 Hyundai Veloster sustains damage, you need a service provider who understands the nuances of this specific vehicle. You need a team that respects your time, values your safety, and delivers uncompromising quality.
AlexWindshield is proud to be the premier provider of mobile auto glass repair and replacement services across the Greater Toronto Area. Whether you are parked in a commercial lot in Markham, your home driveway in Vaughan, or an office complex in Richmond Hill, our fully equipped mobile technicians bring the highest standard of auto glass care directly to you. We handle everything from complex vent and door glass cleanups to full windshield replacements complete with mandatory ADAS camera calibration.
We stand confidently behind our craftsmanship, which is why every single vent glass replacement we perform is backed by our comprehensive Lifetime Warranty against leaks, wind noise, and manufacturer defects. Do not let a shattered vent glass disrupt your life or compromise the striking look of your Hyundai Veloster. Contact AlexWindshield today for industry-leading expertise, ultimate mobile convenience, and flawlessly executed auto glass solutions.


