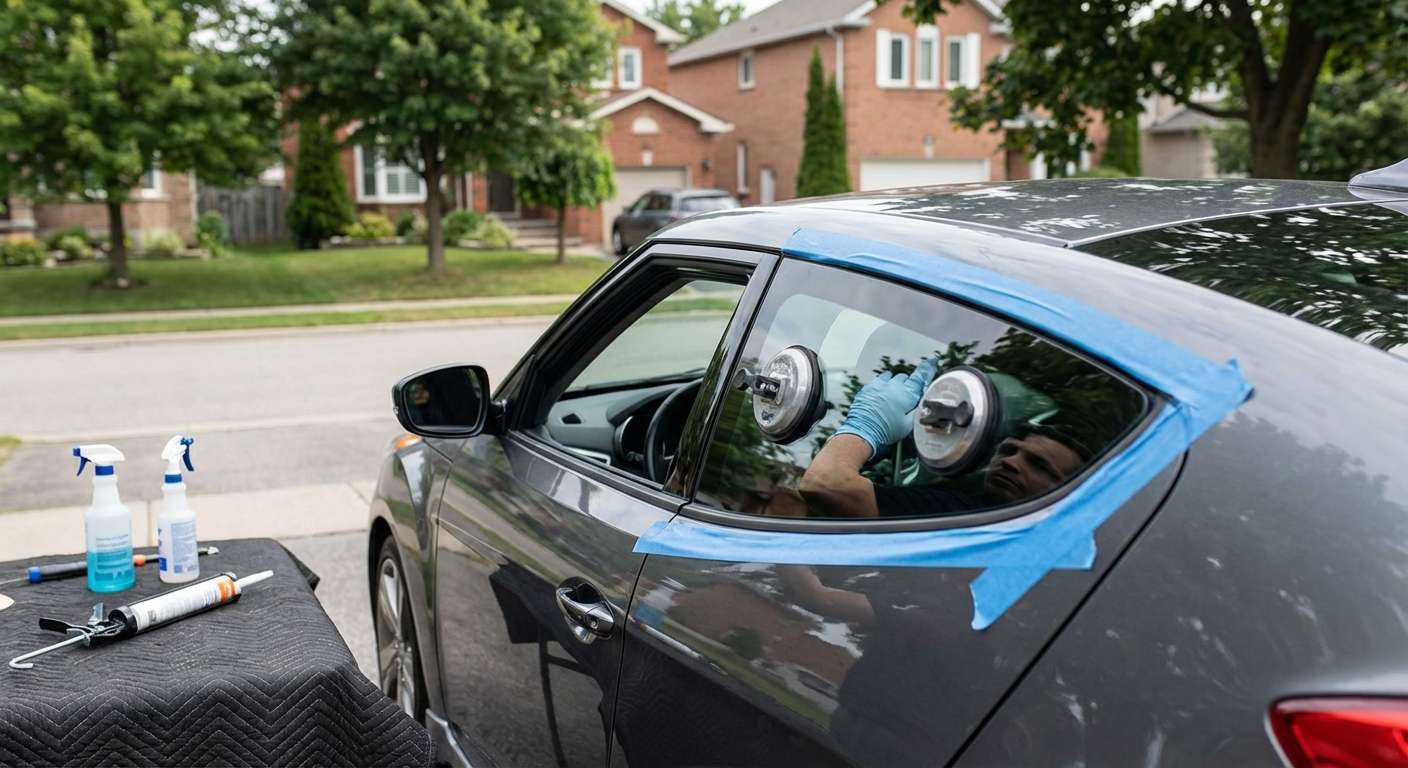
The Asymmetrical Icon: Quarter Glass Replacement for the 2012-2017 Hyundai Veloster
When Hyundai introduced the Veloster to the market for the 2012 to 2017 model years, it completely disrupted the traditional hatchback segment with its bold, quirky, and iconic asymmetrical three-door design. Featuring a single elongated door on the driver's side and two standard doors on the passenger side, the structural layout of this vehicle makes its glass components entirely unique. Because of this unconventional body style, a Hyundai Veloster quarter glass replacement is not a standard, run-of-the-mill job. The dimensions, mounting points, and curvature of the quarter glass differ drastically depending on whether the damage is on the driver or passenger side.
As a Master Technician at AlexWindshield, I have worked on hundreds of Velosters. I know firsthand that replacing the quarter glass on this specific model requires an elevated level of precision, specialized tools, and a deep understanding of Hyundai’s factory specifications. Whether your quarter glass has been shattered by a break-in, damaged by road debris, or compromised by extreme weather, restoring the vehicle's structural integrity and weatherproofing is our top priority.
Why You Cannot Ignore a Damaged Quarter Glass
Unlike a front windshield, which is made of laminated glass that spiderwebs when struck, the quarter glass on your 2012-2017 Hyundai Veloster is manufactured using tempered safety glass. When tempered glass is compromised, it is designed to shatter instantly into thousands of tiny, blunt pieces to prevent severe lacerations. While this is a brilliant safety feature, it leaves your vehicle’s interior completely exposed to the elements. Immediate replacement is crucial for several reasons:
- Vehicle Security: An open or temporarily taped quarter window makes your Veloster an easy target for theft and vandalism.
- Weather Protection: Rain, snow, and humidity can quickly ruin your interior upholstery, cause electrical shorts in the rear wiring harnesses, and lead to mold growth.
- Cabin Acoustics: The aerodynamic shape of the Veloster means an open quarter panel area will create deafening wind noise and unbearable whistling at highway speeds.
- Structural Safety: Modern auto glass is a load-bearing component of your vehicle’s cabin. Proper installation restores the rigid structural integrity of your Hyundai.
Master Technician’s Step-by-Step Quarter Glass Replacement Process
At AlexWindshield, we do not cut corners. Auto glass replacement is a highly technical chemical and mechanical process. Below is the exact, A-to-Z procedure our certified technicians follow when performing a Hyundai Veloster quarter glass replacement.
Step 1: Vehicle Pre-Inspection and Interior Protection
Before any tools touch your vehicle, we conduct a comprehensive pre-inspection. We verify the exact side (driver or passenger) and ensure the replacement glass matches the 2012-2017 Veloster factory tint and curvature specifications. Because shattered tempered glass goes everywhere, we meticulously tape off the surrounding exterior paint using automotive-grade protective tape to prevent scratches. Inside the cabin, we lay down heavy-duty protective drop cloths over the rear seats, floor mats, and trunk area to shield your upholstery from debris and adhesive.
Step 2: Safe Removal of Interior Trim and Body Panels
To access the mounting points of the quarter glass, the interior trim must be partially dismantled. Using specialized, non-marring nylon pry tools, we carefully detach the C-pillar trim and rear interior quarter panels. The Veloster’s plastic retaining clips are notoriously fragile, especially in older 2012-2017 models, so this step requires a gentle, experienced hand. Removing these panels exposes the inner body cavity and the urethane track where the glass sits.
Step 3: Meticulous Vacuuming of Broken Glass Shards
Because the quarter glass is tempered, thousands of tiny glass granules will have fallen into the door cavities, the trunk, and beneath the rear seats. Leaving even a small amount of this glass behind will result in an infuriating rattling sound every time you hit a bump or close a door. We use high-powered industrial vacuums with specialized micro-crevice attachments to extract every single shard of broken glass from the vehicle's interior, the window tracks, and the deep recesses of the quarter panel cavity.
Step 4: Old Urethane Extraction and Pinch Weld Preparation
The old quarter glass (or the remaining shards still glued to the frame) must be removed. We use an advanced cold knife and wire cutting system to slice through the original factory urethane adhesive from the outside in. Once the glass frame is removed, we use sharp specialized chisels to shave down the old adhesive bead on the vehicle's pinch weld to an ultra-thin layer of about 1-2 millimeters. This process creates the perfect bonding foundation for the new adhesive.
Step 5: Surface Cleaning and High-Quality Primer Application
Contamination is the enemy of a secure auto glass bond. We thoroughly clean the newly exposed pinch weld and the edges of the new replacement quarter glass using an alcohol-based, lint-free cleaning agent. Next, we apply a high-grade chemical primer to any areas of the pinch weld where the paint may have been nicked during the removal process. This step is absolutely mandatory; the primer prevents rust from forming on the bare metal of your Veloster and acts as a chemical activator that ensures the new urethane adhesive bonds permanently to the glass.
Step 6: Precision Installation Using High-Quality Adhesive
With the surfaces prepped and primed, it is time to apply the adhesive. At AlexWindshield, we use only premium, OEM-certified, fast-curing automotive polyurethane adhesive. Using a specialized power caulking gun, we lay down a perfectly uniform "V-bead" of urethane along the pinch weld. The new quarter glass is then carefully lifted, aligned with the Veloster’s unique body lines, and pressed firmly into the adhesive. We use suction cups and alignment pins to ensure the glass is seated perfectly flush with the exterior bodywork, guaranteeing a watertight and airtight seal.
Step 7: Reassembly, Cure Time, and Final Quality Assurance
Once the glass is set, we carefully reassemble all the interior plastic trim panels, ensuring every clip snaps back into its proper factory position. We clean the new glass inside and out to a streak-free shine. Finally, we observe the Safe Drive Away Time (SDAT). Thanks to the advanced, high-quality adhesive we use, your Hyundai Veloster will be safe to drive shortly after the installation is complete. A final quality assurance check is performed to ensure the vehicle looks exactly as it did the day it rolled off the assembly line.
Serving the Greater Toronto Area (GTA): Vaughan, Richmond Hill, and Markham
Driving with a shattered quarter window is not just uncomfortable; it is unsafe and leaves your car vulnerable. That is why AlexWindshield offers premium mobile auto glass replacement services directly to your doorstep across the Greater Toronto Area (GTA). You do not need to waste your day sitting in a dusty repair shop waiting room. We bring our fully equipped, state-of-the-art mobile service vans to your location, allowing you to carry on with your day uninterrupted.
Whether you are parked in a residential driveway in Vaughan, working at a commercial office park in Richmond Hill, or shopping at a plaza in Markham, our Master Technicians will come directly to you. We understand the specific climate challenges of the GTA—from freezing winter temperatures to humid summer heat—and we use climate-adaptive primers and adhesives that cure perfectly regardless of the Ontario weather. Our local expertise ensures that your Hyundai Veloster receives a durable, weather-resistant seal that will last for the lifetime of your vehicle.
Choose AlexWindshield: The Trusted Experts for Your Auto Glass Needs
When it comes to restoring the unique 2012-2017 Hyundai Veloster, you need an auto glass company that combines technical mastery with unparalleled customer service. AlexWindshield is recognized as the leading expert for mobile auto glass services in the GTA.
- Master Technicians: Our installers are highly trained, certified, and experienced with complex, unique vehicle architectures like the asymmetrical Veloster.
- Premium Materials: We use only OEM-equivalent or superior glass, alongside the industry's highest-rated urethane adhesives and primers.
- Impeccable Cleanup: We treat your vehicle as if it were our own, guaranteeing a thoroughly vacuumed, safe, and spotless interior.
- Mobile Convenience: Proudly serving Vaughan, Richmond Hill, Markham, and the broader GTA at your home or workplace.
- Lifetime Warranty: We stand entirely behind our craftsmanship. Every quarter glass replacement comes with an industry-leading Lifetime Warranty covering any air leaks, water leaks, or manufacturer defects for as long as you own the vehicle.
Do not let a broken quarter glass ruin the bold look and safety of your Hyundai Veloster. Trust the experts who do it right the first time. Contact AlexWindshield today to schedule your mobile auto glass replacement, and experience the ultimate standard in precision, convenience, and peace of mind.


