The Unique Rear Profile of Your 2012-2017 Hyundai Veloster: Restoring Your Iconic Hatchback
The 2012-2017 Hyundai Veloster completely disrupted the automotive market with its brilliantly quirky asymmetrical three-door layout and its aggressive, teardrop-shaped rear profile. At the heart of this signature aesthetic is a highly specialized rear hatch featuring a unique, multi-pane glass design. The main heated back glass isn't just a window; it acts as a critical structural component that completes the vehicle's aerodynamic flow, ensures optimal rearward visibility, and secures the cabin from the elements. When this heavily sloped, tempered back glass shatters, you lose far more than just your rear view—you lose the structural integrity of your hatch, leaving your sporty interior entirely exposed to unpredictable weather and road debris.
Unlike a windshield, which is made of laminated glass that cracks but holds together, the back glass of your Hyundai Veloster is manufactured from tempered safety glass. Upon impact, tempered glass is designed to instantly shatter into thousands of small, blunt shards. While this prevents large, dangerous guillotine-like pieces from injuring passengers, it also means a broken back window leaves an overwhelming, glittering mess inside your trunk, rear seats, and cargo area. Navigating the replacement of such a specifically engineered hatchback glass requires precision, specialized tools, and the steady hands of a Master Technician.
Premium Mobile Auto Glass Services Across the Greater Toronto Area (GTA)
Driving with a blown-out rear window is not only a massive safety hazard, but it is also exceptionally uncomfortable. The booming wind noise and exposure to exhaust fumes make driving your Veloster to a repair shop a terrible experience. That is why AlexWindshield brings the glass shop directly to your driveway, office, or garage.
As the premier auto glass experts in the Greater Toronto Area (GTA), we proudly offer comprehensive, rapid-response mobile auto glass replacement. Our fully equipped service vans are frequently dispatched across key regional hubs, heavily serving the communities of Vaughan, Richmond Hill, and Markham. Whether you are parked at a corporate plaza in Markham, a residential driveway in Vaughan, or a shopping center in Richmond Hill, our mobile technicians arrive with the exact OEM-equivalent glass required for your 2012-2017 Veloster, ensuring you do not have to disrupt your busy schedule.
Step-by-Step Back Glass Replacement Process for the 2012-2017 Hyundai Veloster
As a Master Technician at AlexWindshield, I adhere to a strict, uncompromising protocol for every back glass replacement. The 2012-2017 Veloster presents unique challenges due to its deeply angled hatch and integrated rear wiper system. Here is our meticulous, A-to-Z technical process for restoring your vehicle to factory condition.
Step 1: Complete Interior Protection and Pre-Installation Inspection
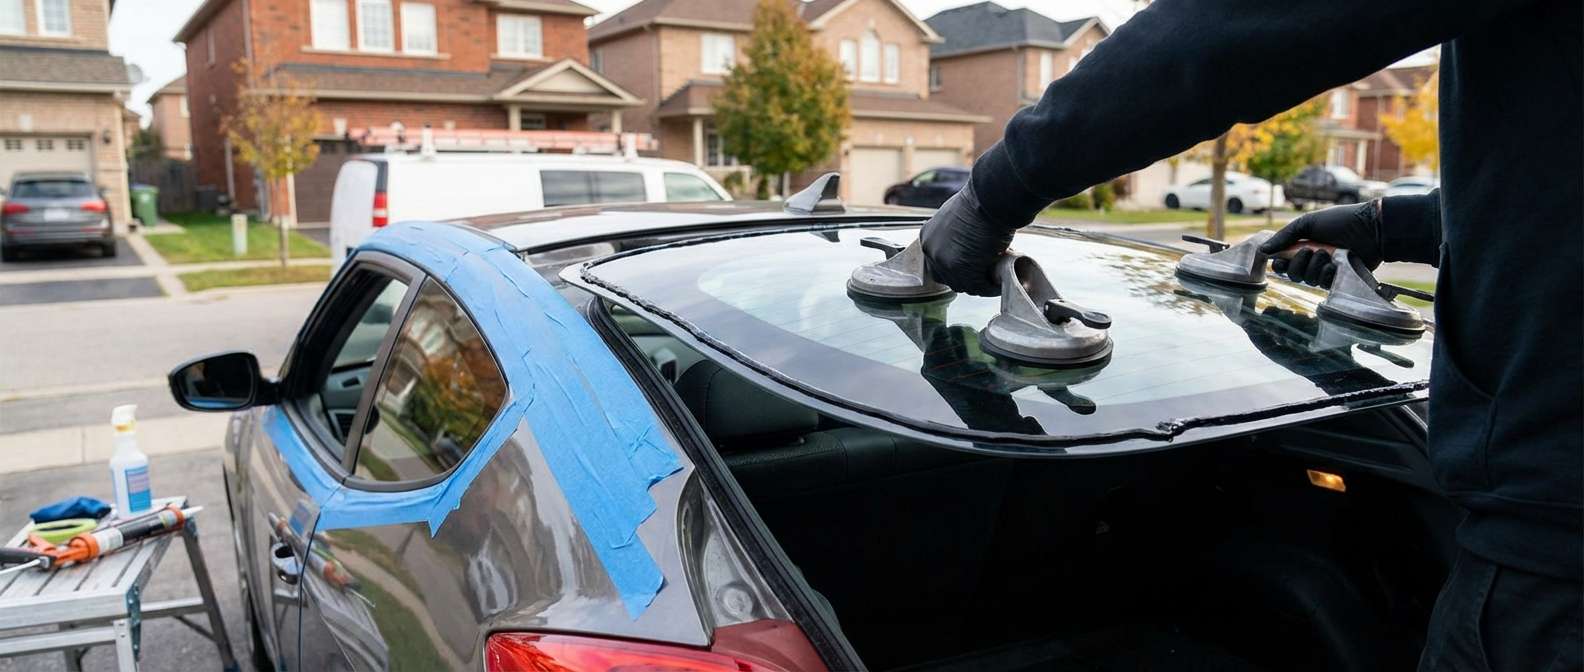
Before any tools are lifted, we secure the vehicle's interior. We lay down thick, protective drop cloths over your Veloster's sporty bucket seats, center console, and rear seating area. The exterior paint surrounding the rear hatch is meticulously taped off with automotive-grade protective tape to prevent any accidental scratches during the removal process. We conduct a thorough pre-inspection of the rear hatch frame, checking for any pre-existing rust, dents, or structural deformations that could impact the watertight seal of the new back glass.
Step 2: Safe Removal of the Liftgate Trim Panels and Rear Wiper Assembly
Accessing the structural mounting points of the Veloster's back glass requires disassembling the interior of the hatch door. Using specialized, non-marring nylon pry tools, we carefully unsnap and remove the interior liftgate trim panels, ensuring that none of the plastic retaining clips are broken. Once the interior framework is exposed, we disconnect the heated defroster wiring harnesses. Finally, we unbolt and carefully remove the exterior rear wiper arm and its associated motor assembly, storing them safely for reinstallation.
Step 3: Deep Vacuuming of All Broken Glass Shards
Because tempered back glass violently shatters into thousands of tiny cubes, a significant portion of our time is dedicated to meticulous cleanup. Broken glass often falls deeply into the interior mechanics of the liftgate door. We utilize high-powered, industrial shop vacuums fitted with specialized micro-crevice tools to extract every single shard of glass. We vacuum the trunk bed, the folded rear seats, the parcel shelf, and most importantly, we vacuum inside the hollow cavities of the rear hatch door panels. Failure to properly clean the inside of the door panels results in a permanent, annoying rattling sound every time you drive or close the hatch. AlexWindshield ensures your cabin is completely glass-free.
Step 4: Extracting the Remaining Glass and Cutting the Old Urethane
With the debris cleared, we must address the remaining perimeter of shattered glass still bonded to the vehicle's frame. Using an advanced cold knife or a specialized power extractor tool, we slice through the factory urethane adhesive that bonds the glass to the hatch. We carefully cut away the jagged edges, ensuring we do not scratch the metal pinch weld. Once the old glass ring is removed, we trim down the remaining bead of old urethane to a precise 1-2 millimeter thickness. This thin base layer serves as an ideal bonding surface for the fresh adhesive.
Step 5: Surface Preparation, Cleaning, and Primer Application
A flawless seal is entirely dependent on an immaculate surface. We clean the entire perimeter of the Veloster's pinch weld using specialized, alcohol-based glass cleaners to strip away any dirt, road grime, and lingering debris. Next, we meticulously inspect the bare metal. Any micro-scratches exposed during the removal process are treated with a high-performance black automotive primer. This primer application is highly critical; it not only creates an aggressive chemical bond between the metal and the new adhesive, but it also provides a vital barrier against rust and corrosion, ensuring the long-term structural integrity of your hatchback.
Step 6: Installing the New Veloster Back Glass with High-Quality Adhesive
With the frame prepped and primed, we prepare the new OEM-equivalent rear glass. The glass is thoroughly cleaned, and a glass-prep activator is applied to its bonding edge. Using an electric caulking gun, we apply a thick, uniform V-bead of industry-leading, high-quality urethane adhesive directly onto the pinch weld. The V-bead technique guarantees that as the glass is pressed into place, the adhesive collapses perfectly, eliminating any air pockets or gaps that could cause water leaks. Two technicians then carefully lift the contoured Veloster back glass and precision-set it into the hatch frame, ensuring perfect alignment with the roofline and lower body panels.
Step 7: Reconnecting Systems, Reassembly, and Final Quality Checks
Once the glass is locked into the fresh urethane, we immediately reconnect the rear defroster wiring grids and test them for electrical continuity. The rear wiper motor and exterior wiper arm are meticulously reinstalled and torqued to factory specifications. We then snap the interior liftgate trim panels back into their original positions, leaving the interior looking as though the breakage never happened. We clean the new glass to a streak-free shine and conduct a final, rigorous visual inspection.
Essential Post-Installation Care for Your Hyundai Veloster
To ensure the high-quality adhesive cures perfectly, we provide our clients with specific aftercare instructions. For the first 24 to 48 hours following your back glass replacement, we strongly advise:
- Leaving your windows slightly cracked: This prevents massive air pressure spikes from blowing out the seal when you slam the heavy Veloster doors.
- Avoiding high-pressure car washes: Hand washing is fine, but automated high-pressure jets can compromise the urethane before it fully cross-links and cures.
- Driving gently: Avoid massive potholes, aggressive cornering, and rough off-road driving while the adhesive achieves its maximum structural strength.
The AlexWindshield Guarantee: Your Trusted Auto Glass Experts
When the unique, heavily contoured back glass of your 2012-2017 Hyundai Veloster shatters, you need a team that understands the intricate engineering of modern sport hatchbacks. You need an established, local authority equipped with the right tools, the highest quality materials, and the technical mastery to do the job perfectly the very first time.
AlexWindshield is proudly recognized as the trusted expert for mobile auto glass services throughout the GTA, reliably servicing clients across Vaughan, Richmond Hill, and Markham. We stand firmly behind the precision of our Master Technicians and the durability of our materials. That is why every single back glass replacement we perform is backed by our comprehensive Lifetime Warranty, covering you against any air noises, water leaks, or manufacturer defects for as long as you own your Veloster. Do not let a shattered rear window compromise your safety or the aggressive styling of your car. Contact AlexWindshield today for unparalleled, convenient mobile service that brings factory-level precision straight to your doorstep.


