Restoring Your First-Generation Innovator: Expert Vent Glass Replacement for the 2006-2014 Honda Ridgeline
The 2006-2014 Honda Ridgeline completely redefined the mid-size pickup truck market with its revolutionary unibody construction, independent rear suspension, and an incredibly spacious, sophisticated cabin. However, even this legendary, rugged utility vehicle is not immune to the hazards of the road or the unfortunate reality of vehicular break-ins. When the vent glass on your Honda Ridgeline is shattered, it leaves your truck's interior exposed to harsh weather, elevated road noise, and serious security vulnerabilities. Because this specific piece of glass is tempered, an impact causes it to shatter into thousands of granular pieces, creating an immediate mess and a complex repair scenario.
As a Master Technician at AlexWindshield, I have spent years perfecting the highly technical process of auto glass restoration. Replacing the vent glass on a first-generation Honda Ridgeline is not a simple plug-and-play task; it requires specialized knowledge of Honda's unique door architecture, precision dismantling of interior components, and meticulous clean-up. We provide unparalleled, SEO-optimized, and structurally sound auto glass replacement services designed to bring your Ridgeline back to factory-standard safety and aesthetic perfection.
Premium Mobile Auto Glass Services Across the Greater Toronto Area (GTA)
A shattered vent glass means your vehicle is temporarily compromised, making it unsafe and uncomfortable to drive to a traditional repair shop. That is exactly why AlexWindshield brings our state-of-the-art mobile auto glass service directly to your location. We proudly serve the entire Greater Toronto Area (GTA), ensuring that you receive professional-grade repairs without disrupting your daily schedule.
Whether your Ridgeline is safely parked in a residential driveway in Vaughan, sitting in an office parking lot in Richmond Hill, or stranded at a commercial plaza in Markham, our fully equipped mobile service vans arrive on-site with all the necessary tools, premium adhesives, and OEM-equivalent glass required to perform a flawless installation.
The AlexWindshield Master Technician Advantage
Why do Honda Ridgeline owners across the GTA trust us with their auto glass needs? The answer lies in our unwavering commitment to technical excellence and customer satisfaction.
- OEM-Quality Materials: We source only the highest-grade vent glass that matches Honda's original specifications for tint, contour, and structural integrity.
- Advanced Urethane Systems: We utilize premium-grade, fast-curing polyurethane adhesives to ensure an absolute, weatherproof seal and the safest drive-away time.
- Comprehensive Clean-Up: Tempered glass explosions require meticulous extraction; we do not leave a single shard behind.
- Mobile Convenience: Unmatched service flexibility covering Vaughan, Richmond Hill, Markham, and the broader GTA.
Step-by-Step Technical Process: 2006-2014 Honda Ridgeline Vent Glass Replacement
Replacing the rear door vent glass on the first-generation Honda Ridgeline is an intricate procedure. As a Senior Auto Glass Technician, I adhere to a strict, step-by-step protocol to ensure the structural integrity of the door assembly, the flawless integration of the new glass, and the absolute cleanliness of your truck's interior.
Step 1: Initial Vehicle Inspection and Extensive Interior Protection
Before any tools are utilized, a thorough inspection of the damaged area is conducted. We assess the door frame, the exterior paint, and the rubber weatherstripping to identify any secondary damage caused by the impact or break-in. Once the assessment is complete, we initiate comprehensive interior protection. Heavy-duty drop cloths and protective covers are draped over the Honda Ridgeline's distinct contoured seating, center console, and floor mats. We also apply automotive-grade masking tape to the exterior door frame to prevent any accidental scratches to the clear coat during the extraction and installation process.
Step 2: Precision Door Panel Removal
Because the vent glass is integrated deeply into the door's framework alongside the primary roll-up window, accessing the mounting points requires the complete removal of the interior door trim panel. This is a delicate process that demands technical finesse to avoid damaging Honda's interior plastics and electronics.
- Using specialized non-marring nylon pry tools, we carefully pop off the aesthetic screw covers behind the interior door handle and underneath the armrest.
- We extract the hidden Philips and 10mm bolts securing the panel to the steel door shell.
- The power window switch assembly is carefully pried up, and the electrical harnesses are disconnected to prevent wiring damage.
- Applying controlled upward and outward pressure, we disengage the plastic retaining clips along the perimeter of the door panel, lifting it safely over the door lock actuator.
- Finally, the vapor barrier (moisture shield) is gently peeled back to expose the internal mechanical cavities of the door.
Step 3: Exhaustive Glass Shard Extraction and Vacuuming
When the tempered vent glass shatters, thousands of sharp glass pebbles flood the interior cabin and drop directly into the hollow cavity of the door shell. Vacuuming all broken glass shards from the vehicle's interior and door mechanics is a mandatory and critical step. Leaving glass inside the door will result in maddening rattles every time you close the door or drive over a bump, and can even jam the primary window regulator.
Using a high-powered, industrial HEPA vacuum equipped with flexible crevice extensions, we systematically extract every single piece of glass from the seats, floor carpets, and seat rails. We then spend significant time vacuuming the inside of the door shell, flushing out the window tracks, and ensuring the window regulator gears are completely free of microscopic glass debris.
Step 4: Removing the Division Bar and Old Seals
To free the space for the new vent glass, we must address the division bar—the vertical metal and rubber channel that separates the roll-up window from the vent glass. We lower the main window glass completely. Using precise metric sockets, we unbolt the division bar from the top of the door frame and the bottom bracket inside the door shell. The bar is carefully maneuvered and tilted out of the way. We then extract the remaining rubber encapsulation and any jagged glass shards still clinging to the vent glass frame.
Step 5: Surface Preparation and Cleaning
A perfect installation requires a pristine bonding surface. We deeply clean the bare metal pinchweld and the surrounding rubber channels using specialized, alcohol-based auto glass cleaners. All dirt, road grime, and residual factory adhesive must be completely eradicated. If the original urethane or butyl tape is present, it is trimmed down to a microscopic layer to provide a flush seating area for the new glass. We ensure the entire mounting area is completely dry and free of any chemical contaminants.
Step 6: Primer Application for Rust Prevention
Any areas where the metal pinchweld was exposed or lightly scratched during the removal process must be treated. We apply a scientifically formulated, fast-drying black glass primer to the metal surfaces. This primer serves a dual purpose: it acts as a critical rust inhibitor to protect your Ridgeline's body from future corrosion, and it creates a necessary chemical bonding layer that interacts with the polyurethane adhesive for maximum structural strength.
Step 7: Urethane Adhesive Application and Glass Installation
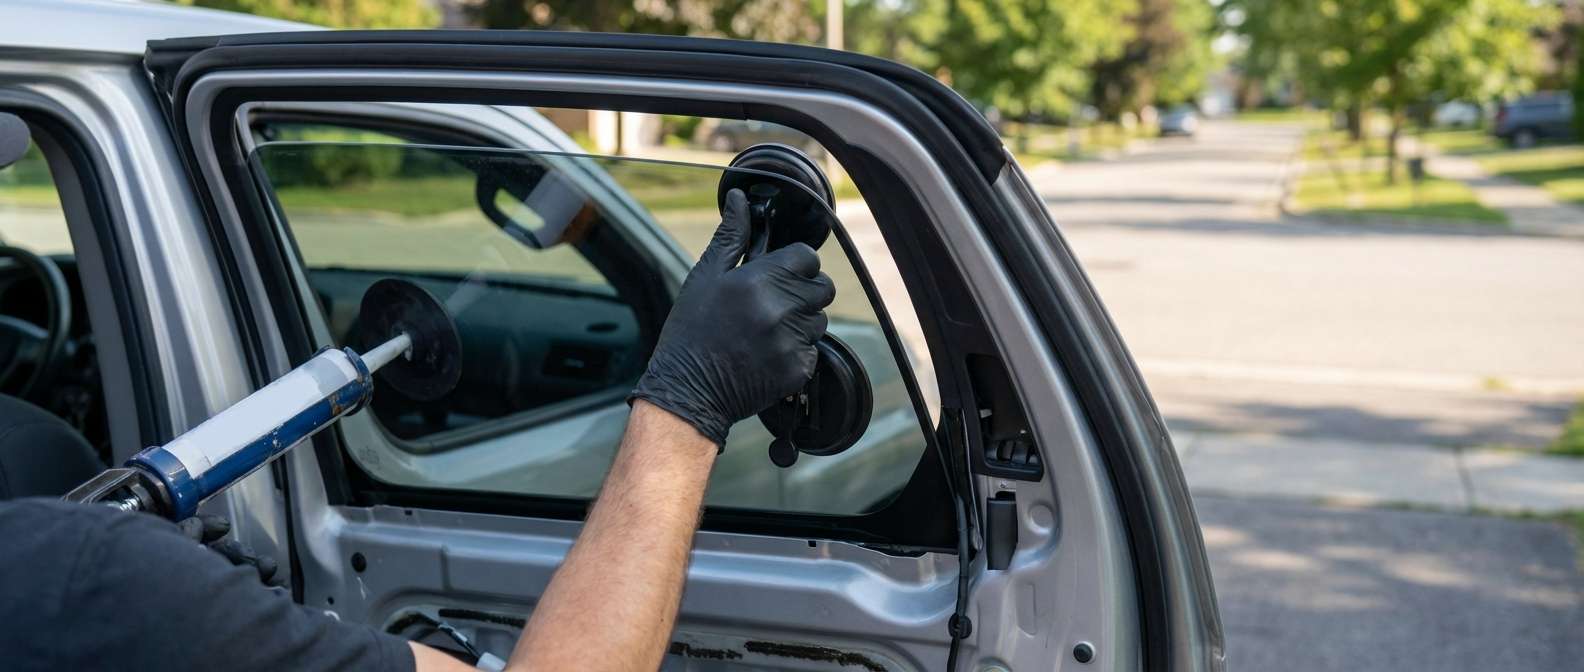
With the surface fully prepped, it is time for the installation. We use a high-powered caulking gun to lay down a precise, uniform bead of high-quality, OEM-approved automotive urethane adhesive along the mounting flange of the new vent glass. The triangular vent glass is then carefully manipulated into the door frame. Using specialized suction cups and technical precision, the glass is pressed firmly into the urethane bed, ensuring a watertight, airtight seal that perfectly aligns with the exterior contours of the Honda Ridgeline.
Step 8: Reassembly and Final Quality Assurance
Once the glass is securely set, the reassembly process begins. The division bar is guided back into its factory position, perfectly slotting between the newly installed vent glass and the main roll-up window, and is firmly bolted down. We run the main window up and down several times to ensure it glides smoothly within the run channel without any binding or friction.
The moisture barrier is resealed using high-tack butyl tape. The interior door panel is meticulously aligned, the electrical harnesses for the window switches are reconnected, and the retaining clips are securely snapped back into the door frame. All screws and cosmetic covers are replaced. Finally, we clean the newly installed vent glass with a streak-free, ammonia-free foaming cleaner, leaving it completely invisible to the eye.
The Crucial Importance of Immediate Vent Glass Replacement
Driving your 2006-2014 Honda Ridgeline with a missing or compromised vent glass is more than just an aesthetic issue. It presents an immediate security risk, providing easy, silent access for thieves to reach the interior door handles. Furthermore, the GTA is known for its unpredictable weather. An open window cavity invites rain, snow, and humidity into the cabin, which can permanently damage your truck's sensitive electrical components, leather or cloth seating, and lead to hazardous interior mold growth. Prompt replacement restores your vehicle's security, climate control efficiency, and overall driving comfort.
Trust AlexWindshield: Your Elite Mobile Auto Glass Experts in the GTA
When the unexpected happens, you need a team that combines masterful technical expertise with unparalleled customer convenience. AlexWindshield is recognized as the premier destination for comprehensive, reliable, and precise mobile auto glass services across the Greater Toronto Area. From the bustling streets of Vaughan to the corporate centers of Markham and the residential neighborhoods of Richmond Hill, we deliver dealership-quality repairs directly to your doorstep.
We stand firmly behind the quality of our craftsmanship and the superior grade of our materials. That is why every single vent glass replacement we perform comes with our ironclad Lifetime Warranty. This warranty guarantees that your newly installed glass will be completely free from water leaks, wind noise, and workmanship defects for as long as you own your Honda Ridgeline. Do not let shattered glass compromise the integrity and security of your vehicle. Contact AlexWindshield today to schedule your mobile vent glass replacement and experience the highest standard of auto glass care in the industry.


