Restoring the Open-Air Cabin of Your First-Generation Honda Ridgeline
The 2006-2014 Honda Ridgeline redefined what a mid-size pickup truck could be, combining a rugged unibody construction, an innovative in-bed trunk, and a surprisingly luxurious cabin. However, when you are cruising down the highway and an errant rock, a sudden hailstorm, or a rogue tree branch shatters your truck's sunroof, that comfortable, quiet cabin instantly becomes a noisy, weather-exposed hazard. A broken sunroof does not just ruin your driving experience; it compromises the security of your vehicle and leaves your interior vulnerable to severe water damage. At AlexWindshield, we specialize in precise, factory-standard auto glass solutions tailored specifically for the unique architecture of your first-generation Ridgeline.
Expert Mobile Auto Glass Services Across the Greater Toronto Area
Driving with a shattered or missing sunroof is not an option, especially with the unpredictable weather in Southern Ontario. That is why AlexWindshield brings the repair shop directly to you. Our fully equipped mobile service vehicles are designed to perform complex glass replacements right in your driveway, garage, or workplace parking lot.
We proudly serve the entire Greater Toronto Area (GTA), with dedicated, rapid-response routes ensuring top-tier service availability in:
- Vaughan: Whether you are near Vaughan Mills or on a busy construction site, our mobile technicians arrive fully prepared to secure your Ridgeline.
- Richmond Hill: We provide seamless, at-home sunroof replacements so you do not have to disrupt your daily routine or risk driving a damaged vehicle on the 404.
- Markham: From residential neighborhoods to corporate parks, our master technicians deliver precision glass replacement without the hassle of a traditional repair shop wait.
The Anatomy of the 2006-2014 Honda Ridgeline Sunroof
Unlike standard windshields or door glass, the sunroof assembly on the 2006-2014 Honda Ridgeline is a complex, motorized system. It features a heavy-duty tempered or laminated glass panel that is engineered to sit flush with the roofline to prevent aerodynamic drag and wind noise. When this glass breaks, it typically explodes into thousands of tiny, sharp cubes (if tempered) that embed themselves deep into the sunroof tracks, the headliner, and the vehicle's interior. A simple "glass swap" is never enough; the replacement process requires deep mechanical cleaning, structural bonding, and precise alignment to ensure the sunroof track mechanism is not destroyed by leftover debris.
Step-by-Step Sunroof Replacement Process from A to Z
As a Master Technician at AlexWindshield, I ensure that every sunroof replacement follows a strict, manufacturer-approved protocol. Here is our comprehensive, step-by-step process for restoring your Honda Ridgeline's sunroof to perfect condition.
Step 1: Comprehensive Interior Protection
Because sunroof glass sits directly above the passenger cabin, a shattered panel means gravity has pulled sharp glass shards all over your seats, center console, and floorboards. Before we touch the broken roof, our first priority is protecting your interior. We lay down heavy-duty, puncture-resistant drop cloths over the front and rear seats, the dashboard, and the center console of your Ridgeline. We also apply protective automotive tape around the roof's exterior painted edges to prevent any accidental scratching during the removal process.
Step 2: Meticulous Glass and Debris Vacuuming
One of the most critical steps in replacing a shattered sunroof is dealing with the debris. We use high-powered industrial vacuums to extract all broken glass shards from the vehicle's interior. More importantly, we meticulously vacuum the delicate sunroof tracks and the water drainage channels. If even a single shard of glass is left in the sunroof's mechanical track, it can grind against the cables, causing the motor to burn out or the new glass to bind. We also ensure the four corner drain tubes are clear of glass dust, which prevents future water leaks into your Ridgeline's cabin.
Step 3: Removal of the Old Glass and Hardware
Once the area is safe and clean, we carefully unbolt the remaining structural frame of the shattered sunroof panel from the sliding cassette mechanism. This involves removing the side accordion trims and loosening the torx screws that hold the glass bracket to the track. We carefully extract the old mounting hardware and any remaining chunks of glass still adhered to the factory weatherstripping. If the damage extends to the headliner, we carefully lower the necessary sections of the interior roof lining to gain full access to the sunroof's motorized assembly.
Step 4: Surface Cleaning and Preparation
With the old hardware out, we focus on the metal brackets and mounting flanges where the new glass will sit. We perform a deep surface cleaning using a specialized, alcohol-based auto glass cleaner to remove grease, dirt, old adhesive residues, and microscopic glass dust. The bonding surface must be absolutely pristine. Any contamination left on the mounting flanges will compromise the chemical bond of the new adhesives, leading to dangerous wind noise or water intrusion.
Step 5: Primer Application
To guarantee a permanent, waterproof seal, we prepare the new sunroof glass panel and the mounting framework. We apply a specialized black glass primer to the frit band (the black painted edge) of the new glass, as well as to any bare metal on the mounting brackets. This primer serves two critical functions: it prevents rust from forming on the vehicle's metal components, and it acts as a chemical bonding agent that creates a molecular link between the glass, the metal, and the adhesive we are about to apply.
Step 6: Installation of the New Glass Using High-Quality Adhesive
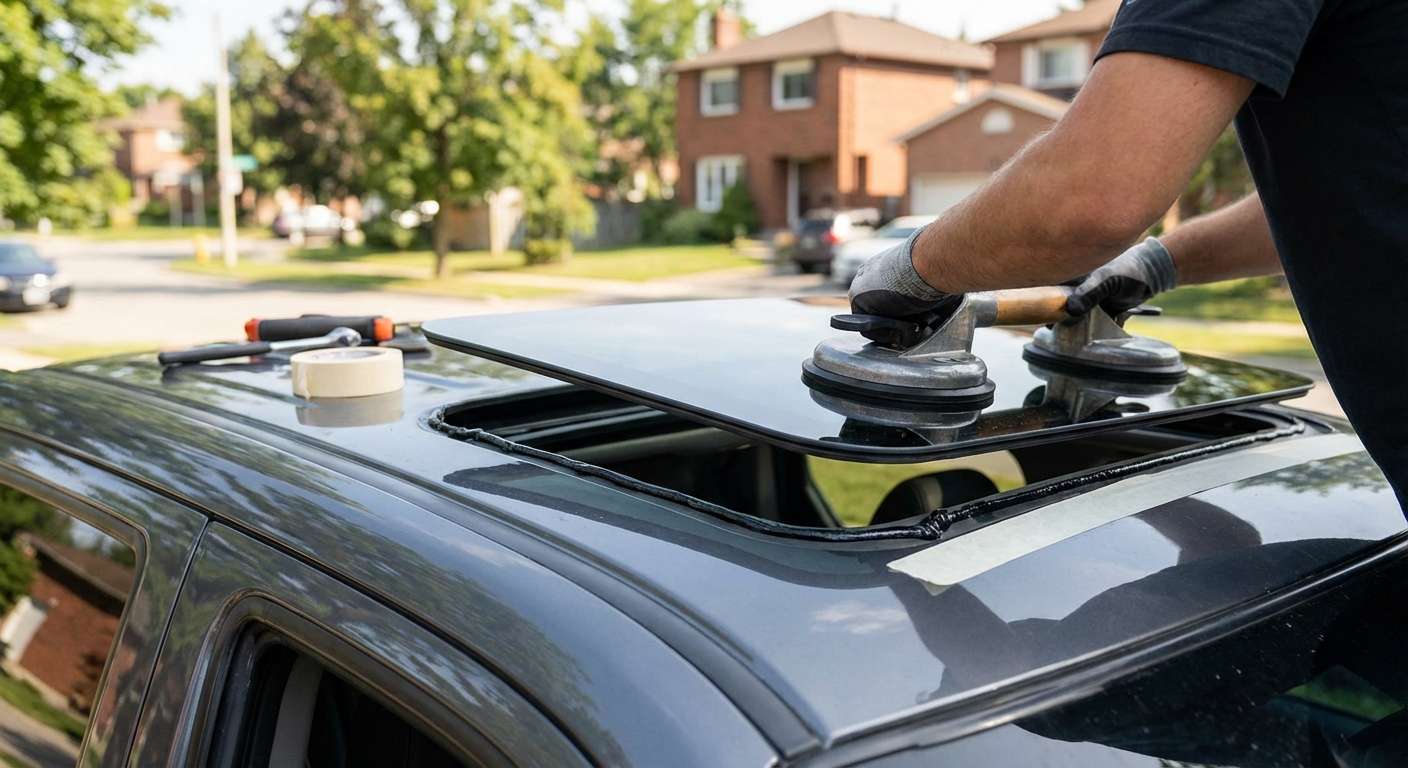
With the primer flashed and cured, we proceed to the most important structural step. Using a pneumatic caulking gun, we lay down a continuous, uniform bead of high-quality, automotive-grade urethane adhesive along the bonding channel. We then carefully lower the new, premium-grade sunroof glass into position. This urethane is the same industrial-strength adhesive used on factory assembly lines; it boasts incredibly high tensile strength and a fast cure time. Once the glass is seated into the adhesive, we secure the mechanical brackets back into the Ridgeline's sunroof tracks, torquing the bolts to Honda's exact factory specifications.
Step 7: Final Alignment, Calibration, and Testing
Before the urethane fully cures, we must ensure the glass is perfectly aligned. A sunroof that sits even a millimeter too high will cause severe wind whistling at highway speeds, while one sitting too low will pool water and eventually leak. We manually measure the flushness of the glass against the Ridgeline's roofline. Once perfected, we power on the vehicle and run the sunroof through its full range of motion—venting, sliding open, and closing. We test the auto-reverse safety feature to ensure the motor is operating without abnormal resistance. Finally, we perform a rigorous water leak test, flooding the roof with water to verify that the new adhesive seal and the cleared drain tubes are functioning flawlessly.
Why Choose AlexWindshield for Your Auto Glass Needs?
Replacing the sunroof on a 2006-2014 Honda Ridgeline requires a deep understanding of automotive structural integrity, mechanical track systems, and advanced chemical adhesives. Amateurs or cut-rate shops often skip the vital vacuuming of the tracks or use inferior sealants, leading to costly motor failures or ruined interiors down the road.
At AlexWindshield, we do not cut corners. We treat every vehicle as if it were our own, utilizing only OEM-equivalent or better glass, premium urethane adhesives, and Master Technician expertise. We are the trusted leaders for mobile auto glass services throughout the GTA, bringing our fully equipped shop directly to your location in Vaughan, Richmond Hill, and Markham.
For your absolute peace of mind, every complete auto glass replacement we perform is backed by our comprehensive Lifetime Warranty against leaks, wind noise, and manufacturer defects. Do not let a shattered sunroof keep your Honda Ridgeline off the road. Contact AlexWindshield today for industry-leading precision, unparalleled convenience, and safety you can trust.


