The First-Generation Workhorse: Preserving the Structural Integrity of Your 2003-2008 Honda Pilot
The 2003-2008 Honda Pilot remains a legendary family SUV, renowned for its rugged boxy frame, unmatched reliability, and spacious eight-passenger seating built on the robust YF1/YF2 chassis. However, keeping this first-generation powerhouse safely on the road requires meticulous maintenance, particularly when it comes to one of its most critical structural components: the windshield. In a rollover collision, the windshield of your Honda Pilot provides up to 60% of the cabin's roof crush resistance and serves as the backboard for the passenger-side airbag deployment. When compromised by severe cracks, spiderweb fractures, or deep bullseye chips, it ceases to be a mere cosmetic issue and becomes a severe safety hazard. As a Senior Auto Glass Technician, I approach the windshield replacement for the Honda Pilot 2003-2008 with surgical precision, ensuring your classic SUV is restored to original factory safety standards.
Premium Mobile Auto Glass Services Across the Greater Toronto Area (GTA)
Driving throughout the Greater Toronto Area (GTA) exposes your vehicle to extreme weather fluctuations, heavy construction zones, and hazardous road debris. Whether you are commuting along the sprawling 400-series highways or navigating local suburban routes, windshield damage is an unfortunate reality. At AlexWindshield, we eliminate the hassle of traditional repair shops by bringing our state-of-the-art mobile auto glass shop directly to you.
Our fully equipped mobile units proudly serve the entire region, specifically bringing rapid, dealership-level service to your driveway or workplace in Vaughan, Richmond Hill, and Markham. You do not have to risk driving a compromised vehicle through heavy traffic; our Master Technicians deliver unparalleled craftsmanship right to your location, ensuring your Honda Pilot is serviced safely and conveniently.
Our Master Technician’s A to Z Windshield Replacement Process
Replacing the windshield on a 2003-2008 Honda Pilot requires specialized knowledge of its specific cowl configuration, side molding retention clips, and exact urethane bonding requirements. Below is the comprehensive, step-by-step technical process we execute to guarantee a flawless installation.
Step 1: Pre-Installation Inspection and Interior Protection
Before any tools touch your vehicle, a thorough pre-inspection is conducted. We document the current state of the glass and test the functionality of the windshield wipers and interior electronics. To ensure absolute cleanliness, we lay down heavy-duty protective drop cloths over your Honda Pilot’s dashboard, steering wheel, and front seats. We also apply protective automotive tape to the exterior A-pillars and roofline to prevent any accidental scratches to your vehicle's clear coat during the extraction process.
Step 2: Removing the Cowl, Wipers, and Exterior Trim
The first-generation Pilot features a specific plastic cowl cover at the base of the windshield and rigid side moldings. We carefully unbolt the wiper arms using a specialized puller tool to prevent stripping the splines. Next, we use non-marring trim removal tools to pop the retention clips holding the lower plastic cowl and the vertical A-pillar moldings. Extracting these aging plastic clips requires a delicate touch to prevent snapping them, a common mistake made by inexperienced technicians.
Step 3: Precision Extraction of the Damaged Glass
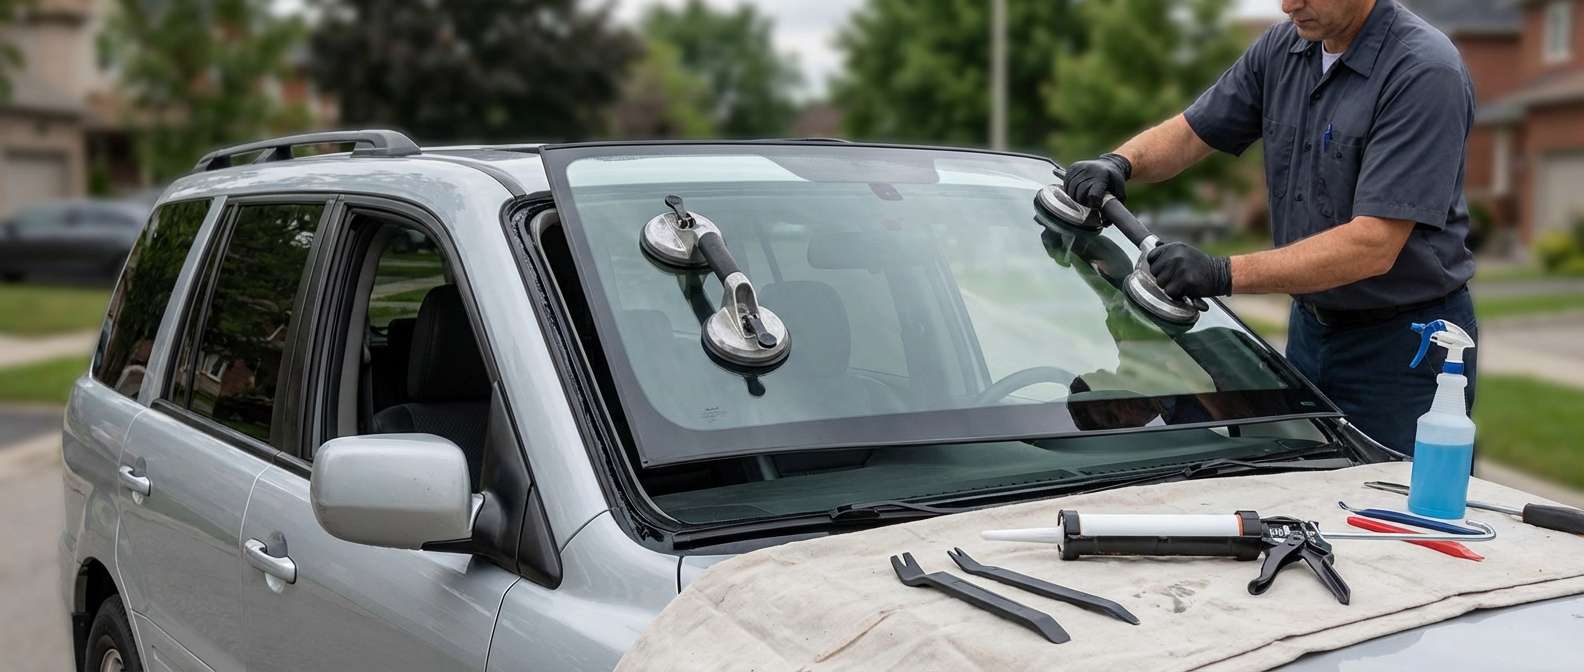
With the perimeter cleared, we break the original structural seal. Using an advanced wire extraction tool (spider system) or a specialized cold knife, we carefully slice through the thick layer of old polyurethane adhesive securing the glass to the vehicle's frame. We run the high-tensile cutting wire tightly against the inner edge of the glass, meticulously severing the bond around the entire perimeter. Once fully detached, heavy-duty industrial suction cups are applied to the exterior of the cracked glass, allowing two technicians to safely lift the heavy windshield up and away from the vehicle's body.
Step 4: Pinch Weld Preparation and Surface Cleaning
The bare frame where the glass sits, known as the pinch weld, must be perfectly prepared. We use a high-carbon scraper blade to trim the existing old urethane down to a thin, uniform base layer of approximately 1 to 2 millimeters. This "full cut" method is vital, as fresh urethane bonds best to a clean, firmly attached layer of old urethane. After shaving the bead, we vacuum away all dirt, debris, and microscopic glass shards from the pinch weld and the dashboard. The entire channel is then wiped down with a specialized, alcohol-based auto glass cleaner that leaves zero chemical residue.
Step 5: Applying Glass Primer and High-Quality Adhesive
Chemical bonding is the most critical phase of the installation. We first apply a high-tech black glass primer to any microscopic scratches or bare metal spots on the pinch weld to prevent future rust formation. We also apply a specialized adhesion promoter to the frit band (the black painted edge) of the brand-new OEM-quality glass. After allowing the primer to flash-off and dry completely, we use a professional-grade, battery-operated caulking gun to apply a continuous, perfectly triangular "V-bead" of high-viscosity, fast-curing urethane adhesive around the entire perimeter of the pinch weld. There can be no gaps, bubbles, or weak points in this bead, as it ensures the watertight and structural integrity of the installation.
Step 6: Setting and Installing the New Windshield
Using ergonomic suction cup lifting grips, the new windshield is carefully hovered over the fresh urethane bed. Precision is paramount; the glass must be set perfectly centered on the first attempt so as not to smear or roll the urethane bead. Once perfectly aligned with the pilot marks, we gently press the glass down into the adhesive, locking it into the channel. We then replace the lower cowl, reattach the side moldings, and torque the wiper arms back to factory specifications.
Step 7: Mandatory ADAS Camera Calibration Process
Modern auto glass replacement extends far beyond physical installation. We place the highest emphasis on the mandatory ADAS camera calibration process. While the 2003-2008 Honda Pilot predates some of the most complex autonomous driving features, any vehicle fitted with forward-facing safety systems, aftermarket collision warning modules, or retrofitted Advanced Driver Assistance Systems (ADAS) requires immediate recalibration when a new windshield is installed.
- System Diagnostics: We connect a highly advanced OBD2 diagnostic scanner to the vehicle’s computer to clear any previous fault codes and initiate the calibration sequence.
- Target Alignment: Using lasers and highly precise measurements, we set up specific optical target boards at exact distances from the vehicle's front bumper, replicating factory calibration geometry.
- Digital Recalibration: The camera system is digitally realigned to recognize the exact pitch, yaw, and curvature of the newly installed glass, ensuring that collision alerts and safety sensors react with split-second accuracy. Failing to perform this mandatory step can result in safety systems miscalculating distances by several feet, putting occupants in grave danger.
Uncompromising Quality Standards for Your Vehicle
When servicing your 2003-2008 Honda Pilot, we refuse to cut corners. We exclusively utilize premium OEM-quality glass that guarantees distortion-free optics, proper acoustic dampening to reduce highway wind noise, and the exact solar tint matching your factory specifications. The urethane adhesive we deploy is top-tier, crash-tested automotive polyurethane featuring a Safe Drive-Away Time (SDAT) of just 30 to 60 minutes, ensuring you can get back on the road rapidly and safely.
Post-Installation Care Guidelines
To ensure the chemical curing process of the urethane completes perfectly, we provide strict post-installation instructions for your newly serviced Honda Pilot:
- Keep Windows Cracked: Leave your side windows rolled down an inch for the first 24 hours to prevent air pressure from slamming doors and pushing the windshield outward.
- Avoid Car Washes: Do not use high-pressure automated car washes for at least 48 to 72 hours, as the massive water pressure and harsh chemicals can disturb the curing adhesive.
- Leave the Tape: If retention tape was used to hold the glass firmly to the roofline, leave it in place for at least 24 hours before gently peeling it off.
- Gentle Driving: Avoid massive potholes, aggressive off-roading, and slamming your doors to maintain the structural alignment of the fresh seal.
Trust the Experts: Book Your Mobile Auto Glass Service Today
Your vehicle's safety is far too important to trust to amateur installations. For seamless, technically flawless auto glass solutions, AlexWindshield is the undisputed industry leader across the Greater Toronto Area (GTA). We pride ourselves on delivering rapid, mobile service directly to your door in Vaughan, Richmond Hill, and Markham. Every installation is backed by our comprehensive Lifetime Warranty against leaks, wind noise, and manufacturer defects, giving you ultimate peace of mind. Protect your family and your classic 2003-2008 Honda Pilot by choosing the master technicians who put safety and precision above all else. Contact AlexWindshield today to schedule your expert mobile windshield replacement.


