Expert Vent Glass Replacement for the First-Generation Honda Pilot (2003-2008)
The 2003-2008 Honda Pilot remains one of the most rugged, reliable, and beloved family SUVs on the road today. Its boxy, utilitarian design provides exceptional visibility and interior space, but that same design also features specialized auto glass components. The rear door vent glass—that small, fixed, triangular pane situated just behind the main roll-down window—serves as a critical structural and aesthetic component of your vehicle's cabin. Unfortunately, due to its location, this specific pane is notoriously vulnerable. It is the most common target for opportunistic break-ins, as thieves shatter it to reach inside and unlock the rear doors. When this glass is compromised, your legendary SUV is immediately exposed to unpredictable weather, road noise, and security risks. Prompt, professional replacement is not just an aesthetic repair; it is a vital restoration of your vehicle's safety and integrity.
Comprehensive Mobile Auto Glass Services Across the Greater Toronto Area (GTA)
A shattered vent glass means your vehicle is exposed to the elements, making it stressful and potentially unsafe to drive to a repair shop. That is exactly why AlexWindshield brings the auto glass shop directly to you. We are proud to offer unparalleled, fully equipped mobile auto glass repair and replacement services throughout the Greater Toronto Area (GTA). Whether you have discovered a broken vent glass in your driveway in Vaughan, your workplace parking lot in Richmond Hill, or outside a shopping center in Markham, our Master Technicians will arrive on-site promptly. We understand the specific geographic and weather challenges of the GTA, and our mobile fleet is equipped to perform flawless, factory-grade installations right where you are, saving you time, towing fees, and unnecessary stress.
Our Master Technician's Step-by-Step Vent Glass Replacement Process
Replacing the vent glass on a 2003-2008 Honda Pilot is an intricate procedure that requires far more than simply pushing a new piece of glass into a hole. Because the vent glass is integrated into the rear door assembly and sits adjacent to the main window's run channel, the replacement process demands a high level of technical automotive expertise. At AlexWindshield, we adhere to a strict, A-to-Z replacement protocol to ensure your vehicle is restored to its original factory condition.
Step 1: Thorough Vehicle Assessment and Interior Protection
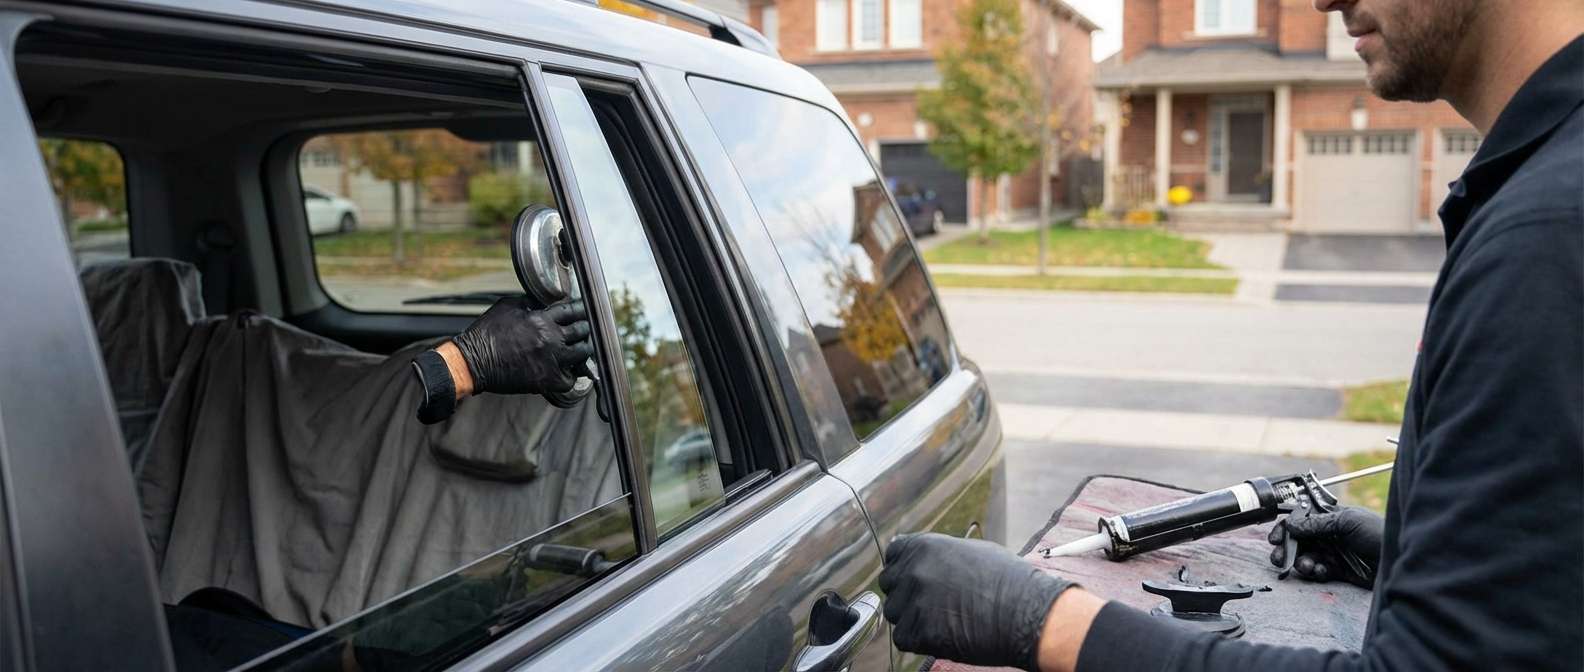
Before any tools are lifted, our certified technicians conduct a comprehensive assessment of the damage. We inspect the door frame, the exterior molding, and the surrounding paint for any secondary damage caused during the breakage. Once assessed, we begin the crucial preparation phase. We meticulously protect your vehicle's interior by draping heavy-duty automotive drop cloths over the rear seats, floor mats, and center console. We also apply protective automotive tape to the exterior door frame to ensure our tools do not scratch or damage your Honda Pilot's paint during the extraction process.
Step 2: Precision Removal of Door Panels and Hardware
Because this is a door-mounted glass component, accessing the internal mounting points of the vent glass requires the complete removal of the interior door panel. Our technicians use specialized, non-marring pry tools to carefully unclip the Honda Pilot's interior door trim. We methodically remove the retaining screws hidden behind the interior door handle and the power window switch bezel. Once the door panel is safely detached, we disconnect all electronic wiring harnesses to ensure the power lock and window systems remain undamaged. We then carefully peel back the factory vapor barrier to gain full access to the inner door cavity and the window division bar (the track that separates the main drop glass from the vent glass).
Step 3: Meticulous Vacuuming of Broken Glass Shards
When a vent glass is shattered, thousands of tiny, razor-sharp glass fragments fall down inside the door cavity. If left uncleaned, these shards will rattle every time you close the door, grind against your window regulator mechanism, and eventually block the water weep holes at the bottom of the door, leading to severe internal rust. AlexWindshield technicians prioritize a flawless cleanup. We utilize high-powered, industrial-strength shop vacuums with specialized micro-crevice attachments to extract every single shard of broken glass from the vehicle's interior seats, floor carpets, and deep within the door cavity. We physically inspect the window regulator tracks and latch mechanisms to ensure no hidden glass fragments remain to cause future mechanical failures.
Step 4: Old Adhesive Removal and Surface Cleaning
With the division bar unbolted and the damaged vent frame removed, we focus on preparing the vehicle's pinch weld. We use specialized cold knives and precision scrapers to trim down the old factory urethane to a flat, thin layer—roughly 1 to 2 millimeters thick. This provides the ideal base for the new adhesive to bond to. After the old urethane is trimmed, we thoroughly clean the entire mounting surface using a high-grade, alcohol-based glass and surface cleaner. This step eliminates any dirt, road grime, natural oils, or micro-debris that could compromise the integrity of the new watertight seal.
Step 5: Primer Application and Corrosion Prevention
Any areas of the vehicle's metal pinch weld that were exposed or slightly scratched during the removal of the old glass must be chemically treated. We apply a specialized high-quality black primer to the bare metal and the edges of the newly prepared pinch weld. This primer serves two critical functions: it actively prevents the formation of rust and corrosion inside your door frame, and it creates an aggressive chemical bonding layer that prepares the surface to accept the new adhesive. We allow the primer to flash (dry) for the exact time specified by the chemical manufacturer, ensuring maximum adhesion strength.
Step 6: High-Quality Adhesive Application
The strength and weather-resistance of your new vent glass depend entirely on the quality of the bonding agent. At AlexWindshield, we strictly use premium, OEM-grade, high-modulus urethane adhesive. Using a specialized, battery-operated caulking gun, our Master Technicians lay down a consistent, precision V-bead of urethane around the perimeter of the vent glass mounting frame. This continuous bead ensures there are no gaps, air pockets, or thin spots, guaranteeing an absolute watertight and airtight seal that meets or exceeds Honda's original factory safety specifications.
Step 7: Precision Installation of the New Vent Glass
Once the adhesive is perfectly applied, we carefully maneuver the brand new, OEM-equivalent vent glass into place. We precisely align the glass with the contour of the Honda Pilot's door frame, ensuring it sits flush against the exterior body lines. We then firmly press the glass into the fresh urethane bed, allowing the adhesive to spread and grip the glass edge securely. The division bar is then realigned and bolted firmly back into place, locking the vent glass in its permanent position and securing the track for your main roll-down window.
Step 8: Reassembly and Final Quality Inspection
With the new vent glass securely installed, we begin the reassembly process. Our technicians reattach the moisture vapor barrier, reconnect all electrical harnesses for your window switches and door locks, and snap the interior door panel back into its factory position. We secure all screws and trim pieces, ensuring there are no loose parts or rattling noises. Finally, we clean the newly installed vent glass with professional-grade glass cleaner and perform a rigorous quality check. We test the main roll-down window to ensure it glides smoothly in its track and inspect the external seals to guarantee your 2003-2008 Honda Pilot is completely secure and weather-tight.
Why Trust AlexWindshield for Your Honda Pilot Auto Glass Needs?
Replacing the auto glass on a classic SUV like the first-generation Honda Pilot requires precision, patience, and a deep understanding of automotive structural integrity. When you choose AlexWindshield, you are not just getting a piece of glass replaced; you are investing in top-tier automotive craftsmanship. We pride ourselves on delivering exceptional value and peace of mind to our customers.
- Convenient Mobile Service: We bring our fully equipped mobile shop directly to your location anywhere in the Greater Toronto Area (GTA), including Vaughan, Richmond Hill, and Markham. You don't have to disrupt your day or drive an insecure vehicle.
- OEM-Quality Materials: From the replacement glass to the high-viscosity urethane adhesive and rust-preventative primers, we only use the highest quality materials that meet or exceed Original Equipment Manufacturer standards.
- Master Technicians: Our installers are highly trained, certified, and experienced in handling complex door glass and vent glass replacements, ensuring no damage to your vehicle's interior panels or delicate internal mechanisms.
- Impeccable Cleanup: We guarantee a thorough vacuuming of your vehicle's interior and door panels, removing all dangerous glass shards so your family can ride safely and comfortably.
- Lifetime Warranty: We stand confidently behind our work. Every installation we perform is backed by our comprehensive Lifetime Warranty against leaks, whistling, and workmanship defects for as long as you own your Honda Pilot.
Contact Us Today for Reliable Auto Glass Repair
Don't let a shattered vent glass compromise the safety, security, and comfort of your 2003-2008 Honda Pilot. Whether you are dealing with the aftermath of a break-in or accidental damage, our mobile team is ready to restore your SUV to perfect condition. Trust the experts who combine local GTA convenience with unparalleled technical excellence. Contact AlexWindshield today to schedule your mobile auto glass replacement and experience the industry's best service, backed by our ironclad Lifetime Warranty.


