The 2011-2017 Honda Odyssey: A Family Fortress That Deserves Flawless Quarter Glass
The 2011-2017 Honda Odyssey is widely celebrated as the ultimate family chariot, instantly recognizable by its signature "lightning bolt" beltline design. This unique zigzag window line doesn't just give the minivan its distinct aerodynamic profile; it creates a highly specialized, elongated rear quarter glass that provides crucial third-row visibility and eliminates dangerous blind spots for the driver. Because this glass is heavily integrated into the structural aesthetics of the vehicle, a shattered or compromised quarter glass is not just a cosmetic eyesore—it is a direct threat to the safety, security, and climate control of your mobile family command center.
As a Master Technician at AlexWindshield, I have seen firsthand how the specific geometry of the fourth-generation Honda Odyssey quarter glass presents unique challenges. When this tempered safety glass sustains an impact—whether from a stray baseball, extreme thermal shock, or a targeted break-in—it is engineered to shatter into thousands of small, granular pieces to prevent deep lacerations. While this design saves lives in an accident, it leaves your vehicle’s interior, third-row seating, and rear cargo area absolutely covered in hazardous glass shards. Restoring your vehicle requires much more than just slapping on a new piece of glass; it requires meticulous extraction, precision interior detailing, and advanced chemical bonding techniques.
Complete Step-by-Step Quarter Glass Replacement Process for the Honda Odyssey (2011-2017)
Replacing the encapsulated quarter glass on a 2011-2017 Honda Odyssey is a highly technical procedure that demands precision, specialized tooling, and an intimate knowledge of Honda's interior trim assemblies. Below is our master-level, step-by-step process to ensure a factory-perfect restoration.
Step 1: Extensive Interior Protection and Initial Debris Management
Because the quarter glass on the Odyssey is made of tempered safety glass, a break means your rear cargo area, third-row Magic Seat, and interior panels are likely filled with broken glass. Our top priority is protecting your family from these hidden hazards.
- Protective Covering: We begin by laying down heavy-duty protective drop cloths over the exterior paint and the interior upholstery, specifically covering the third-row seating area to prevent accidental scratches or fabric tears.
- Deep Interior Vacuuming: Using a high-powered, industrial-grade Shop-Vac, we meticulously vacuum all visible glass shards from the seats, the floorboards, and the cargo bay.
- Safety Gear: Our technicians equip themselves with cut-resistant Kevlar gloves and safety glasses to safely handle the razor-sharp remnants still clinging to the vehicle's window frame.
Step 2: Interior Trim and D-Pillar Panel Removal
Unlike a standard windshield, replacing the quarter glass requires accessing the mounting points and internal cavities from inside the vehicle. The 2011-2017 Odyssey features highly integrated interior plastics that must be handled with extreme care.
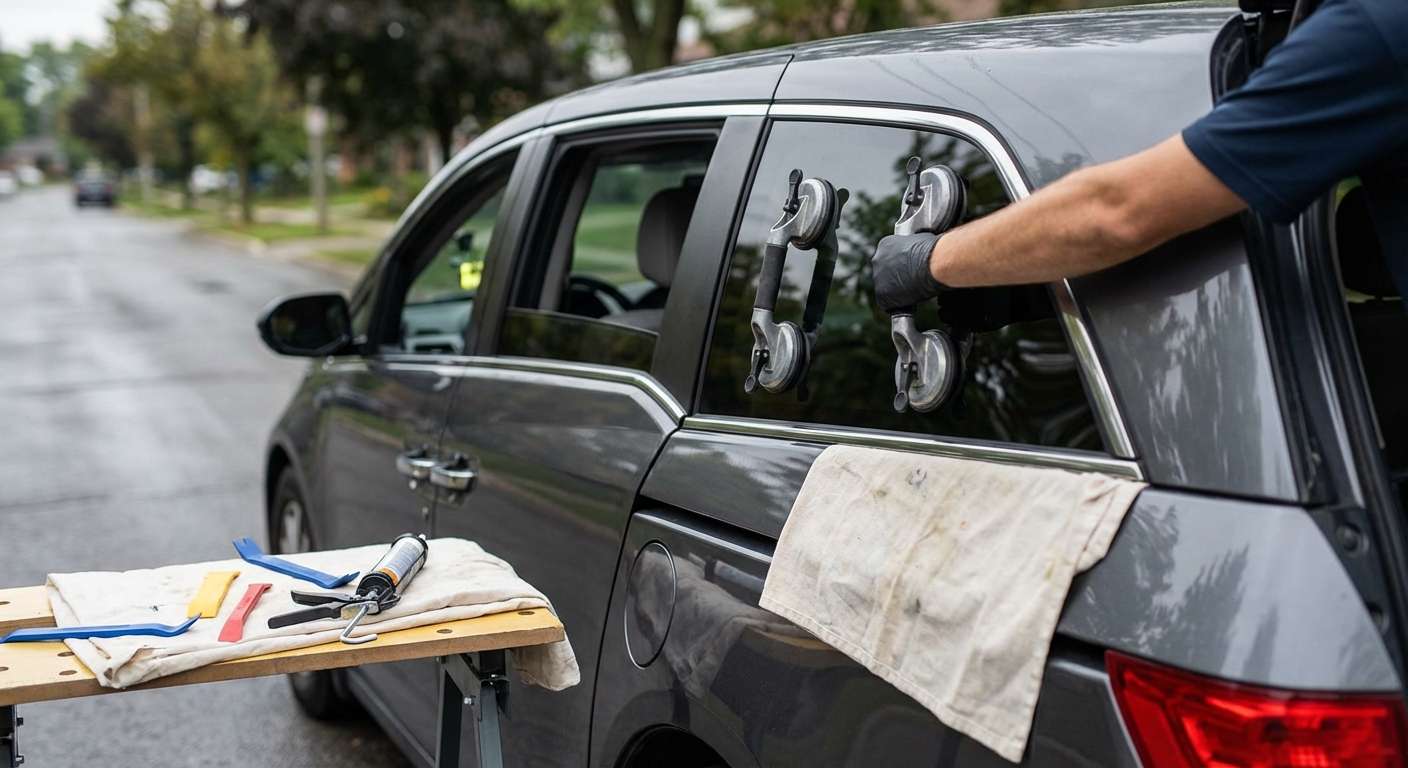
- Careful Dismantling: We use specialized, non-marring nylon pry tools to carefully disengage the hidden retaining clips holding the rear C-pillar and D-pillar interior trim panels in place.
- Exposing the Cavity: Once the interior plastic panels are safely detached, we expose the inner sheet metal and the backside of the quarter glass frame.
- Secondary Vacuuming: This is a crucial step often skipped by amateur technicians. Glass shards inevitably fall down into the deep cavities behind the plastic trim. We insert flexible vacuum nozzles deep into the vehicle's body panels to extract every single hidden shard, ensuring you won't hear annoying rattling noises when you drive over bumps.
Step 3: Extracting the Damaged Quarter Glass and Old Adhesive
The quarter glass on the Honda Odyssey is bonded to the vehicle’s frame using heavy-duty polyurethane. To install the new OEM-quality replacement glass, we must expertly sever this bond.
- Wire Extraction System: We utilize an advanced braided-wire or fiber-line cutting system. This specialized tool is threaded through the existing polyurethane bead from the inside out. We carefully pull the wire along the perimeter of the glass, slicing through the tough adhesive without ever touching or scratching the bare metal of the vehicle’s body.
- Removing the Encapsulation: The Odyssey's quarter glass often comes as an encapsulated unit (meaning the rubber/plastic molding is permanently attached to the glass). We carefully remove the entire damaged assembly and safely dispose of it.
- Trimming the Pinch Weld: Using a razor-sharp cold knife, we pare down the old, remaining urethane bead on the vehicle's pinch weld to a thin, uniform layer of about 1-2 millimeters. This thin base layer of old urethane actually provides the best possible bonding surface for the new adhesive.
Step 4: Surface Cleaning, Preparation, and Pinch Weld Priming
The secret to a Lifetime Warranty installation lies entirely in the chemical preparation of the bonding surfaces. Any contamination here can lead to leaks or total adhesive failure.
- Decontamination: We use an alcohol-based, lint-free cleaning solution to rigorously scrub the pinch weld and the surrounding painted areas, stripping away dirt, road grime, and old wax.
- Glass Preparation: The new Honda Odyssey quarter glass is unpacked, inspected for optical clarity and perfect molding alignment, and scrubbed with a specialized glass cleaner to remove any manufacturing residues.
- Applying the Primer: We apply a high-tech, fast-drying black glass primer to any exposed bare metal scratches on the pinch weld to prevent future rust formation. We also apply a specific glass-activation primer to the ceramic frit band (the black painted edge) of the new quarter glass. This primer acts as a chemical bridge, ensuring the urethane bites aggressively into the glass on a molecular level.
Step 5: Precision Urethane Application and Glass Bonding
With both surfaces chemically prepped and flashed off (dried), it is time to apply the structural adhesive.
- High-Modulus Urethane: We load a specialized, battery-operated caulking gun with premium, high-modulus, non-conductive (HMNC) automotive urethane. This is the exact same OEM-grade adhesive used on the Honda factory assembly line in Alabama.
- Creating the Bead: The technician extrudes a perfect, continuous "V-bead" of urethane along the perimeter of the vehicle's pinch weld. The height and consistency of this bead are critical to preventing wind noise and water leaks.
- Setting the Glass: Using high-powered suction cups, two technicians carefully lift the new quarter glass and align it perfectly with the Odyssey’s distinct "lightning bolt" body lines. The glass is gently pressed into the urethane, collapsing the V-bead evenly to create a watertight, structural seal.
- Securing the Glass: Retention tape is applied across the glass and the body of the van to hold the heavy encapsulated unit perfectly in place while the chemical curing process begins.
Step 6: Final Clean-up, Reassembly, and Curing Time
The physical installation may be complete, but our AlexWindshield master technician service demands a flawless finish.
- Trim Reassembly: We carefully align and snap the interior D-pillar and C-pillar plastic trim panels back into their factory positions, ensuring all hidden clips are securely engaged.
- Final Glass Cleanup: We perform a third and final vacuum sweep of the interior and wipe down all the windows in the vehicle using an ammonia-free cleaner, leaving your Odyssey looking better than it did before the break.
- Safe Drive-Away Time (SDAT): We inform the customer of the mandatory curing time. Our premium urethane typically requires only 30 to 60 minutes to cure to standard safety regulations, ensuring your family can get back on the road safely and quickly.
Premier Mobile Auto Glass Service Across the Greater Toronto Area (GTA)
At AlexWindshield, we understand that a shattered window brings your busy family life to a grinding halt. You don't have time to drag a van filled with broken glass across town to a repair shop. That is why we bring our master-level auto glass repair shop directly to you.
Our fleet of fully equipped, climate-controlled mobile service vans provides top-tier mobile auto glass services completely free of charge across the Greater Toronto Area (GTA). Whether you are dealing with a shattered window while shopping at Vaughan Mills, parked in your residential driveway in Richmond Hill, or working out of a corporate office park in Markham, our technicians will arrive on-site with the exact 2011-2017 Honda Odyssey quarter glass your vehicle requires.
We expertly navigate the unique weather conditions of the GTA. Our specialized mobile units are stocked with advanced, temperature-agnostic urethane adhesives that cure perfectly whether we are replacing your glass during a humid Vaughan summer or a freezing Markham winter. We handle the traffic, the tools, and the heavy lifting, allowing you to relax comfortably in your home or office while we restore your vehicle's safety.
Trust AlexWindshield for Your Honda Odyssey Auto Glass Needs
Your 2011-2017 Honda Odyssey is engineered to protect what matters most. Don't compromise your family's safety by trusting your quarter glass replacement to cut-rate, amateur installers who cut corners, skip vital interior vacuuming, or use inferior, aftermarket adhesives. The structural integrity of your minivan relies heavily on precise, factory-grade glass installations.
Choose the dedicated experts at AlexWindshield. As the leading provider of highly technical auto glass replacements in the GTA, we pride ourselves on our meticulous attention to detail, from the moment we vacuum the very first shard of glass to the final polish of your brand-new window. We stand fiercely behind our craftsmanship, which is why every single quarter glass replacement we perform is backed by our comprehensive, no-hassle Lifetime Warranty against leaks, wind noise, and manufacturer defects.
If your Honda Odyssey has suffered glass damage, do not wait. Experience the gold standard of mobile automotive glass repair in Vaughan, Richmond Hill, Markham, and the broader GTA. Contact AlexWindshield today for a fast, free quote, and let our Master Technicians restore your vehicle to absolute perfection.


