Restoring Your Family's Command Center: Honda Odyssey 2011-2017 Back Glass Replacement
The 2011-2017 Honda Odyssey isn't just a vehicle; it is the ultimate mobile command center for your family's daily life. Known for its distinctive "lightning bolt" beltline, unmatched safety ratings, and incredibly spacious third-row seating, this fourth-generation minivan is a marvel of family engineering. However, when the back glass shatters, that safe haven is instantly compromised. Unlike front windshields that crack or chip, the rear glass of your Honda Odyssey is made from tempered safety glass. Upon impact, it is designed to completely shatter into thousands of small, granular cubes to prevent deep lacerations. While this is a brilliant safety feature, it leaves the rear of your family vehicle completely exposed to the harsh elements, road noise, and security risks of the Greater Toronto Area.
At AlexWindshield, we understand that a broken rear windshield on a family minivan constitutes an absolute emergency. Whether the damage was caused by a stray hockey puck, extreme temperature fluctuations, or an attempted break-in, you need a highly technical, completely secure, and flawless repair. As Master Technicians, we don't just tape up the window and send you on your way; we perform a comprehensive, factory-standard back glass replacement engineered to protect your loved ones and restore your Odyssey's structural integrity.
Understanding the Complexity of Your Honda Odyssey's Rear Glass
Replacing the back glass on a 2011-2017 Honda Odyssey is significantly more complex than a standard window replacement. The rear liftgate of this specific generation houses an intricate ecosystem of automotive technology. The back glass features an integrated thermal defrosting grid essential for cutting through thick Ontario winter ice. Furthermore, the glass serves as the mounting point and pass-through for the rear wiper motor assembly. A substandard installation can lead to malfunctioning defrosters, a misaligned wiper blade, or dangerous exhaust fumes leaking into the third-row passenger cabin. This is why professional intervention by seasoned technicians is strictly required.
Step-by-Step Back Glass Replacement Process for the 2011-2017 Honda Odyssey
As senior technicians at AlexWindshield, we adhere to a rigid, multi-point protocol for every rear windshield replacement. Here is our meticulous from A to Z technical process for your Honda Odyssey.
Step 1: Comprehensive Damage Assessment and Interior Protection
Before any tools are deployed, our primary focus is the safety of your interior. Because tempered glass shatters explosively, glass shards inevitably project deep into the vehicle. We begin by laying down heavy-duty protective drop cloths over the Odyssey's third-row seats, cargo area, and exterior rear bumper to prevent any secondary scratching to the paintwork. We carefully inspect the metal frame of the liftgate to ensure it hasn't been warped or damaged by whatever impact shattered the original glass.
Step 2: Liftgate Panel Removal and Exhaustive Vacuuming
This is a non-negotiable step that separates Master Technicians from average installers. In the 2011-2017 Odyssey, shattered glass falls directly into the deep lower cavities of the rear hatch door and the recessed cargo well. We systematically unclip and remove the interior plastic liftgate trim panels. Using industrial HEPA-filtered shop vacuums equipped with specialized micro-crevice tools, we extract every single shard of broken glass from the interior cabin, the cargo well, and deep inside the metal shell of the rear door. Failing to perform this step results in a persistent, maddening rattling sound every time you drive or close the trunk, and can potentially jam the rear latch mechanism.
Step 3: Removing the Wiper Assembly and Defroster Disconnection
With the area completely safe and clear of debris, we move to hardware removal. We carefully unbolt the rear wiper arm and extract the wiper motor assembly from the liftgate. Next, we disconnect the wiring harness for the rear thermal defroster grid. The Odyssey’s electrical connectors can become brittle over the years, so we use precision tools to release the tabs without causing any damage to your vehicle's wiring loom.
Step 4: Old Adhesive Removal and Pinch Weld Preparation
The remaining shards of glass are usually still glued to the vehicle's frame by the old factory urethane. Using a sharp cold knife and specialized oscillating power tools, we meticulously slice through the existing polyurethane adhesive. We trim the old bead down to a thin, uniform base of approximately 1 to 2 millimeters. This perfectly smooth foundation is critical for the new adhesive to bond correctly. We then comprehensively clean the entire pinch weld area with industry-grade, residue-free solvents to eliminate dirt, road grime, and moisture.
Step 5: Primer Application and Bare Metal Treatment
If the removal process exposes any bare metal on the liftgate’s pinch weld, we immediately treat it with an advanced, fast-drying anti-corrosion primer. Rust is the absolute enemy of a secure windshield seal. We then apply a specialized black glass primer to the ceramic frit band (the black painted border) of your new, OEM-quality back glass. This primer acts as a chemical bridge, ensuring the urethane adhesive bonds with maximum structural tension to the new glass.
Step 6: High-Quality Urethane Adhesive Application
Using a battery-operated professional caulking gun, we apply a fresh, continuous bead of premium, fast-curing automotive urethane adhesive. We utilize the precise "V-bead" extrusion technique. This triangular shape ensures that when the glass is pressed into the frame, the adhesive spreads perfectly and uniformly, eliminating any microscopic gaps that could lead to wind noise or water leaks during heavy rainstorms.
Step 7: Precision Installation of the New OEM-Quality Back Glass
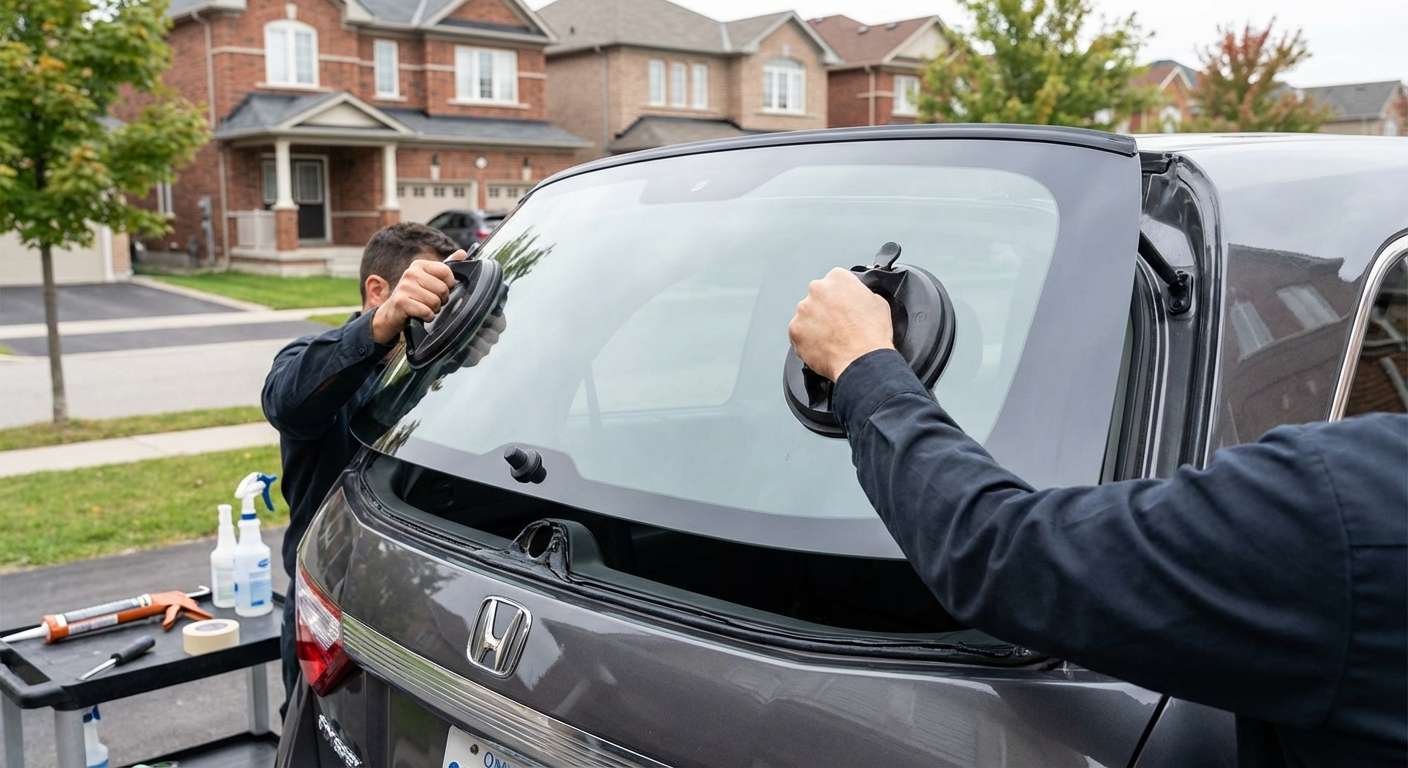
Handling the large, curved rear glass of a Honda Odyssey requires immense precision. Using heavy-duty vacuum suction cups, two of our master technicians carefully align the new back glass with the liftgate frame. Once perfectly centered, the glass is gently but firmly pressed into the fresh urethane bead. We secure the glass with specialized retention tape to hold it perfectly in place while the adhesive undergoes its initial flash-cure.
Step 8: Final Assembly, Reconnection, and Curing Time
Once the glass is set, the reassembly begins. We reattach the rear wiper motor, meticulously aligning the wiper arm to its factory resting position. We reconnect the electrical leads to the new thermal defroster grid and test the circuit to ensure your rear visibility will be flawless in the winter. Finally, we reinstall the interior liftgate trim panels, perform one last comprehensive vacuuming of the trunk area, and clean the new glass with ammonia-free professional glass cleaner. We then brief you on the Safe Drive-Away Time (SDAT), ensuring the urethane has cured sufficiently for structural safety.
Premium Mobile Auto Glass Services Across the Greater Toronto Area (GTA)
Driving a family minivan with a shattered back window covered in plastic wrap and packing tape is not just an eyesore; it is a severe safety hazard on fast-paced roads like the 404, 400, or the 407. Exhaust fumes can easily be sucked into the cabin, putting your children at risk. That is why AlexWindshield brings the auto glass shop directly to you.
We provide rapid, fully-equipped mobile auto glass replacement services right to your driveway, workplace, or emergency location. Our mobile units are climate-controlled and stocked with all the necessary tools and premium materials to perform a flawless installation on-site. We are incredibly proud to serve the entire Greater Toronto Area (GTA), with dedicated, lightning-fast dispatch specifically catering to the vibrant communities of Vaughan, Richmond Hill, and Markham. You don't need to disrupt your busy family schedule or risk driving an unsafe vehicle; our master technicians bring our state-of-the-art service directly to your doorstep.
Why Choose AlexWindshield for Your Honda Odyssey?
When it comes to the safety of your family and the integrity of your vehicle, you cannot afford to cut corners. Here is why Honda Odyssey owners across the GTA trust us with their auto glass needs:
- Master Technicians: Our installers are highly trained, fully certified, and deeply experienced specifically with the 2011-2017 Honda Odyssey platform and its unique liftgate architecture.
- OEM-Quality Glass: We utilize only premium glass that meets or exceeds Original Equipment Manufacturer standards, guaranteeing perfect curvature, flawless optical clarity, and exact defroster grid matching.
- Premium Materials: We use industry-leading, crash-tested urethane adhesives that offer incredibly fast safe drive-away times and unmatched structural bonding.
- Thorough Interior Cleanup: We don't just replace the glass; we meticulously remove interior panels and vacuum every hidden crevice to ensure your vehicle is completely free of dangerous glass shards.
- Mobile Convenience: Unmatched mobile auto glass service throughout Vaughan, Richmond Hill, Markham, and the broader GTA.
- Lifetime Warranty: We stand behind our craftsmanship. Every replacement comes with a robust lifetime warranty covering any highly unlikely issues like air leaks, water leaks, or manufacturer defects.
Contact AlexWindshield Today
Don't let a shattered rear window disrupt your family's routine or compromise their safety. For the most reliable, technically precise, and hassle-free Honda Odyssey back glass replacement in the Greater Toronto Area, trust the true experts. AlexWindshield is your premier destination for mobile auto glass services, combining master-level craftsmanship with unparalleled convenience. Contact us today to schedule your mobile appointment and experience the peace of mind that comes with our Lifetime Warranty and flawless service.


