Restoring Your Family's Fortress: Expert Door Glass Replacement for the 2011-2017 Honda Odyssey
The 2011-2017 Honda Odyssey is widely recognized as the quintessential family fortress on wheels. Distinguished by its iconic "lightning bolt" beltline and incredibly spacious cabin, this fourth-generation Odyssey was engineered to transport your loved ones with unparalleled safety and comfort. However, when a stray piece of highway debris shatters your side window, or an unfortunate break-in compromises your vehicle, that secure family bubble is instantly shattered. A broken door glass not only exposes your vehicle's interior to the harsh Canadian weather but also poses a severe safety hazard to your passengers. At AlexWindshield, we understand that your minivan is the lifeline of your daily routine. As Master Technicians, we specialize in precise, factory-standard door glass replacements specifically tailored for the 2011-2017 Honda Odyssey, ensuring your vehicle is returned to its original, pristine condition.
Understanding the Complexity of the 4th Generation Honda Odyssey Door Glass
Replacing the door glass on a 2011-2017 Honda Odyssey is not a generic, one-size-fits-all procedure. Depending on the trim level—whether you drive an LX, EX, EX-L, Touring, or Touring Elite—your Odyssey is equipped with advanced internal door components that require a meticulous touch. For instance, the rear sliding doors on the higher trims feature integrated retractable sunshades, advanced pinch-protection sensors, and specialized acoustic glass designed to minimize road noise. Navigating these components requires deep technical expertise to ensure that nothing is damaged during the glass replacement process. At AlexWindshield, our Master Technicians possess the specialized knowledge required to dissemble, service, and reassemble these complex door environments flawlessly.
Our Master Technician Step-by-Step Door Glass Replacement Process
When you trust AlexWindshield with your Honda Odyssey, you are receiving a premium, A-to-Z technical service. We adhere to strict industry protocols to guarantee a secure, leak-proof, and aesthetically perfect installation. Here is our comprehensive step-by-step process for replacing your Odyssey's door glass:
Step 1: Pre-Inspection and Advanced Interior Protection
Before any tools are utilized, we perform a thorough assessment of the damage. We inspect the door frame, the weatherstripping, and the window regulator mechanisms. Because shattered tempered glass can explode into thousands of tiny, sharp pebbles, protecting your minivan's interior is our immediate priority. We lay down heavy-duty protective tarps over the premium fabric or leather seating, tape off the master window switch consoles to prevent debris from falling into the electrical contacts, and shield your interior door panels.
Step 2: Expert Removal of the Odyssey Door Panels
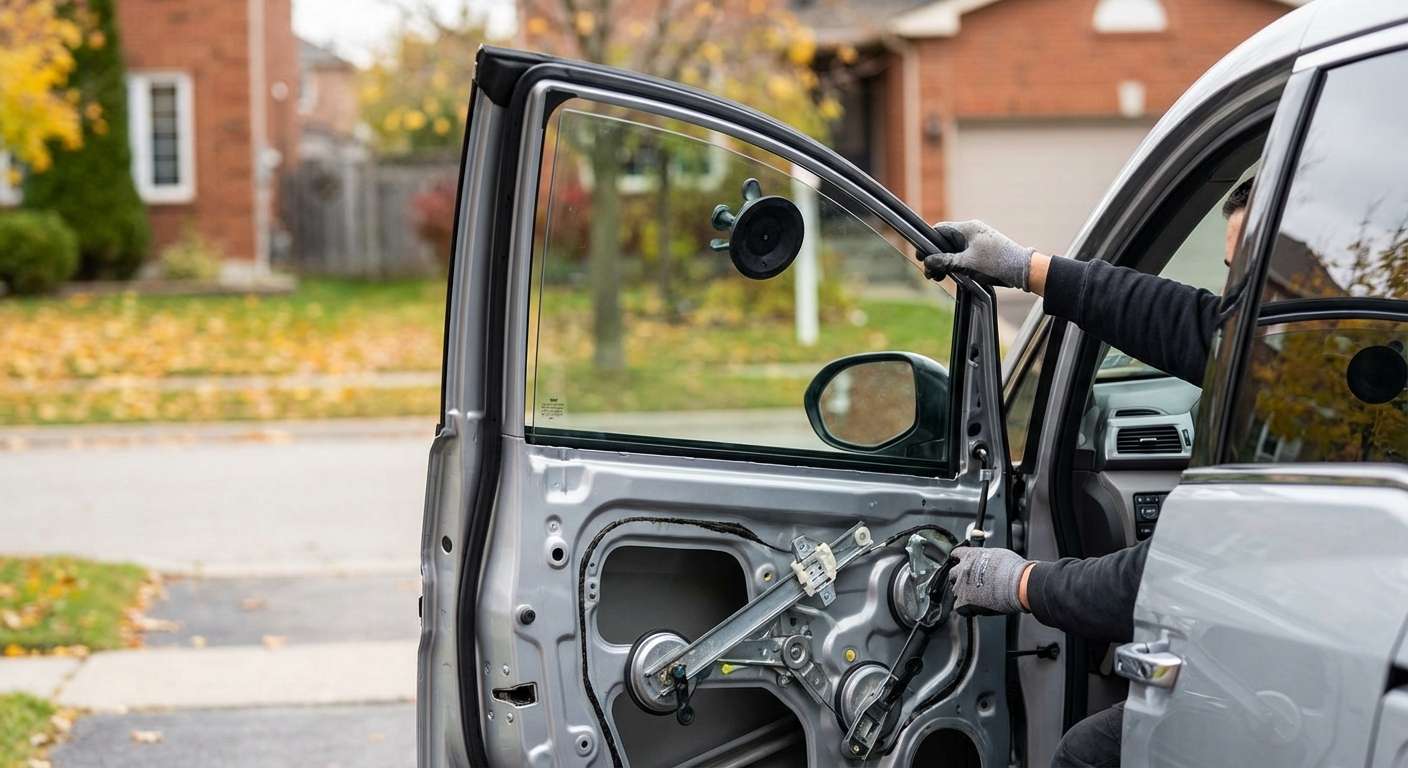
To access the window regulator and the shattered glass remnants, the interior door panel (door card) must be completely removed. For the 2011-2017 Odyssey, this involves carefully extracting the hidden retaining screws located behind the inner door handle cover and the armrest pocket. Using specialized, non-marring nylon trim tools, our technicians gently pry the perimeter of the door panel to disengage the proprietary Honda retaining clips without breaking them. Once the panel is loose, we meticulously disconnect the wiring harnesses for the power locks, window switches, memory seat modules (on Touring models), and courtesy lights. If we are working on the rear sliding doors, we also safely bypass the integrated sunshade housing.
Step 3: Comprehensive Vacuuming of Broken Glass Shards
One of the most critical and often overlooked steps in door glass replacement is the meticulous removal of debris. If left behind, glass pieces can cause maddening rattles, block the water drainage weep holes at the bottom of the door, or severely damage the new glass and regulator cables. We spend a significant amount of time vacuuming all broken glass shards from the vehicle's interior, deep within the door cavity, and inside the window tracks. We utilize high-powered, industrial shop vacuums with specialized micro-crevice tools to extract every single fragment from the speaker baffles, lock actuators, and the floor carpets, ensuring a safe environment for your family.
Step 4: Surface Cleaning, Primer Application, and Adhesive Preparation
While standard door glass typically utilizes bolt-on regulator brackets, achieving a factory-sealed environment requires meticulous attention to the supporting infrastructure. First, we perform a deep surface cleaning of the rubber run channels and the stationary guide tracks using specialized glass-prep solvents. To ensure absolute structural integrity, specifically regarding the vapor barrier seal and the mounting brackets that hold the glass to the lifter mechanism, we execute precise primer application, and the installation of the new glass using high-quality adhesive. We apply an advanced urethane primer to the necessary bonding points and use premium automotive-grade adhesive to secure the weatherstripping and vapor barrier seals. This crucial step guarantees that your Odyssey will not suffer from high-speed wind noise or interior water leaks during heavy rainstorms.
Step 5: Installation of the New Glass and Regulator Calibration
With the tracks cleaned and primed, we carefully angle the new, high-quality Original Equipment Equivalent (OEE) or OEM door glass into the door frame. The 2011-2017 Odyssey requires specific maneuvering to slip the glass past the B-pillar seal and down into the regulator lifter channels. Once seated, we align the mounting holes with the regulator brackets and tighten the bolts to Honda's exact factory torque specifications. Over-tightening can shatter the new glass, while under-tightening will cause the window to fall off track. After the glass is mechanically secured, we reconnect the power window switch to test the operation. We meticulously calibrate the "auto-up" and "auto-down" anti-pinch functions to ensure the motor recognizes the new glass weight and resistance, preventing the window from falsely reversing direction.
Step 6: Reassembly and Final Quality Assurance
Once the glass is flawlessly tracking up and down, we begin the reassembly phase. We reseal the inner moisture barrier (vapor barrier) utilizing the high-quality adhesive applied earlier, ensuring an airtight seal against the inner door skin. We then reconnect all electrical harnesses, carefully reattach the interior door panel, and secure all mounting screws and trim covers. Finally, we clean the newly installed glass using streak-free, ammonia-free professional glass cleaners and conduct a final inspection of the entire door assembly.
Serving the Greater Toronto Area (GTA): Vaughan, Richmond Hill, and Markham
At AlexWindshield, we know that driving a minivan with a shattered window is stressful and unsafe. That is why we bring our Master Technician expertise directly to your doorstep. We proudly offer comprehensive mobile auto glass services across the Greater Toronto Area (GTA). Whether you are at home managing the kids, parked at your office, or stranded in a commercial lot, our fully equipped mobile service vans will come to you.
- Vaughan: From Woodbridge to Maple, we navigate Vaughan's busy suburban streets to deliver prompt, on-site door glass replacement, minimizing your downtime.
- Richmond Hill: Whether you are near the Oak Ridges Moraine or the bustling Highway 7 corridor, our technicians arrive precisely on time to secure your Honda Odyssey.
- Markham: Serving families and professionals throughout Markham, we ensure your vehicle's safety glass is replaced to the highest standards, right in your driveway.
Why Choose AlexWindshield for Your Auto Glass Needs?
Your 2011-2017 Honda Odyssey was built to protect your most precious cargo, and we believe your auto glass replacement should uphold that standard. Choosing AlexWindshield means choosing uncompromising quality, technical mastery, and unparalleled customer service. We do not cut corners; from our rigorous debris vacuuming protocols to our precise primer and high-quality adhesive applications, every step is executed with perfection in mind.
Furthermore, we stand firmly behind our craftsmanship. Every door glass replacement performed by our Master Technicians is backed by an industry-leading Lifetime Warranty. This warranty covers any issues related to workmanship, including wind leaks, water leaks, and manufacturer glass defects, giving you complete peace of mind for as long as you own your Odyssey.
Do not let a broken window compromise the safety and comfort of your family's minivan. Trust the leading experts in mobile auto glass services in the GTA. Contact AlexWindshield today to schedule your precise, Master Technician-certified door glass replacement for your 2011-2017 Honda Odyssey, and experience the ultimate in convenience and automotive care.


