The 9th Generation Precision: Understanding the 2012-2015 Honda Civic Windshield
The 2012-2015 Honda Civic represents the acclaimed ninth generation of a global automotive icon. Unlike its predecessors, this specific generation features a deeply raked, highly aerodynamic windshield design that seamlessly contours into the hood line. This steeply angled glass does much more than reduce wind resistance and improve fuel economy; it is a vital engineered component of the vehicle's safety restraint system (SRS). In the event of a front-end collision or a rollover, the windshield of your 2012-2015 Honda Civic contributes up to 45% of the cabin's structural crush resistance. Furthermore, it acts as the primary backstop for the passenger-side airbag deployment. Because of this unique structural dependency, replacing the windshield on this specific model requires the exacting precision of a Master Technician. Settling for subpar materials or rushed installation methods can compromise the safety of you and your passengers.
Your Premier Auto Glass Specialists in the Greater Toronto Area (GTA)
Driving with a cracked or severely chipped windshield is not just a safety hazard; it is a major liability on the busy highways of Southern Ontario. At AlexWindshield, we bring our world-class auto glass expertise directly to your doorstep. We proudly serve the entire Greater Toronto Area (GTA), providing swift, reliable, and highly specialized mobile windshield replacement services. Whether you are parked at your office in the bustling tech hubs of Markham, relaxing at home in the residential neighborhoods of Richmond Hill, or running errands in the commercial centers of Vaughan, our fully equipped mobile service vans come to you. We eliminate the hassle of waiting in a repair shop by delivering dealership-quality windshield replacement directly to your driveway across the GTA.
Our Master Technician's Step-by-Step Windshield Replacement Process
At AlexWindshield, we do not cut corners. Replacing the glass on a 2012-2015 Honda Civic is a highly technical procedure that must adhere strictly to the Automotive Glass Replacement Safety Standard (AGRSS). Below is the comprehensive, A-to-Z process our Master Technicians utilize to ensure a flawless, factory-grade installation.
Step 1: Pre-Installation Inspection and Interior Protection
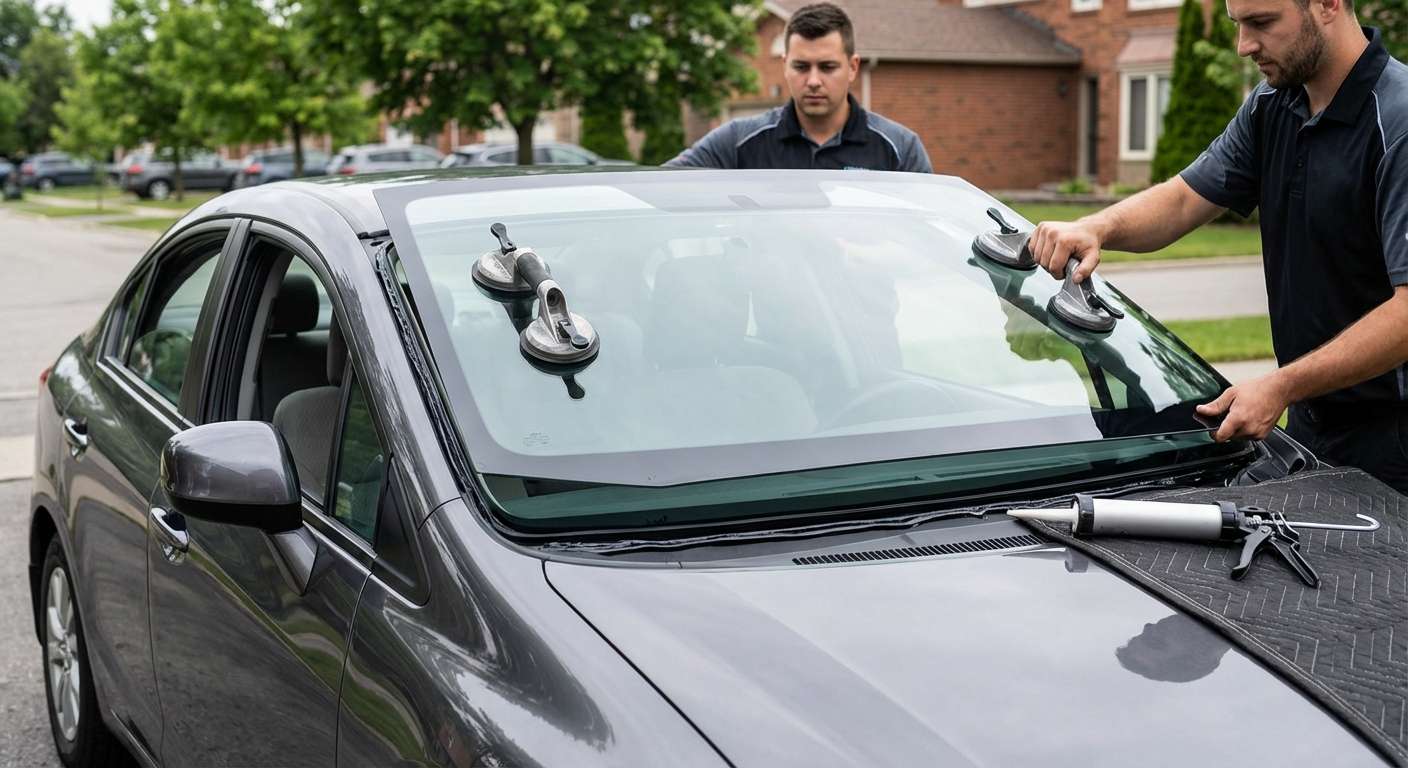
Before any tools are lifted, we conduct a thorough pre-installation inspection of your vehicle. We document the extent of the damage, check the functionality of the wipers, and test all electrical components connected to the glass. Following this, we meticulously prepare the vehicle to ensure zero damage occurs during the repair. We lay down heavy-duty protective drop cloths over your Honda Civic's hood and fenders to prevent paint scratches. Inside the cabin, we cover the dashboard, steering wheel, and front seats with specialized protective mats. This strict preparation ensures your vehicle remains pristine throughout the entire procedure.
Step 2: Removing the Cowl, Wipers, and Exterior Trim
To access the lower perimeter of the windshield, our technicians carefully detach the wiper arms using a specialized puller tool, preventing any damage to the wiper splines. Next, we remove the plastic cowl panel that spans the base of the windshield. The 2012-2015 Honda Civic utilizes a series of delicate plastic retaining clips to hold this cowl in place; our technicians use specialized non-marring trim removal tools to extract these clips without breaking them. The side molding and top weather-stripping are also carefully detached and safely stored.
Step 3: Precision Removal of the Old Damaged Glass
Extracting the broken windshield is the most delicate part of the operation. To protect the underlying metal frame (the pinch weld), we employ advanced cold knife tools and a state-of-the-art wire cutting system (such as the WRD Spider or similar fiber-line systems). We carefully thread a high-tensile cutting wire through the old adhesive bead from the inside of the cabin to the exterior. Using a specialized winding mechanism, we slice through the factory urethane seamlessly. This method eliminates the risk of scratching the metal frame or damaging the delicate interior headliner. Once the urethane seal is completely broken, we use heavy-duty suction cups to safely lift the heavy, damaged glass away from the vehicle.
Step 4: Pinch Weld Surface Cleaning and Preparation
The secret to a leak-proof, structurally sound windshield replacement lies in the preparation of the pinch weld. After the old glass is removed, a thick layer of old urethane remains on the vehicle's frame. Using a razor-sharp precision scraper, we trim this existing urethane down to a thin, uniform baseline of approximately 1 to 2 millimeters. We never strip it down to the bare metal, as the old urethane provides an excellent bonding base for the new adhesive. Once trimmed, we thoroughly clean the entire perimeter, utilizing an alcohol-based surface cleaner to remove all dirt, grease, moisture, and debris. Any microscopic contaminants left behind can cause chemical reactions that weaken the final bond.
Step 5: Advanced Primer Application
Even with the most careful removal process, microscopic scratches to the vehicle's paint can occasionally occur. To combat this and ensure ultimate adhesion, we apply an advanced, high-performance black glass primer. We carefully brush this primer onto any exposed bare metal on the pinch weld to act as an impenetrable rust inhibitor. Rust on the pinch weld is the leading cause of future windshield leaks and structural failure, so this step is absolutely critical. We also apply a specific glass primer to the bonding edge (the frit band) of your new, premium Replacement Auto Glass. This creates a perfect chemical bridge between the glass and the adhesive.
Step 6: High-Quality Urethane Adhesive Application
With the surfaces prepped and primed, we are ready for the adhesive. At AlexWindshield, we utilize only industry-leading, high-modulus, non-conductive urethane adhesives that meet or exceed Original Equipment Manufacturer (OEM) specifications. Using a heavy-duty power caulking gun, we apply the urethane in a precise "V-bead" pattern around the entire perimeter of the pinch weld. The triangular V-shape of the bead is crucial; it guarantees that as the glass is pressed into place, the adhesive collapses evenly, eliminating air pockets and ensuring a watertight, airtight, and structurally rigid seal.
Step 7: Installing the New Windshield and Final Assembly
Timing is everything once the urethane is applied. Utilizing ergonomic suction-cup lifting tools, two of our Master Technicians carefully align the new windshield above the Honda Civic's frame. The glass is gently lowered perfectly into place. We apply firm, even pressure around the edges to seat the glass into the V-bead urethane. Once the glass is set, we immediately begin the reassembly process. We reinstall the exterior trim, precisely realign and reattach the plastic cowl, and re-torque the wiper arms to factory specifications. Finally, we clean the new auto glass with a streak-free, foaming glass cleaner, leaving your vehicle looking showroom-ready.
Mandatory ADAS Camera Calibration for Your Honda Civic
While the 2012-2015 Honda Civic generation may seem older, the upper trim levels introduced between 2013 and 2015 (such as the EX-L and Touring models) began incorporating early Advanced Driver Assistance Systems (ADAS). Systems like Lane Departure Warning (LDW) and Forward Collision Warning (FCW) rely heavily on a forward-facing camera mounted directly to the windshield behind the rearview mirror.
When a windshield is replaced, the camera is temporarily disconnected and the new glass—even if it perfectly matches the original—can slightly alter the camera's viewing angle due to microscopic variations in glass curvature and thickness. ADAS Camera Calibration is absolutely mandatory following a windshield replacement on these equipped vehicles. At AlexWindshield, our technicians utilize cutting-edge computerized diagnostic tools and precise optical targeting boards to perform dynamic and static recalibrations. We ensure your Honda Civic's safety sensors are communicating perfectly with the vehicle's onboard computer. Failing to perform this calibration can result in your safety systems failing to detect a lane drift or a stopping vehicle, putting your life at risk. We never skip this vital technological safety protocol.
The AlexWindshield Advantage: Unmatched Mobile Service and a Lifetime Warranty
Choosing the right auto glass shop is an investment in your vehicle's safety and longevity. Here is why Honda Civic owners across the GTA continue to trust us:
- Unparalleled Convenience: Our mobile auto glass service means you do not have to disrupt your day. Whether you are at a shopping center in Vaughan, an office building in Markham, or your driveway in Richmond Hill, we bring the shop to you.
- Master Technicians: Every technician at AlexWindshield is highly trained, certified, and deeply experienced in the specific structural nuances of the 2012-2015 Honda Civic.
- Premium Materials: We use only OEM-equivalent or better glass, ensuring perfect acoustic dampening, UV protection, and structural integrity, paired with industry-leading, fast-curing urethane for a rapid Safe Drive Away Time (SDAT).
- Lifetime Warranty: We stand entirely behind our craftsmanship. Every windshield replacement performed by AlexWindshield is backed by an ironclad Lifetime Warranty covering air leaks, water leaks, and manufacturer defects for as long as you own the vehicle.
Do not compromise on your safety or settle for second-rate auto glass repair. For the highest quality 2012-2015 Honda Civic windshield replacement in the Greater Toronto Area, trust the dedicated experts at AlexWindshield. Contact us today to schedule your mobile service and experience the gold standard in automotive glass care.


