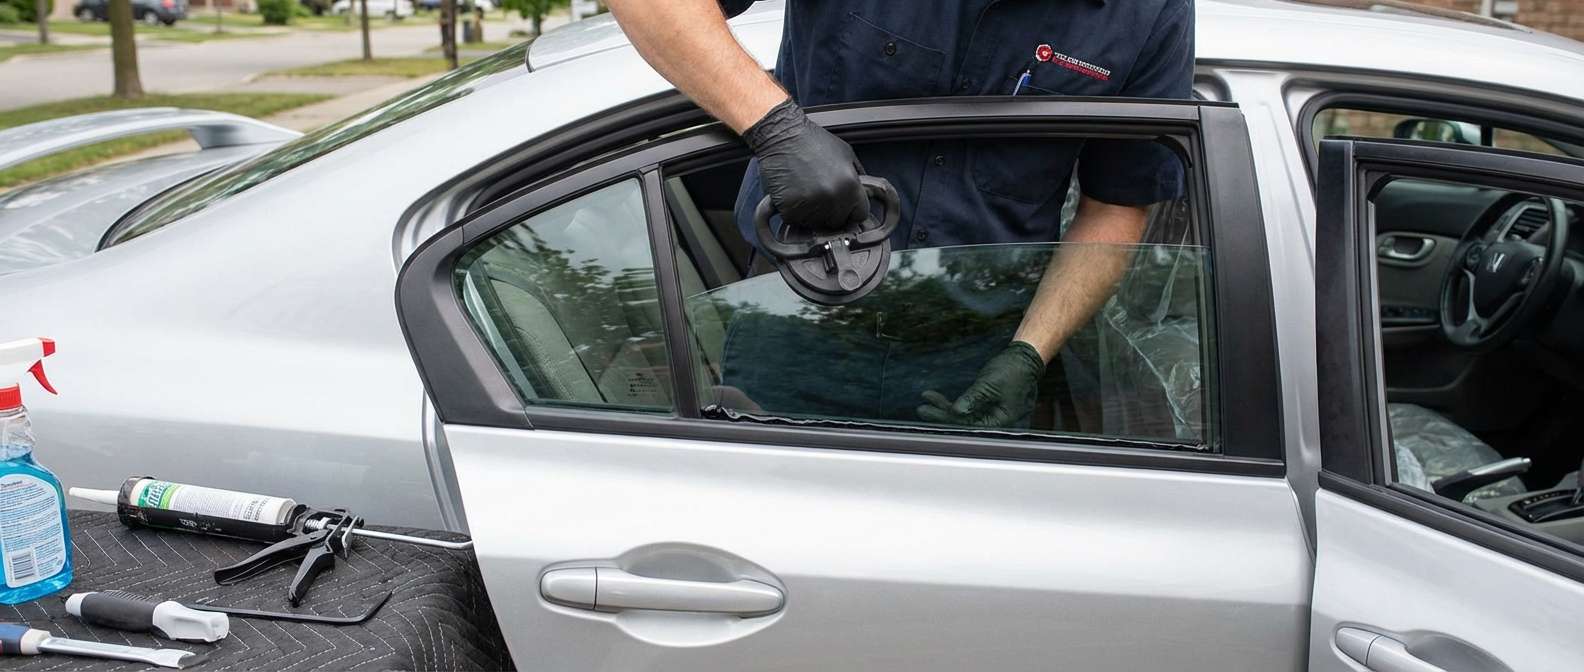
The 2012-2015 Honda Civic Vent Glass: A Prime Target for Intruders and How We Restore Your Peace of Mind
The 9th generation 2012-2015 Honda Civic is an undisputed staple on Canadian roads, renowned for its bulletproof reliability, excellent fuel economy, and sleek aerodynamic profile. However, this incredibly popular sedan has a specific vulnerability: its vent glass. Often referred to as the quarter glass or fly window, this small, triangular pane of glass located on the rear doors is frequently targeted by opportunistic thieves. Criminals know that shattering this specific piece of glass provides just enough room to reach inside and unlock the vehicle, bypassing alarms and gaining unauthorized access to the cabin. When you walk out to your vehicle and find a shattered vent glass, it leaves you with more than just a mess; it leaves your vehicle's interior exposed to the harsh Canadian weather, significantly compromises your safety, and strips away your peace of mind.
As a Master Technician at AlexWindshield, I have replaced countless vent glasses on this exact vehicle generation. I know the intricacies of the Civic’s door assembly, the exact locations of the hidden retaining clips, and the precise chemical bonding required to restore the factory seal. Our highly specialized auto glass repair team does not believe in shortcuts. We provide an uncompromising, premium replacement service engineered to bring your Honda Civic back to its original factory condition.
Why Expert Replacement is Critical for Your Honda Civic Vent Glass
Many vehicle owners assume that because the vent glass is one of the smallest windows on the vehicle, it requires minimal effort to replace. This is a dangerous misconception. The vent glass on the 2012-2015 Honda Civic is an integral part of the door’s structural integrity and weather-sealing system. A poor installation can lead to severe wind noise at highway speeds, catastrophic water leaks during heavy rain, and rust development deep inside the door frame. Furthermore, modern auto glass relies heavily on the structural bonding of high-grade urethanes. If the incorrect primer or adhesive is utilized, the glass can easily detach during a collision or fail to keep out environmental hazards.
At AlexWindshield, we utilize only OEM-equivalent or superior glass, paired with industry-leading chemical retention systems. Our mobile service spans the entire Greater Toronto Area (GTA), meaning whether you are parked at a shopping center in Vaughan, at your office in Richmond Hill, or in your residential driveway in Markham, our technicians bring the auto glass shop directly to you.
The Complete, Step-by-Step Vent Glass Replacement Process by AlexWindshield
Transparency is the cornerstone of our service. As a senior technician, I want you to understand exactly what goes into a professional vent glass replacement. Here is our meticulous, A-to-Z protocol specifically tailored for the 2012-2015 Honda Civic.
Step 1: Vehicle Assessment and Interior Protection
Before any tools are lifted, we begin with a comprehensive pre-installation inspection. We assess the damage to the vent glass and inspect the surrounding metal frame and division bar for any scratches or pry marks left by thieves. Once the assessment is complete, we prioritize the protection of your Honda Civic’s interior. We drape heavy-duty protective covers over the seats, center console, and exterior paintwork directly below the door. Automotive masking tape is applied to the edges of the door frame to ensure our tools never make direct contact with your vehicle's clear coat.
Step 2: Door Panel Disassembly and Vapor Barrier Access
Because the vent glass is deeply integrated into the door architecture, we must remove the interior door panel to access the mounting hardware. For the 2012-2015 Honda Civic, this involves:
- Carefully prying off the plastic trim behind the interior door handle and removing the hidden Phillips-head screws.
- Removing the armrest trim and extracting the underlying retaining bolts.
- Using specialized non-marring nylon pry tools to disengage the plastic door clips without snapping them.
- Disconnecting the power window and door lock electrical harnesses.
- Gently peeling back the waterproof vapor barrier (butyl tape seal) to gain full access to the internal door cavity and the window regulator track.
Step 3: Comprehensive Vacuuming of Broken Glass Shards
Unlike windshields which are laminated and stay relatively intact when struck, automotive side glass and vent glass are made of tempered safety glass. When broken, tempered glass explodes into thousands of tiny, pebble-like shards. If left uncleaned, these shards will rattle inside your door every time you hit a bump, and worse, they can jam the moving parts of your main roll-down window regulator. We perform an exhaustive cleaning process:
- Vacuuming the cabin: We use high-powered industrial shop vacuums to extract every single shard from your seats, floor mats, and carpet fibers.
- Vacuuming the door cavity: We utilize specialized micro-nozzle attachments to reach deep into the bottom of the door shell, vacuuming up all the glass shards resting near the door drains and audio speakers.
- Clearing the weatherstripping: We meticulously brush and vacuum the rubber window run channels to ensure no microscopic glass dust remains, which could later scratch your main door glass.
Step 4: Removing the Division Bar and Old Adhesive
The vent glass is separated from the main roll-down window by a vertical metal track known as the division bar. To extract the remnants of the broken vent glass, we unbolt the 10mm bolts securing the division bar at the top and bottom of the door frame. We carefully slide the main window glass out of the way and remove the division bar. Next, we use specialized cold knives and auto glass cut-out tools to slice through the old polyurethane adhesive holding the shattered vent glass frame in place. We trim the existing bead of adhesive down to a thin, even layer of about 1-2 millimeters, which provides the perfect substrate for the new adhesive to bond to.
Step 5: Precision Surface Cleaning and Primer Application
The secret to a leak-free, lifetime installation lies in the chemical preparation. Any dirt, grease, or hand oils left on the bonding surface will cause the adhesive to fail. We clean the pinch weld (the metal frame) and the new Honda Civic vent glass using specialized, alcohol-based glass cleaners. Once spotless, we move to the most critical chemical step: the primer application.
- Glass Primer: We apply a black frit primer to the edge of the new vent glass. This promotes a cross-linking chemical bond with the urethane and protects the adhesive from UV degradation caused by sunlight.
- Pinch Weld Primer: If any bare metal was exposed on the door frame during the removal process, we apply a high-grade anti-corrosion body primer. This completely seals the metal, ensuring rust never develops inside your door frame.
Step 6: Installation Using High-Quality Adhesive
With the surfaces properly prepped and the primer fully flashed (dried), it is time to install the glass. We use a heated electric caulking gun to extrude a perfectly uniform, triangular bead of high-quality adhesive (fast-curing automotive polyurethane) along the perimeter of the vent glass mounting area. The new vent glass is then carefully aligned and pressed firmly into the frame. The precise viscosity of our premium urethane ensures the glass sits perfectly flush with the vehicle's body lines, eliminating any risk of wind noise. We secure the glass with specialized retention tape while the urethane begins its rapid curing process.
Step 7: Reassembly and Final System Checks
Once the glass is set in place, we reverse the disassembly process. We reinstall the division bar, carefully torqueing the 10mm bolts to factory specifications. We guide the main roll-down window back into its rubber run channel, ensuring it moves smoothly without any binding. The moisture vapor barrier is resealed, electrical connections are re-plugged, and the interior door panel is firmly snapped and screwed back into its original position. Before handing the keys back, we test the power windows, lock switches, and wipe down the new vent glass to a sparkling, streak-free shine.
Premium Mobile Auto Glass Services Across the GTA
Dealing with a broken vehicle window is stressful enough without having to figure out how to drive a compromised, freezing, or rain-exposed car to a repair shop. That is exactly why AlexWindshield brings the auto glass shop directly to your location. We proudly offer rapid, fully equipped mobile replacement services across the Greater Toronto Area (GTA).
Whether your Honda Civic was targeted overnight in a residential neighborhood in Vaughan, broken into while you were shopping in Richmond Hill, or damaged in a corporate parking lot in Markham, our master technicians will arrive promptly with all the necessary glass, tools, and high-powered vacuums to complete the job on-site. We navigate the GTA traffic so you don't have to, providing a seamless, stress-free restoration of your vehicle's security.
Trust AlexWindshield for Unmatched Auto Glass Expertise
Your 2012-2015 Honda Civic was built to last, and its replacement glass should be installed with the exact same standard of durability. When you choose AlexWindshield, you are not just getting a piece of glass fitted; you are investing in the premier auto glass service in the GTA. Our master technicians follow strict factory protocols, use the industry's best chemical bonding agents, and obsess over the smallest details—from vacuuming hidden glass shards to ensuring perfect panel alignment.
We stand confidently behind our craftsmanship, which is why every single vent glass replacement comes backed by our comprehensive Lifetime Warranty against leaks, wind noise, and manufacturer defects. Do not leave your vehicle vulnerable to the elements or thieves for another day. Contact AlexWindshield today to schedule your mobile Honda Civic vent glass replacement in Vaughan, Richmond Hill, Markham, or anywhere in the Greater Toronto Area, and let our experts restore your vehicle to flawless condition.


