The 2004-2012 GMC Canyon: A Rugged Classic that Demands Pristine Glass
The 2004-2012 GMC Canyon represents an era of rugged, unyielding mid-size pickup trucks built to endure the rigors of heavy hauling, off-road trails, and demanding job sites. However, its robust design cannot completely shield it from all hazards. The quarter glass—the small, often encapsulated window located at the rear sides of your truck's cabin—is highly susceptible to damage. Whether compromised by a stray rock kicked up on a busy job site, an unfortunate break-in, or severe weather impacts, a shattered quarter glass instantly exposes your truck's interior to harsh elements, excessive road noise, and immediate security vulnerabilities. At AlexWindshield, we know that leaving this damage unaddressed is not an option for a reliable workhorse like the GMC Canyon.
Because automotive quarter glass is constructed from tempered glass, a hard impact does not simply crack it; it completely shatters the panel into thousands of tiny, pebble-like shards. This creates a massive mess inside your cabin, posing safety risks to your passengers and potentially damaging your truck's interior mechanisms. As a Master Technician, I have engineered a precise, uncompromising replacement protocol specifically tailored for the 2004-2012 GMC Canyon to restore your vehicle's structural integrity, climate control, and security.
Why Immediate Quarter Glass Replacement is Crucial for Your GMC Canyon
Ignoring a broken quarter window on your GMC Canyon can lead to escalating issues that go far beyond aesthetics. Here is why prompt replacement is absolutely essential:
- Cabin Security: An open or temporarily taped-up quarter window is an open invitation for theft and vandalism.
- Weather and Moisture Protection: The Canadian climate is unforgiving. A missing quarter glass allows rain, snow, and humidity to penetrate your cabin, leading to mold, mildew, and severe electrical damage inside the door panels and rear seating area.
- Acoustic Insulation: The quarter glass plays a crucial role in sealing out wind and road noise, ensuring a quiet and comfortable ride.
- Pest Prevention: An open gap in your vehicle's exterior allows insects and rodents to nest inside your truck's interior paneling.
Our Master Technician A-to-Z Quarter Glass Replacement Process
Replacing the quarter glass on a 2004-2012 GMC Canyon requires precision, highly specialized tools, and a meticulous attention to detail. At AlexWindshield, our step-by-step process ensures a flawless factory-quality seal every single time.
Step 1: Comprehensive Damage Assessment and Interior Protection
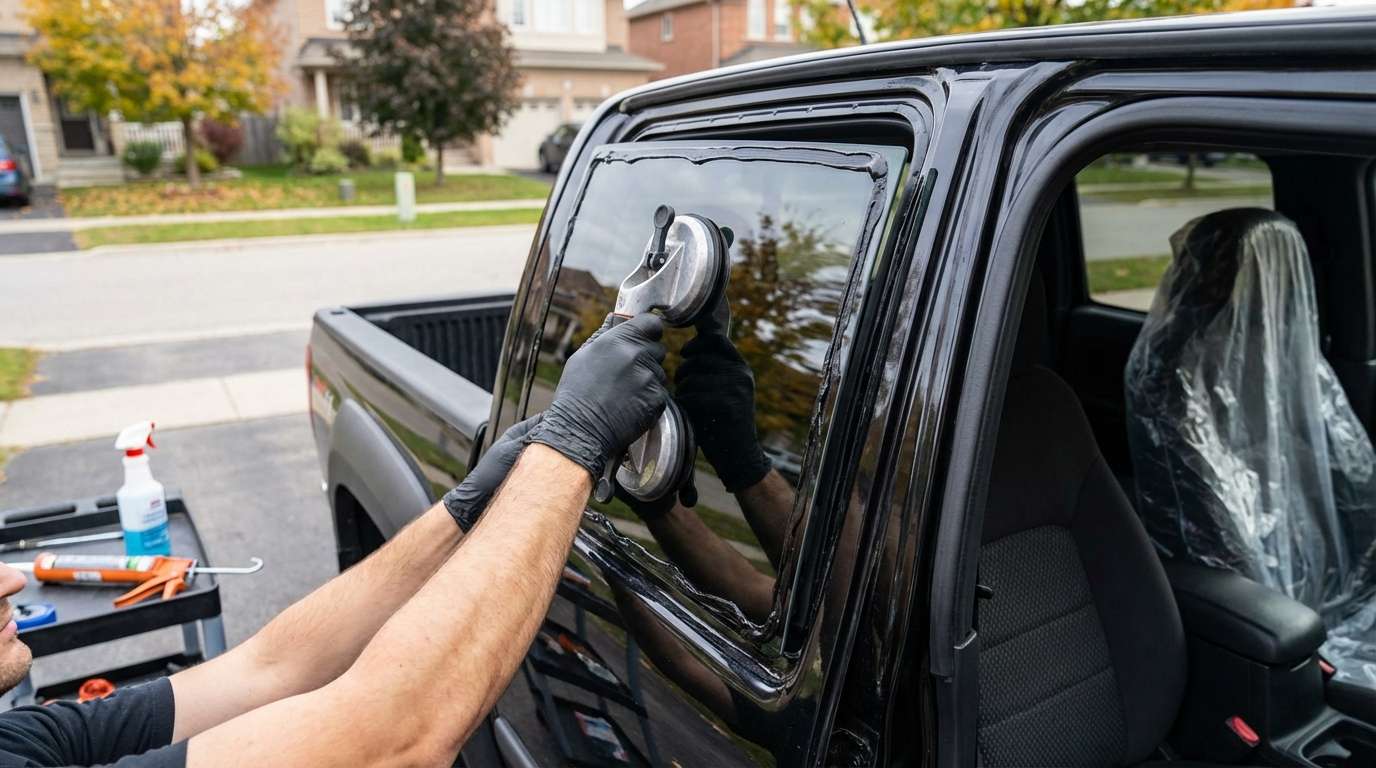
Before any heavy work begins, we conduct a thorough inspection of the damage. We check the surrounding metal frame for dents, deep scratches, or rust that may compromise the new seal. Next, we prioritize protecting the interior. We lay down heavy-duty protective drop cloths and automotive-grade seat covers over your GMC Canyon's rear seats, floor mats, and center console. We also apply specialized protective tape to the exterior paint surrounding the window frame to ensure no accidental scratches occur during the extraction process.
Step 2: Thorough Vacuuming and Glass Shard Removal
Because the GMC Canyon's quarter glass is tempered, a break results in thousands of tiny glass fragments. These shards do not just land on the seats; they fall deep into the window tracks, interior quarter panels, and rear trim. To execute a proper repair, we systematically remove the interior door panels and rear C-pillar trim. Using high-powered industrial vacuums equipped with specialized micro-crevice tools, we meticulously extract every single shard of broken glass from the seating, carpeting, and hidden cavities of the body panels. Failing to perform this step would result in annoying rattling noises and potential damage to interior components down the road.
Step 3: Removing the Old Glass Encapsulation and Urethane
The 2004-2012 GMC Canyon quarter glass is typically bonded to the vehicle's body using high-strength urethane. Using a professional cold knife, specialized power wire tools, or an oscillating heavy-duty cut-out tool, our technicians carefully slice through the old, hardened urethane bead from the inside out. We carefully extract any remaining glass chunks still glued to the frame, ensuring that the truck's delicate pinch weld (the metal lip where the glass sits) remains completely undamaged.
Step 4: Surface Cleaning and Pinch Weld Preparation
A new window will only bond properly to a meticulously prepped surface. We carefully trim down the existing urethane bead on the pinch weld to a thin, uniform layer of about 1 to 2 millimeters—a technique known as a "full cut." This existing base provides the best foundation for the new adhesive. We then perform a rigorous surface cleaning of the entire frame using an alcohol-based, lint-free automotive glass cleaner to remove any dirt, grease, moisture, or debris that could interfere with the chemical bonding process.
Step 5: Primer Application and High-Quality Adhesive Extrusion
To prevent rust and ensure a permanent bond, we apply a high-grade primer application to any microscopic bare metal scratches on the pinch weld, as well as to the frit band (the black painted edge) of the new premium quarter glass. Once the primer has flashed (dried), we use an electric caulking gun to extrude a continuous, perfectly uniform V-bead of high-quality adhesive—specifically, an advanced, fast-curing automotive urethane. The V-bead shape is critical, as it guarantees a tall, structured wall of adhesive that collapses perfectly flat when the glass is pressed in, eliminating any chance of air gaps or water leaks.
Step 6: Precision Installation of the New Quarter Glass
Using industrial suction cups, our Master Technicians carefully lift and align the new OEM-quality quarter glass into the vehicle's frame. We gently press the glass into the fresh urethane bed, ensuring perfectly even spacing gaps around the entire perimeter to match factory specifications. We temporarily secure the glass with specialized retention tape to prevent any shifting or sagging while the urethane begins its initial cross-linking curing process. Once the glass is locked in place, we reinstall all previously removed interior door panels, trim pieces, and weatherstripping, ensuring all clips and fasteners are firmly seated.
Step 7: Final Inspection, Cleanup, and Safe Drive-Away Time
After the installation is complete, we conduct a final, rigorous quality control check. We clean all the windows in the vehicle and wipe down the interior to ensure your truck is returned in better condition than when we found it. Finally, we brief you on the Safe Drive-Away Time (SDAT). Because we use premium, advanced-cure urethane, your GMC Canyon will be safe to drive shortly after the installation, fully restoring its structural rigidity and safety.
Mobile Service Across the Greater Toronto Area (GTA)
We know that a shattered quarter window disrupts your busy day, which is why AlexWindshield operates a fleet of fully equipped, state-of-the-art mobile service vans. You don't need to drive a compromised, drafty vehicle across town. We bring our Master Technician expertise directly to your driveway, workplace, or job site anywhere in the Greater Toronto Area (GTA).
We proudly offer rapid-response, specialized mobile auto glass replacement services to specific regions, heavily focused on:
- Vaughan: Whether you are near Vaughan Mills or working on a construction site in Concord, our mobile technicians will reach you promptly to secure your GMC Canyon.
- Richmond Hill: Navigating the busy stretches of Yonge Street with a broken window is unsafe. We provide fast, reliable on-site replacements throughout Richmond Hill to get you back on the road safely.
- Markham: From residential driveways in Cornell to commercial zones near Highway 404, our mobile service ensures top-tier glass repair without you having to alter your daily schedule.
Choose AlexWindshield: Your Trusted Auto Glass Experts
When it comes to the safety, security, and longevity of your 2004-2012 GMC Canyon, you should never compromise on quality. At AlexWindshield, we combine decades of Master Technician experience with top-tier materials to deliver an unparalleled auto glass repair experience. We refuse to cut corners, which is why every quarter glass replacement includes thorough interior glass shard extraction, rigorous anti-rust primer treatments, and the use of industry-leading urethane adhesives.
We stand firmly behind our craftsmanship. Every single auto glass installation performed by our team is backed by our comprehensive Lifetime Warranty, covering any leaks, wind noise, or manufacturer defects for as long as you own your vehicle. Don't let a shattered quarter glass keep your truck sidelined or vulnerable to the harsh GTA weather.
Contact AlexWindshield today to schedule your mobile GMC Canyon quarter glass replacement and experience the highest standard of automotive glass service in Vaughan, Richmond Hill, and Markham!


