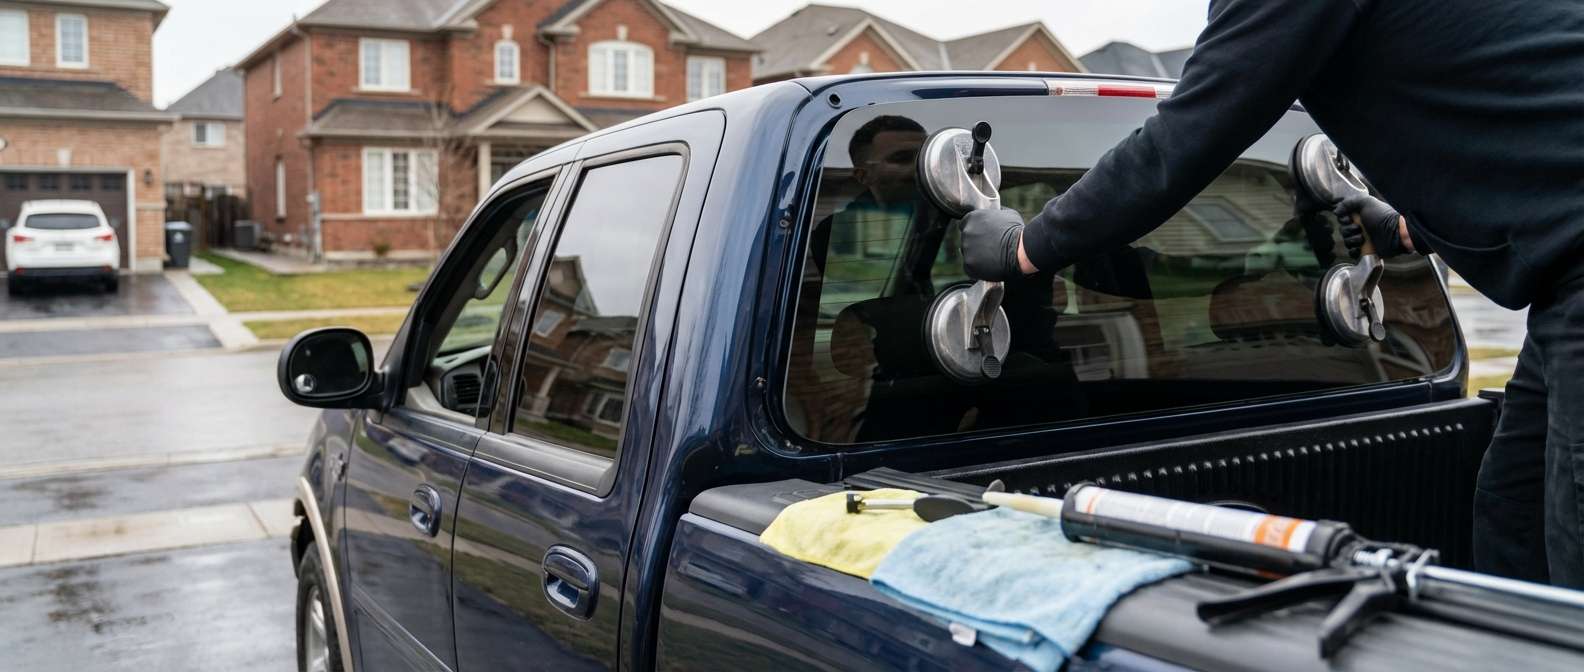
Blowing Away the Box: Reviving Your 10th Generation F-150 with Master-Level Back Glass Replacement
When Ford unveiled the 10th generation F-150 in 1997, it sent shockwaves through the automotive world. Gone were the rigid, boxy lines of the past; in their place was a revolutionary "aeroshell" design with rounded contours that vastly improved aerodynamics and completely redefined what a modern pickup truck looked like. Today, the 1997-2003 Ford F-150 remains a legendary workhorse, celebrated for its durability and distinctive styling. However, whether you use yours for hauling heavy loads to the job site or for weekend getaways, a shattered rear window instantly compromises your truck's security, interior comfort, and structural integrity.
Because the back glass on these trucks is made from tempered safety glass, an impact doesn't just result in a simple crack—it causes the entire pane to detonate into thousands of tiny, pebble-like shards. If you are dealing with a shattered rear window, you need an immediate, professional solution. As a Senior SEO Specialist and Master Technician at AlexWindshield, I have spent years perfecting the art of truck glass repair. Below is our comprehensive, step-by-step guide to Ford F-150 back glass replacement, ensuring your classic 10th-generation truck is restored to factory standards and heavily fortified against the harsh Canadian elements.
Why Immediate Replacement is Crucial for Your 1997-2003 Ford F-150
Driving with a missing or compromised rear window is not an option, especially with the unpredictable weather across the Greater Toronto Area (GTA). An open cabin leaves your truck's interior completely vulnerable to rain, snow, and road debris. Water intrusion can quickly rot out your rear bench seat, damage the headliner, and corrode sensitive wiring hidden beneath the carpeting. Furthermore, an open rear window is an open invitation for thieves.
At AlexWindshield, we specialize in mobile auto glass services, bringing our fully equipped mobile workshops directly to your home, office, or job site. Whether you are parked in a residential driveway in Vaughan, outside a commercial complex in Markham, or running errands in Richmond Hill, our master technicians arrive promptly to secure your vehicle and perform a flawless, high-quality replacement.
Master Technician's Guide: The Complete Step-by-Step Back Glass Replacement Process
Replacing the back glass on a 1997-2003 Ford F-150 is a meticulous process that requires far more than simply gluing a new window into place. Because it is a rear window rather than a windshield, we do not have to worry about ADAS camera calibration. Instead, the primary challenges are dismantling the rear cabin architecture and managing the massive debris field created by tempered glass. Here is our A-to-Z process.
Step 1: Vehicle Preparation and Interior Protection
Before any tools are lifted, we secure the work area. A shattered back window means glass is everywhere. We begin by laying heavy-duty protective drop cloths over your truck's bed and tailgate to prevent scratches to your paint. Inside the cabin, we drape protective covers over the rear bench seat (whether you have a Standard Cab or a SuperCab) and apply low-tack automotive tape around the exterior window frame to protect the F-150's clear coat during the extraction process.
Step 2: Removal of Interior Panels and Trim
To safely access the mounting points and the pinch weld of the back glass, we must carefully perform the removal of interior panels. On the 1997-2003 F-150, this involves:
- Unbolting and carefully folding forward or removing the rear seat backrest to gain unobstructed access to the lower window channel.
- Using specialized non-marring nylon pry tools to safely detach the interior C-pillar plastic trim panels without breaking their aging retention clips.
- Dropping the rear edge of the headliner slightly to access the upper edge of the glass frame, ensuring the delicate fabric is not creased or stained.
Step 3: Vacuuming All Broken Glass Shards from the Vehicle's Interior
When tempered back glass breaks, the shards infiltrate every conceivable crevice of your truck. Leaving these shards behind is a severe safety hazard for passengers and pets. At AlexWindshield, we are obsessed with cleanliness. We spend a significant amount of time vacuuming all broken glass shards from the vehicle's interior. We use high-powered industrial shop vacuums with specialized crevice attachments to extract glass from:
- Inside the seatbelt retractor mechanisms (to prevent the belts from jamming).
- Deep within the seat cushions, floor mats, and the carpet beneath the rear bench.
- Inside the window channel and the lower frame cavity of the truck body.
Step 4: Removal of the Old Glass and Urethane Bead
Even when shattered, the outer perimeter of the original glass usually remains stubbornly bonded to the truck's steel frame. Our technicians use advanced cold knife tools and wire cutting systems to meticulously slice through the original factory polyurethane bead. We carefully extract the remaining glass ring and the encapsulating rubber molding, ensuring no stress is placed on the aluminum and steel body panels of your F-150.
Step 5: Surface Cleaning and Pinch Weld Preparation
A new window is only as secure as the surface it is bonded to. Once the old glass is out, we inspect the truck's pinch weld (the metal frame where the glass sits). We use specialized scraper blades to trim the old urethane adhesive down to a thin, uniform baseline of 1 to 2 millimeters. This "close cut" is essential for the new adhesive to bond properly. We then perform a rigorous surface cleaning, using a powerful, alcohol-based auto glass cleaner to strip away decades of accumulated dust, road grime, and moisture from the metal frame.
Step 6: Primer Application for Ultimate Rust Prevention
The 1997-2003 F-150s are notorious for developing rust if the paint is scratched during glass removal. To prevent this, we meticulously perform our primer application. We apply a specialized, high-tech glass and pinch weld primer to any bare metal spots and over the remaining urethane bed. This black primer serves a dual purpose: it acts as a highly reactive chemical bonding agent for the new adhesive, and it creates a permanent, waterproof barrier that prevents the formation of rust, ensuring the structural integrity of your truck's cab for years to come.
Step 7: Installation Using High-Quality Adhesive
With the frame primed and ready, it is time for the adhesive. We never cut corners with cheap sealants. Our technicians load a heavy-duty electric caulking gun with an industry-leading, fast-curing automotive polyurethane. We apply a thick, triangular bead of this high-quality adhesive directly onto the pinch weld. The triangular shape is an industry secret—it ensures that when the glass is compressed, the adhesive spreads perfectly and uniformly, eliminating any chance of air gaps, wind noise, or water leaks.
Step 8: Precision Installation of the New Back Glass
Whether you have opted for a solid pane or a multi-panel sliding rear window—a highly popular upgrade for the 10th gen F-150—we use heavy-duty suction cups to lift the new auto glass. Two technicians carefully align the glass with the cab's contours, setting it gently into the wet urethane bed. We apply firm, even pressure to seat the glass securely, ensuring it sits flush with the exterior bodylines. Retention tape is then applied to the roof and glass to hold the window perfectly in place while the chemical curing process begins.
Step 9: Reassembly and Final Quality Inspection
While the high-quality adhesive cures, we reverse the dismantling process. We carefully reinstall the headliner, the C-pillar interior trim panels, and re-bolt the rear bench seat to factory torque specifications. We perform one final, meticulous sweep with the vacuum to ensure absolutely no glass dust remains. Finally, we clean the new back glass with premium foaming glass cleaner, leaving it completely streak-free.
Servicing the Entire Greater Toronto Area (GTA)
You shouldn't have to navigate busy highways with a truck full of broken glass. That is why AlexWindshield operates a premier fleet of mobile auto glass repair vehicles covering the entire Greater Toronto Area (GTA). If your F-150 sustains damage on a job site in Vaughan, we will meet you there with all the necessary tools and replacement glass. If you wake up to a shattered window in your driveway in Richmond Hill, our technicians will be dispatched right to your door. Working at a corporate office in Markham? We can replace your back glass right in the parking lot while you finish your workday. We bring our master-level expertise directly to you, saving you time, money, and towing fees.
Why Choose AlexWindshield for Your F-150 Auto Glass Needs?
Your 1997-2003 Ford F-150 is a classic piece of automotive history that deserves expert care. Trusting an amateur with your back glass replacement can lead to catastrophic water leaks, ruined interiors, and dangerous rust accumulation. When you choose AlexWindshield, you are choosing unparalleled expertise and peace of mind.
We pride ourselves on using only Original Equipment Equivalent (OEE) glass and industry-best urethane adhesives. Every single replacement we perform is backed by our comprehensive Lifetime Warranty. This warranty covers all workmanship, ensuring that your new back glass will never leak, whistle, or shift for as long as you own the vehicle.
If you are dealing with broken auto glass, do not wait for the weather to ruin your interior. Contact AlexWindshield today—the most trusted, reliable, and technically proficient mobile auto glass experts in the GTA. Let our master technicians clear the mess, secure your cabin, and get your legendary F-150 back on the road where it belongs.


