Reviving a Rugged Classic: Ford Explorer 2006-2010 Vent Glass Replacement
The 2006 to 2010 Ford Explorer represents a definitive era of traditional, heavy-duty SUV design. Built on a truck-like chassis, this generation of the Explorer was engineered to haul families across the country and navigate unpredictable off-road trails with equal confidence. However, despite its rugged exterior and durable mechanics, the vehicle's glass components remain susceptible to damage. Specifically, the rear door vent glass—that small, stationary window adjacent to the main roll-down door glass—is frequently targeted by thieves seeking quick access to the interior, or shattered by unexpected road debris. Because this window is crafted from tempered safety glass, a break means thousands of sharp shards scattering throughout your vehicle's cabin and internal door cavities.
As a Master Technician at AlexWindshield, I have spent years mastering the intricate architecture of the 2006-2010 Ford Explorer. Replacing the vent glass on this specific model is not just a matter of slapping a new piece of glass into a rubber seal; it requires a deep understanding of door panel assemblies, division bar removal, and precision bonding techniques. A compromised vent glass destroys your vehicle's climate control, exposes your interior to water damage, and poses a significant security risk. We are here to provide a seamless, factory-quality restoration.
Understanding the Ford Explorer Vent Glass Assembly
On the 2006-2010 Ford Explorer, the rear door vent glass is generally an encapsulated piece. This means the glass is pre-molded with a hard rubber or plastic trim and is secured into the door frame using a combination of mechanical fasteners (bolted to the division bar) and high-strength automotive urethane. When this glass shatters, the remaining encapsulated frame must be carefully cut out, and the main roll-down window must often be adjusted to remove the division bar safely. Attempting a DIY repair on this specific model often leads to damaged weatherstripping, misaligned main windows, or severe rust issues inside the door frame. Professional intervention is non-negotiable for a safe and permanent fix.
The A to Z Step-by-Step Vent Glass Replacement Process
At AlexWindshield, we adhere to strict, manufacturer-approved auto glass replacement protocols. Here is the detailed, step-by-step technical breakdown of how we restore the vent glass on your 2006-2010 Ford Explorer.
Phase 1: Meticulous Preparation and Interior Protection
Before any tools touch your vehicle, we focus entirely on protecting your Ford Explorer's interior. Since shattered tempered glass creates a massive mess, containment is our first priority.
- Interior Masking: We lay down heavy-duty protective drop cloths over the rear leather or cloth seats, floor mats, and center console.
- Exterior Protection: We apply specialized automotive tape around the painted exterior of the door frame to prevent any accidental scratches during the extraction process.
- Safety Gear: Our technicians equip themselves with cut-resistant Kevlar gloves and safety glasses to handle the razor-sharp shards of the broken vent glass safely.
Phase 2: Comprehensive Disassembly and Glass Shard Vacuuming
Unlike a windshield replacement, dealing with a broken side vent glass requires extensive interior cleanup. Tempered glass is designed to shatter into tiny, pebble-like pieces, which immediately fall down inside the door cavity.
- Door Panel Removal: Using specialized non-marring trim tools, we carefully unclip the interior door panel of your Explorer. We remove the armrest bolts, disconnect the power window switches, and unhook the interior door latch cable.
- Moisture Barrier Peeling: We gently peel back the factory vapor barrier, ensuring the butyl adhesive remains intact so it can be resealed later to prevent water leaks.
- Deep Vacuuming: We deploy industrial-strength HEPA vacuums. We vacuum the seats, the floorboards, and critically, we vacuum completely inside the bottom of the door cavity. Leaving broken glass inside the door will result in infuriating rattling noises every time you drive or close the door. Furthermore, glass trapped in the window regulator can cause the main door glass to bind and fail.
Phase 3: Division Bar Removal and Frame Cleaning
To successfully extract the broken vent glass frame and install the new one, we must manipulate the door's internal structure.
- Removing the Division Bar: The division bar is the metal track that separates the main roll-down window from the stationary vent glass. We unbolt this track from the top and bottom of the door frame and carefully slide it out of the way.
- Extracting the Old Frame: Using cold knives and specialized wire-cutting tools, we slice through the original factory urethane holding the broken encapsulated vent glass frame to the pinch weld.
- Surface Cleaning: Once the old frame is out, we use a sharp scraper to trim the existing bead of urethane down to a flat 1-2 millimeter base. We then clean the bare metal and remaining adhesive with an alcohol-based, industry-grade glass cleaner to remove all dirt, grease, and debris.
Phase 4: Precision Primer Application
The secret to a vent glass replacement that outlasts the life of the vehicle lies in the chemical preparation of the bonding surface.
- Pinch Weld Inspection: We meticulously inspect the metal pinch weld for any scratches created during the removal process.
- Applying Urethane Primer: We apply a high-grade automotive glass primer to any exposed bare metal on the door frame. This is a crucial step; the primer acts as a chemical rust inhibitor, preventing oxidation that could eventually eat through the door frame.
- Glass Preparation: The new, OEM-quality Ford Explorer vent glass is thoroughly cleaned, and a glass-specific primer is applied to the encapsulation bonding area to promote maximum adhesion. We allow strict flash-off times for the primer to dry chemically.
Phase 5: High-Quality Adhesive Application and Glass Installation
With the surfaces prepped, we move to the critical bonding phase.
- Applying High-Quality Adhesive: We use an electric caulking gun to lay down a thick, perfectly uniform bead of advanced, fast-curing polyurethane adhesive directly onto the prepared pinch weld. This high-quality adhesive is engineered to withstand extreme temperature fluctuations and structural stress.
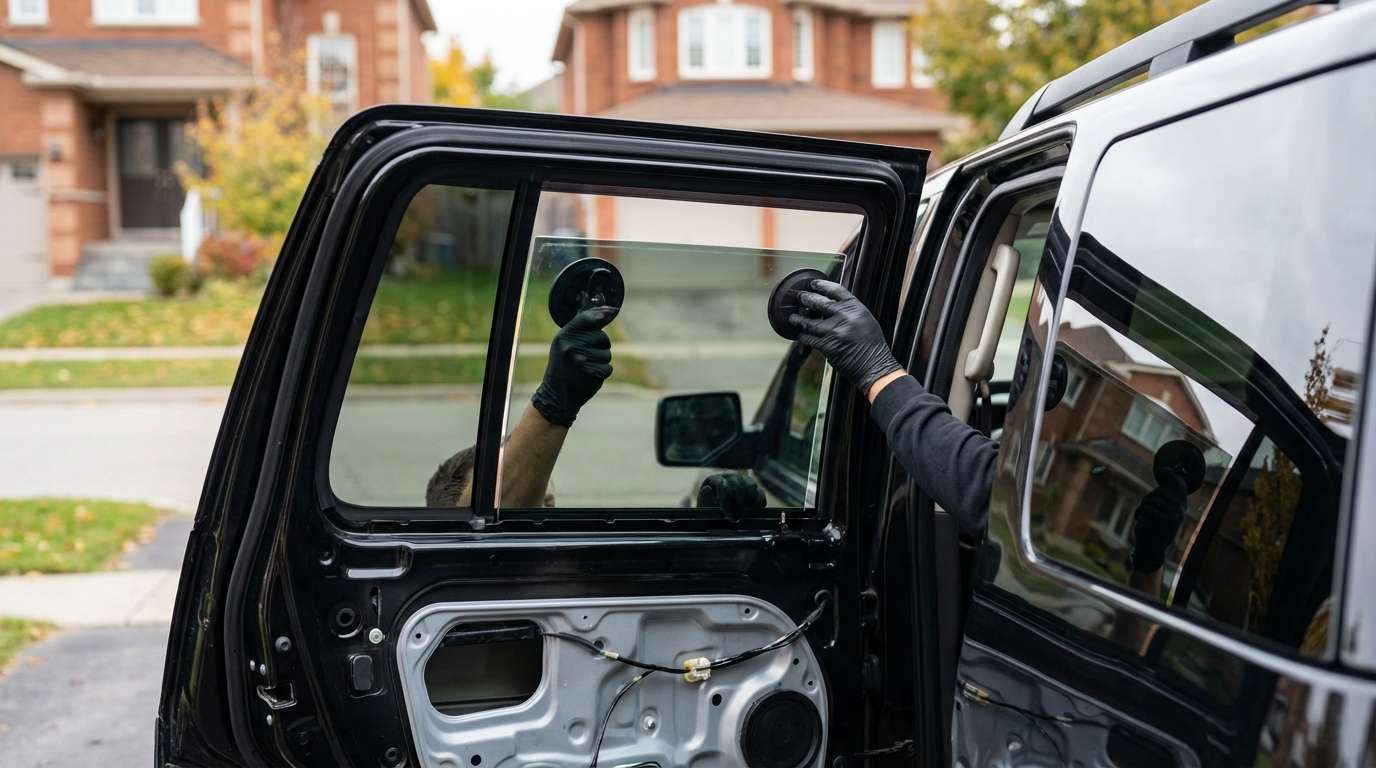
- Setting the Glass: Using heavy-duty suction cups, the new vent glass is precisely maneuvered into the door frame. We firmly press the encapsulated edges into the urethane bead, ensuring a watertight, airtight seal with zero gaps.
- Securing Fasteners: If the encapsulated glass includes mounting tabs, we securely bolt them back into the vehicle's structural frame.
Phase 6: Reassembly and Rigorous Quality Assurance
The installation is only complete once the door is fully restored to its factory condition.
- Reinstalling the Division Bar: We slide the division bar back into place, ensuring the main roll-down glass is properly seated in its rubber run channel, and torque the bolts to factory specifications.
- System Testing: Before replacing the door panel, we reconnect the window switch and test the main window's up-and-down movement. We ensure there is no binding, grinding, or wind noise.
- Final Assembly: The vapor barrier is resealed perfectly. The door panel is re-clipped, all screws are hidden behind their trim caps, and the interior is given one final wipe-down and vacuum. We clean the newly installed vent glass to a streak-free shine.
Unmatched Mobile Auto Glass Service Across the Greater Toronto Area (GTA)
Driving a 2006-2010 Ford Explorer with a shattered vent glass is a miserable experience. The howling wind, the freezing winters, and the rainy springs of Southern Ontario can quickly ruin your vehicle's interior. You shouldn't have to drive an insecure vehicle to a repair shop. That is why AlexWindshield offers premium, fully equipped mobile auto glass replacement services directly to your driveway or workplace.
Our mobile fleet extensively covers the entire Greater Toronto Area (GTA). Whether you are parked at a shopping plaza in Vaughan, safely at home in a residential neighborhood in Richmond Hill, or working at an office complex in Markham, our Master Technicians will come to you. We bring the HEPA vacuums, the high-quality adhesive, the OEM-standard glass, and all the specialized tools required to perform a flawless repair on-site. We understand that residents in Vaughan, Richmond Hill, and Markham value their time and vehicle security, which is why we offer rapid dispatch times and reliable, on-the-spot service without any compromise on quality.
The AlexWindshield Guarantee: Your Trusted Auto Glass Experts
When it comes to restoring the integrity of your 2006-2010 Ford Explorer, you need a technician who respects the complex engineering of your vehicle. At AlexWindshield, we don't cut corners. From the meticulous extraction of thousands of broken glass shards from your door panel to the precise application of rust-preventative primer and premium urethane adhesive, our process is built on automotive excellence.
As the leading trusted experts in the GTA for mobile auto glass solutions, we stand confidently behind our craftsmanship. Every single vent glass replacement performed by AlexWindshield comes with an industry-leading Lifetime Warranty. This warranty guarantees that your newly installed vent glass will be free from water leaks, whistling wind noises, and manufacturer defects for as long as you own your Ford Explorer. Don't let a shattered window compromise your peace of mind or your vehicle's interior. Contact AlexWindshield today to schedule your mobile replacement in Vaughan, Richmond Hill, Markham, or anywhere across the Greater Toronto Area, and experience the benchmark of auto glass perfection.


