Restoring Your Family Fortress: Expert Vent Glass Replacement for the 2007-2017 Ford Expedition
The 2007-2017 Ford Expedition is a rugged, full-size SUV masterfully engineered to haul families, heavy gear, and countless memories across highways and backroads alike. However, when your Expedition’s vent glass—that crucial, smaller window located on the rear doors or rear quarter sections—suffers a catastrophic break, the quiet, climate-controlled sanctuary of your cabin is instantly compromised. Not only does a shattered vent glass leave your SUV's interior entirely vulnerable to the harsh, unpredictable Ontario elements, but it also creates a glaring security risk, making your highly valued vehicle a prime target for opportunistic theft.
At AlexWindshield, we understand that a broken window is more than just an inconvenience; it is a disruption to your daily life. Because vent glass is typically made of tempered glass, a sudden impact from road debris, extreme weather, or an attempted break-in will cause it to explode into thousands of tiny, granular shards. Replacing this specific piece of auto glass requires meticulous attention to detail, a deep understanding of Ford's interior assemblies, and uncompromising technical precision. As a Master Technician, I am here to walk you through our comprehensive, A-to-Z process for Ford Expedition vent glass replacement.
Understanding the Vent Glass on 2007-2017 Ford Expeditions
Depending on the specific trim package of your 2007-2017 Ford Expedition (such as the XLT, Limited, King Ranch, or Platinum), the vent glass may feature deep privacy tinting, encapsulated rubber moldings, or integrated defrosting elements. Unlike standard roll-up door windows, vent glasses on the Expedition are often permanently bonded to the vehicle's frame using heavy-duty automotive urethane, or securely bolted within complex interior door tracks.
Because of this sophisticated integration, replacing the vent glass is never a simple "pop out and pop in" job. It requires specialized auto glass tools, advanced chemical adhesives, and the careful dismantling of your vehicle’s interior trim to ensure a factory-tight seal. Furthermore, ignoring a broken vent glass can lead to extensive water damage, electrical shorts within the door panels, and severe rust development along the vehicle's metal pinchweld.
Our Master Technician Process: Step-by-Step Vent Glass Replacement
When you trust AlexWindshield with your auto glass repair, you are receiving the highest standard of technical care. Here is the exact, step-by-step methodology we employ to ensure your Ford Expedition is restored to its original, pristine condition.
Step 1: Thorough Vehicle Assessment and Interior Protection
Before any tools are utilized, our Master Technician performs a comprehensive pre-installation inspection. We verify the exact specifications of your new OEM-quality replacement vent glass to ensure perfect alignment, correct tint matching, and proper molding fitment for the 2007-2017 Expedition body style.
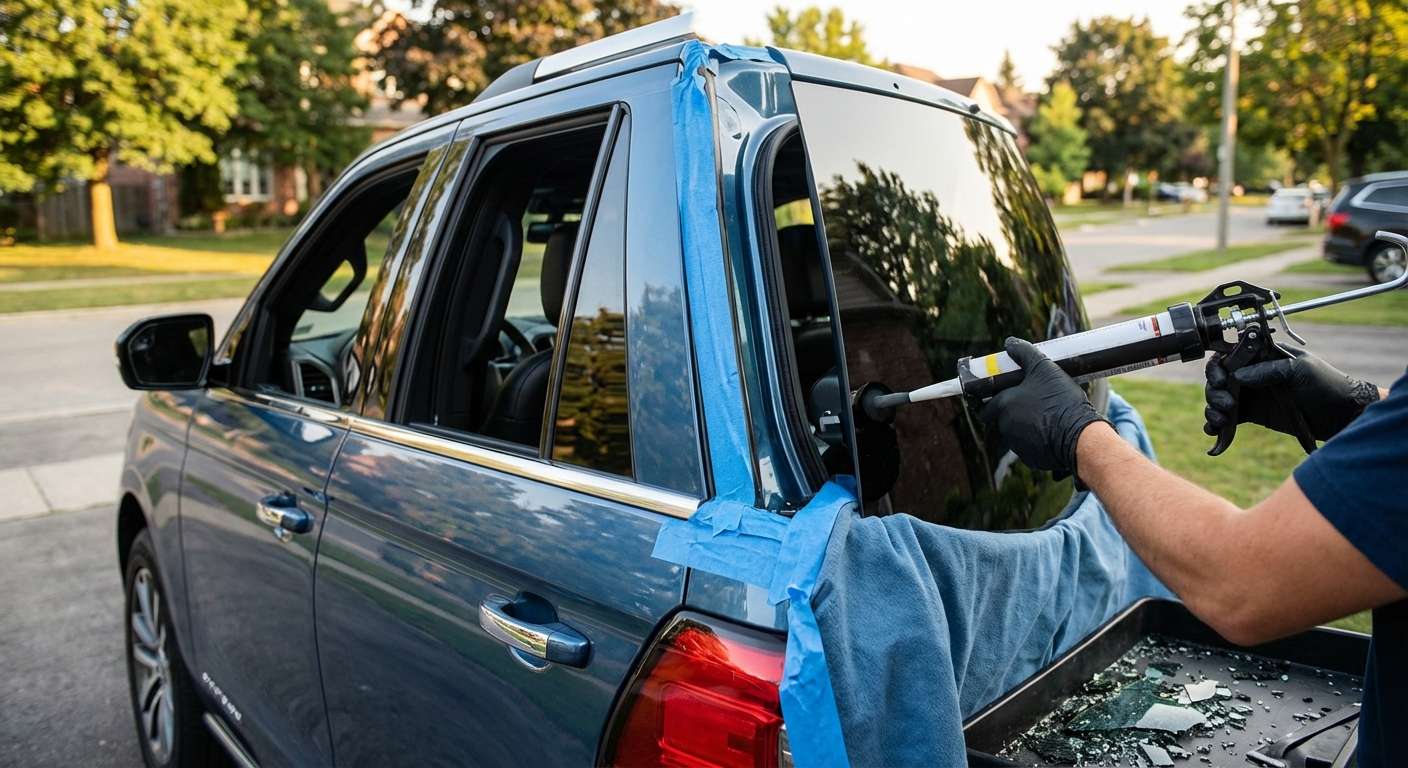
- Protective Covering: We drape heavy-duty protective blankets over your leather or cloth seats, center console, and exterior paint to guard against any accidental scratches or debris.
- Safety First: The technician dons cut-resistant Kevlar gloves and safety glasses to handle the razor-sharp hazards of shattered tempered glass safely.
Step 2: Door Panel Removal and Exhaustive Glass Cleanup
When a vent glass shatters, the fragments do not just fall onto the seats; they plummet directly into the deep cavities of the door frame or quarter panel. If left inside, these shards will cause maddening rattling noises every time you drive or close the door, and they can severely jam your power window regulators.
To prevent this, our technicians execute a meticulous teardown and cleanup phase:
- Precision Dismantling: Using specialized, non-marring nylon pry tools, we carefully detach the interior door panels, switch modules, and plastic trim surrounding the broken vent glass. We take extreme care not to break the fragile Ford retaining clips.
- Deep Vacuuming: We utilize high-powered, industrial HEPA vacuums equipped with flexible micro-crevice attachments to suck out every single broken glass shard from the interior cabin, the floor mats, and the deepest recesses of the metal door cavity. We guarantee a completely glass-free interior environment.
- Weather Shield Removal: The internal vapor barrier is gently peeled back to allow full access to the vent glass mounting points.
Step 3: Removing the Damaged Vent Glass Frame and Old Urethane
If the vent glass is a bonded component, the remnants of the broken glass and its encapsulating rubber molding must be surgically removed from the vehicle's steel frame (the pinchweld).
- Cutting the Bead: We employ specialized cold knives, automated extricator tools, or braided wire cutting systems to slice through the original, hardened urethane adhesive bead that holds the vent glass frame in place.
- Extracting the Frame: The remnants of the old glass and molding are carefully pulled away from the vehicle body, ensuring no stress is placed on the surrounding paint job.
Step 4: Critical Surface Preparation and Primer Application
The secret to a leak-proof, structurally sound auto glass replacement lies entirely in the preparation of the metal bonding surface. This is where amateur installations fail, but where AlexWindshield excels.
- Trimming the Urethane: Using razor-sharp pinchweld scrapers, the old adhesive is pared down to a thin, uniform baseline of approximately 1-2 millimeters. This provides the perfect base for the new chemical bond.
- Deep Cleaning: The entire channel is scrubbed using lint-free wipes and an alcohol-based, automotive-grade glass cleaner to remove dirt, grease, and microscopic road contaminants.
- Applying the Primer: We apply a high-quality, scientifically formulated black glass primer to both the new vent glass bonding surface and any exposed bare metal on the vehicle's frame. Primer application is absolutely mandatory—it promotes maximum urethane adhesion and acts as a powerful barrier against future rust and corrosion.
Step 5: Precision Installation with High-Quality Adhesive
With the surface properly prepped, primed, and flash-cured, we move on to the actual installation of your new Ford Expedition vent glass.
- Urethane Extrusion: Using a specialized, heavy-duty caulking gun, the technician extrudes a continuous, perfectly uniform "V-shaped" or triangular bead of premium, fast-curing automotive urethane around the entire perimeter of the bonding channel.
- Setting the Glass: The new vent glass is carefully guided into place. We apply firm, even pressure around the edges to compress the urethane bead, ensuring a perfectly watertight and airtight seal.
- Securing the Alignment: Retention tape is applied to hold the glass in perfect alignment while the heavy-duty adhesive begins its chemical cross-linking and curing process.
Step 6: Reassembly and Final Quality Inspection
As the urethane sets, we reverse the teardown process with absolute precision.
- Rebuilding the Door: The internal vapor barrier is resealed, and the interior door panels, window sweeps, and electrical switch trims are securely snapped and bolted back into their factory positions.
- Functionality Testing: We test the adjacent power windows and door locks to ensure no wires were pinched and that all mechanisms operate smoothly without any obstruction.
- Final Polish: The newly installed vent glass, along with the surrounding exterior panels, is cleaned to a streak-free, showroom shine. We conduct a final visual inspection to guarantee the highest standard of workmanship.
Premium Mobile Auto Glass Services Across the Greater Toronto Area (GTA)
Dealing with a shattered vehicle window is stressful enough without having to worry about driving an unsecure, drafty SUV across town to a repair shop. That is exactly why AlexWindshield brings the auto glass shop directly to your doorstep. We are proud to offer unparalleled, fully equipped mobile auto glass services across the entire Greater Toronto Area (GTA).
Whether you are parked at a busy corporate office in Markham, relaxing at your suburban home in Richmond Hill, or overseeing a job site in the bustling industrial sectors of Vaughan, our Master Technicians will navigate the 400-series highways to reach you. We dispatch fully stocked, climate-controlled service vans outfitted with all the premium tools, vacuums, and adhesives required to complete a flawless Ford Expedition auto glass replacement directly in your driveway, garage, or workplace parking lot.
Why Choose AlexWindshield for Your Ford Expedition?
Your Ford Expedition is a major investment, and when it comes to the safety and security of your vehicle, you should never settle for second best. By choosing AlexWindshield, you are partnering with the industry elite. Our technicians are extensively trained and certified in the latest auto glass replacement methodologies. We refuse to cut corners; we use only premium, OEM-equivalent glass, industry-leading Sika or Dow urethane adhesives, and rigorous safety protocols.
Most importantly, we stand behind our craftsmanship with unwavering confidence. Every single vent glass installation we perform comes backed by our comprehensive Lifetime Warranty. This industry-leading guarantee covers any highly unlikely issues such as air leaks, water leaks, or manufacturer defects in the glass itself, giving you absolute peace of mind for as long as you own your Ford Expedition.
Book Your GTA Auto Glass Replacement Today
Do not let a broken vent glass compromise the safety, security, and comfort of your 2007-2017 Ford Expedition. Trust the Master Technicians at AlexWindshield to deliver swift, professional, and immaculate service directly to your location anywhere in Vaughan, Richmond Hill, Markham, or the wider GTA. We will clean up the mess, perfectly install your new glass, and get you back on the road safely.
Contact AlexWindshield today to schedule your mobile auto glass replacement appointment, and experience the highest tier of automotive care in the Greater Toronto Area!


