The 2006-2013 Chevrolet Impala: Restoring the Structural Integrity of a Highway Legend
The ninth-generation Chevrolet Impala (model years 2006-2013) stands as a proud testament to the enduring legacy of the General Motors W-body platform. Known for its cavernous interior cabin, robust V6 engine options, and unmistakable highway cruising comfort, this vehicle has been a trusted daily driver for countless families and commuters across the country. However, that expansive, sweeping windshield does much more than simply provide a clear view of the road ahead. In the 2006-2013 Impala, the windshield is a critical structural component, engineered to support the roof during a rollover incident and ensure that the passenger-side airbag deploys correctly against the glass in the event of a front-end collision. When your front glass is compromised by a rogue stone or extreme temperature shifts, it is not merely a cosmetic annoyance—it is a severe safety hazard.
As a Master Technician and Senior SEO Auto Glass Specialist at AlexWindshield, I have dedicated my career to mastering the precise replacement protocols for this specific American classic. Whether you are dealing with a massive spiderweb crack stemming from a harsh winter freeze or a bullseye chip that has aggressively spread beyond the point of repair, our team provides unparalleled precision to restore your vehicle back to its factory-level safety standards.
Premium Mobile Auto Glass Services Across the Greater Toronto Area (GTA)
You do not have to disrupt your busy schedule, take time off work, or wait in a dingy waiting room to secure a safe, professional auto glass replacement. AlexWindshield brings the premier glass shop directly to your driveway, workplace, or fleet lot. We proudly offer comprehensive mobile windshield replacement services throughout the Greater Toronto Area (GTA). Our fully equipped, state-of-the-art mobile service vans are frequently dispatched to service clients in Vaughan, Richmond Hill, and Markham. We ensure that whether you are parked at a bustling corporate plaza in Markham or at your suburban home in Vaughan, you receive pristine, dealership-level service without the dealership hassle.
The Master Technician's Step-by-Step Windshield Replacement Process
Replacing the windshield on a 2006-2013 Chevrolet Impala requires a highly meticulous, multi-step approach. The original factory urethane on these W-body vehicles is notoriously tough, and the specific cowl architecture requires careful handling to prevent damage to the aging surrounding plastics. Here is the exact, A-to-Z technical process we strictly execute at AlexWindshield to guarantee a flawless installation:
Step 1: Comprehensive Vehicle Preparation and Interior Protection
Before a single blade or tool touches your car, we strictly prioritize the protection of your Impala's interior. We drape heavy-duty, clean protective covers over both front seats, the steering wheel, and the floor mats. A specialized, rigid dashboard protector is expertly slid into the tight gap between the dash and the glass to shield the curved dashboard from any falling debris, old adhesive, or sharp wire movements. The exterior fenders and the hood are also thoroughly draped with non-scratch automotive drop cloths. Protecting your vehicle's condition is the primary hallmark of a true Master Technician.
Step 2: Removal of Wiper Arms, Cowl, and Exterior Trim
Using a specialized 15mm socket and a mechanical wiper arm puller, we carefully detach the windshield wiper arms from their splined shafts. Next, we meticulously remove the rubber weather-stripping and the lower plastic cowl panel that houses the vehicle's windshield washer nozzles. On the 2006-2013 Impala, these plastic retention clips can become highly brittle due to years of UV exposure and heat cycling. We utilize specialized, non-marring nylon trim removal tools to carefully extract them without snapping the plastic. Finally, we strip away the rubber perimeter molding that surrounds the top and sides of the glass.
Step 3: Precision Removal of the Damaged Windshield
To safely separate the old, shattered glass from the vehicle's steel frame, we utilize an advanced fiber-line cutting system or a high-leverage cold knife. We meticulously guide a specialized braided cutting wire through the old polyurethane adhesive bead from the inside out. This modern technique allows us to cleanly slice through the extremely dense factory adhesive without ever scratching the critical metal pinchweld of your Impala. Scratching the paint here would lead to hidden rust later on. Once the adhesive bond is broken entirely around the entire perimeter, we use heavy-duty vacuum suction cups to safely lift the heavy, compromised glass away from the vehicle and dispose of it properly.
Step 4: Pinchweld Surface Cleaning and Preparation
A brand-new windshield will only bond correctly to a perfectly prepared surface. We use razor scrapers and specialized cutting chisels to gently pare down the old urethane bead, leaving a highly uniform, flat base layer of exactly 1 to 2 millimeters. This "trim-down" process is crucial for the new chemical adhesive to bind correctly to the old bed. Following this, we use high-powered HEPA vacuums to eliminate any microscopic dust, dirt, leaves, or stray glass shards from the dashboard gap and the surrounding pinchweld track.
Step 5: Chemical Cleaning and Primer Application
The bare pinchweld track is rigorously cleaned with an ammonia-free, automotive-grade foaming glass cleaner. Any microscopic areas where the bare metal may have been accidentally exposed over the life of the vehicle are immediately treated with a specialized, rust-inhibiting black primer. Furthermore, we apply a specific chemical glass primer to the black frit band (the painted outer edge) of the brand-new OE-equivalent windshield. This critical primer step ensures a permanent molecular bond between the glass and the urethane while heavily protecting the adhesive from ultraviolet (UV) degradation over the vehicle's lifespan.
Step 6: High-Quality Urethane Adhesive Application
At AlexWindshield, we use exclusively premium, fast-curing automotive polyurethane adhesive. Using an electric, battery-operated caulking gun for absolute consistency, we apply a precise, continuous "V-bead" of urethane directly onto the prepared pinchweld. The V-shape is a strict industry-standard requirement. Its peaked shape allows the adhesive to collapse perfectly into a dense, watertight, and bubble-free seal when the heavy glass is applied. There is absolutely no room for error or hesitation here; the bead must be uniform in height and perfectly connected at the lower seams to prevent any future water ingress or wind whistling.
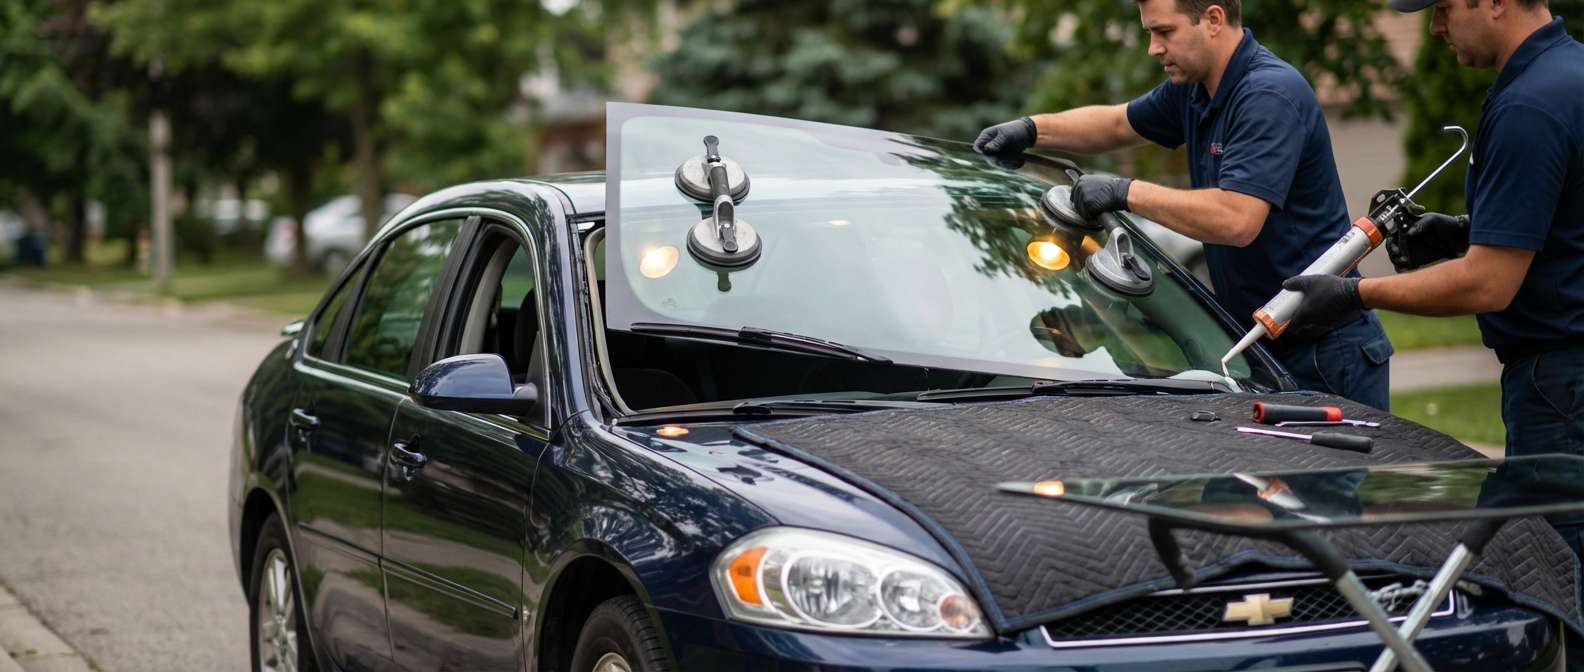
Step 7: Installation and Setting of the New Windshield
Using ergonomic suction lifters, two highly trained technicians (or a single technician utilizing an advanced mechanical setting arm) carefully hoist the new windshield into place over the hood. The glass is gently lowered down onto the uncured urethane V-bead. We check the precise alignment against the roofline and the A-pillars of your Chevrolet Impala, ensuring factory-perfect gaps on all sides. We then apply light, even pressure around the perimeter to "deck" the glass, ensuring the V-bead collapses evenly to form a permanent structural bond. Finally, the cowl, washer lines, wiper arms, and trim pieces are meticulously reinstalled to their exact original factory positions, and the glass is cleaned to a streak-free shine.
Mandatory ADAS Camera Calibration Process
As automotive technology has rapidly evolved, the windshield has transformed from a simple piece of safety glass into a highly complex technological hub. While the base models of the older 2006-2013 Chevrolet Impala featured traditional glass, many modern windshield replacements today—including fully equipped late-model vehicles, or vehicles with retrofitted forward-facing safety equipment—strictly mandate a highly technical process known as ADAS Camera Calibration. If your specific vehicle or auto glass network utilizes Advanced Driver Assistance Systems (ADAS) such as lane departure warnings, forward collision alerts, or automated rain sensors attached to the windshield glass, re-calibration is not an optional upsell—it is a mandatory, critical safety requirement.
When a new windshield is installed, the exact angle, pitch, and optical clarity of the glass differ by microscopic fractions of a millimeter compared to the original factory glass. If the camera mounted behind your rearview mirror is thrown off by even one single degree, your vehicle's onboard computer may miscalculate a lane boundary by several feet at highway speeds, potentially causing an automated steering system to pull you into adjacent traffic. At AlexWindshield, we strictly enforce a mandatory ADAS Camera Calibration protocol to guarantee your onboard safety systems function flawlessly post-replacement.
- System Diagnostics: We plug an advanced OBD-II diagnostic scanner directly into your vehicle's computer port to read and clear any active fault codes related to the forward-facing cameras and sensors.
- Optical Target Alignment: Depending strictly on the vehicle manufacturer's OEM specifications, we set up highly specialized optical laser targets at precise mathematical distances and heights in front of the vehicle's bumper.
- Dynamic or Static Calibration: We initiate the complex software calibration sequence. For static calibration, the windshield camera communicates with our optical targets to re-orient its dead-center point. For dynamic calibration, we take the vehicle on a mandated test drive at specific speeds so the camera system can actively re-learn the road lines and traffic markers.
- Final Safety Verification: Once the onboard computer successfully confirms the recalibration, we generate a final printed digital report certifying that your collision warning, emergency braking, and lane assist systems are perfectly restored to factory safety standards.
Safe Drive-Away Time (SDAT) and Post-Installation Care
After the new windshield is set in your Chevrolet Impala, absolute patience is key. The advanced automotive urethane adhesive we use requires a specific amount of time to physically cross-link and chemically cure. This critical waiting period is known in the industry as the Safe Drive-Away Time (SDAT). We typically require the vehicle to remain completely stationary on a level surface for a minimum of 30 to 60 minutes, heavily depending on the ambient temperature and humidity levels present in the Greater Toronto Area. During this curing window, the adhesive hardens sufficiently to guarantee that the windshield will successfully meet or exceed all Federal Motor Vehicle Safety Standards (FMVSS) in the event of a sudden collision or rollover.
To ensure the longevity and perfection of the installation, we advise all our clients to follow a few simple but crucial rules for the first 48 hours post-installation:
- Leave Retention Tape Intact: Leave any green or blue retention tape in place for at least 24 hours to prevent the heavy glass from micro-shifting downward while the urethane fully cures.
- Avoid High-Pressure Car Washes: Do not use automated or high-pressure power washers, as the extreme water force can compromise the outer edges of the curing urethane seal.
- Manage Cabin Pressure: Leave a window slightly cracked open (about one inch) when shutting the doors. This prevents sudden spikes in cabin air pressure from pushing outward against the newly sealed glass before it is fully hardened.
- Drive Cautiously: Avoid aggressively slamming the doors, slamming the trunk, or driving over severe potholes and speed bumps at high speeds.
Trust AlexWindshield: Your GTA Auto Glass Experts with a Lifetime Warranty
Replacing the windshield on your beloved 2006-2013 Chevrolet Impala is a highly technical, structural task that heavily demands the exact expertise of a master tradesman. Do not entrust your vehicle's vital structural integrity—and ultimately your family's on-road safety—to cut-rate, unverified providers using sub-par, non-compliant materials. At AlexWindshield, we pride ourselves on utilizing only premium OEM-equivalent glass, industry-leading rapid-cure urethane, and rigorous, uncompromising safety protocols.
We stand fiercely behind the uncompromising quality of our master craftsmanship. That is exactly why every single windshield replacement performed by AlexWindshield comes backed by an ironclad, transferrable Lifetime Warranty protecting you fully against leaks, wind noise, and manufacturer glass defects. As the highest-rated and most trusted mobile auto glass experts actively serving the Greater Toronto Area (GTA)—including the vibrant, bustling communities of Vaughan, Richmond Hill, and Markham—we are deeply committed to getting you back on the road safely, securely, and with crystal-clear vision. Contact AlexWindshield today to schedule your master-level auto glass replacement directly at your doorstep.


