The Engineering Behind the 2006-2013 Chevrolet Impala Back Glass
The 9th generation Chevrolet Impala, manufactured between 2006 and 2013, features a distinctively sweeping rear roofline that seamlessly merges into a wide, gracefully curved back glass. Built on the iconic GM W-body platform, this specific auto glass design does more than just define the vehicle's classic, aerodynamic silhouette; it provides crucial structural integrity to the rear cabin and houses an expansive, high-efficiency rear defroster grid. Unlike front windshields that are made of laminated glass, the Chevrolet Impala back window is constructed from tempered glass. When compromised by impact or extreme temperature fluctuations, tempered glass is designed to shatter into thousands of blunt, pebble-like shards to prevent catastrophic lacerations. While this is a vital safety feature, it demands a highly precise, painstaking clean-up and replacement procedure when an incident occurs.
Why Trust AlexWindshield for Your Auto Glass Needs?
As a Master Technician at AlexWindshield, I have replaced countless rear windows on the 2006-2013 Chevy Impala. We understand that a shattered back glass exposes your vehicle's interior to the elements, theft, and immediate weather damage. That is why we provide rapid, premium mobile auto glass services directly to your driveway or workplace. Operating extensively across the Greater Toronto Area (GTA), our specialized mobile units frequently service clients in Vaughan, Richmond Hill, and Markham. We bring the auto glass shop to you, ensuring that your vehicle is restored to factory safety standards without the hassle of towing a compromised car across the city.
Comprehensive A to Z Back Glass Replacement Process
Replacing the back glass on a 2006-2013 Chevrolet Impala is an intricate procedure that requires specialized tools, chemical treatments, and an unwavering attention to detail. Below is our master technician's rigorous, step-by-step process to ensure a flawless and safe installation.
Step 1: Vehicle Inspection and Interior Protection
Before any heavy work begins, we conduct a comprehensive pre-inspection of the vehicle. We assess the damage, check the condition of the rear pinch weld, and test the vehicle's battery to ensure the new defroster can be properly calibrated later. Because a shattered rear window leaves the cabin vulnerable, our first physical step is rigorous interior protection. We drape heavy-duty protective moving blankets over the Impala’s rear seats, the rear parcel shelf, and the exterior trunk lid. We also apply low-tack automotive tape around the exterior painted surfaces surrounding the rear window cavity to prevent any accidental scratches during the extraction phase.
Step 2: Extensive Glass Clean-Up and Vacuuming
Because the Chevrolet Impala rear window is made of tempered glass, an impact will cause it to explode into thousands of tiny glass shards. These fragments inevitably find their way into the seat crevices, child seat anchors, floor mats, and deep into the trunk cavity. Thorough glass removal is absolutely mandatory. Using industrial-grade shop vacuums equipped with specialized micro-crevice nozzles, we meticulously vacuum the entire interior. We fold down the Impala’s rear seats to access the trunk pass-through, vacuuming the rear parcel deck, inside the speaker grilles, and deep within the trunk's weatherstripping channels. Leaving even a single shard behind can cause annoying rattles, pose a safety hazard to passengers, or interfere with the seating of the new glass.
Step 3: Disconnecting the Defroster and Removing Trims
The 2006-2013 Impala utilizes a highly effective rear defogger system that is critical for navigating brutal Canadian winters in the GTA. To safely remove the remnants of the old glass, we must first safely disconnect the electrical components. We carefully remove the interior C-pillar plastic trim panels using specialized nylon pry tools, ensuring none of the fragile plastic retaining clips are broken. Once the wiring harnesses are exposed, we disconnect the heavy-gauge defroster tabs. From the exterior, we remove the rubber encapsulation or any retaining moldings that line the perimeter of the glass.
Step 4: Precision Extraction of the Old Glass
With the trims removed and the area prepped, it is time to cut out the remaining glass and the factory polyurethane adhesive. For the Impala, we typically employ an advanced wire-cutting system or a specialized oscillating cold knife. We thread a high-tensile braided wire through the old urethane bead from the inside out, anchoring it to a ratcheting system. This allows us to smoothly slice through the tough adhesive all the way around the perimeter without ever applying metal blades directly to the vehicle's painted pinch weld. This step requires extreme patience and precision to maintain the structural integrity of the vehicle body.
Step 5: Pinch Weld Preparation and Cleaning
Once the old glass frame is lifted away, we are left with a thick, uneven layer of old urethane on the pinch weld. Utilizing a sharpened, wide-blade scraper, we perform a "full cut," trimming the existing polyurethane down to a uniform base layer of approximately 1 to 2 millimeters. New urethane bonds exceptionally well to freshly cut old urethane, but the surface must be immaculately clean. We brush away all remaining debris and clean the entire perimeter with an alcohol-based, lint-free automotive surface cleaner to eliminate any dirt, moisture, or chemical residues.
Step 6: Primer Application for Rust Prevention and Adhesion
This is one of the most critical steps for the long-term health of your vehicle. If the scraper inadvertently exposed any bare metal on the pinch weld during the trimming process, we immediately treat it with a high-performance black glass primer. This specialized primer acts as a chemical barrier, preventing oxygen and moisture from causing rust beneath the glass—a crucial preventative measure given the heavy use of road salt in places like Markham, Richmond Hill, and Vaughan. We also apply a glass prep and primer to the black frit band of the new OEM-equivalent Chevrolet Impala back glass. This ensures a cross-linking chemical reaction that guarantees maximum adhesion.
Step 7: Applying High-Quality Urethane Adhesive
At AlexWindshield, we never compromise on our bonding agents. We utilize only premium, fast-curing, high-modulus polyurethane adhesive. Using an electric caulking gun fitted with a specialized V-notch nozzle, we extrude a continuous, high-profile bead of urethane directly onto the prepared pinch weld. The V-notch shape is specifically engineered to collapse perfectly when the glass is seated, eliminating any air pockets or gaps that could lead to wind noise or devastating water leaks into your Impala's trunk or cabin.
Step 8: Installation of the New Back Glass
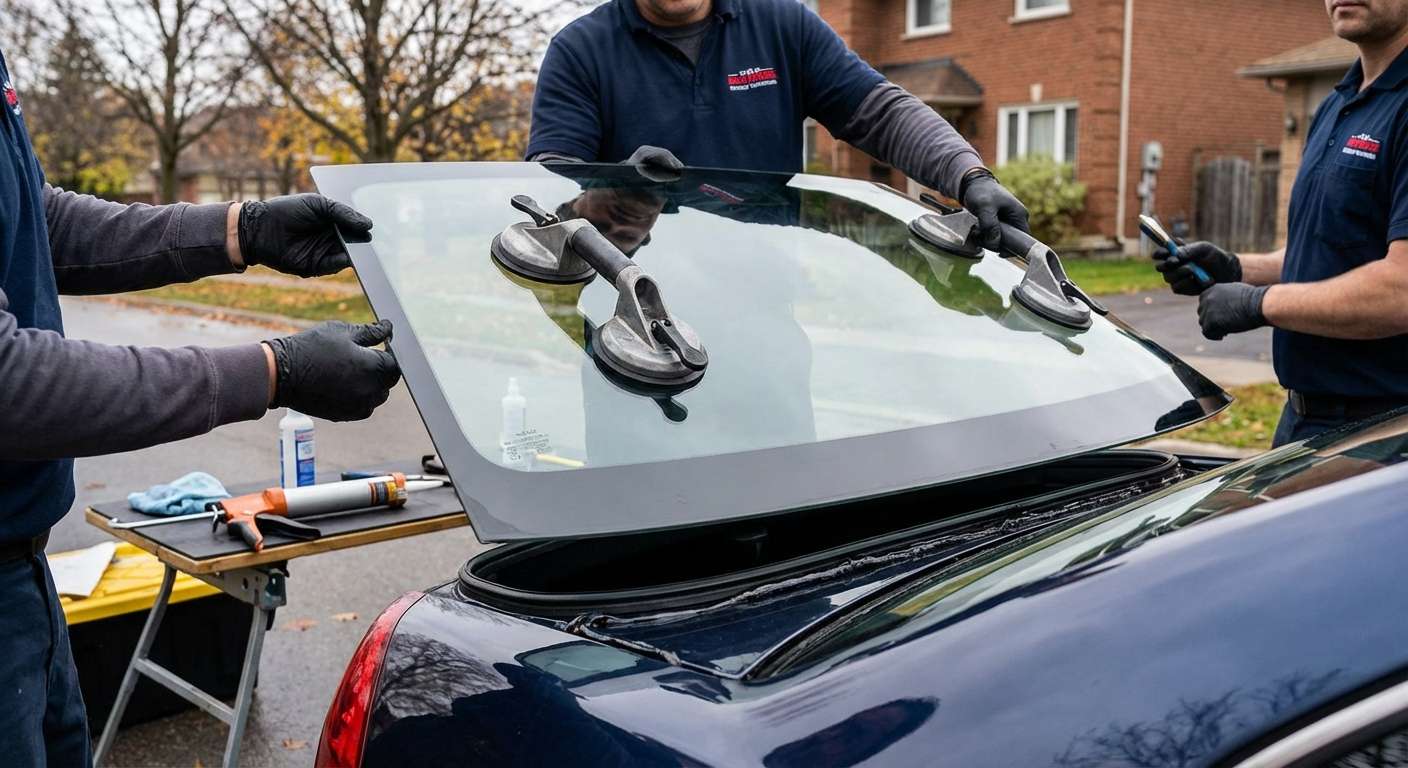
Handling the large, curved back glass of the 2006-2013 Impala requires exact synchronization. Using heavy-duty suction cup lifters, our master technicians carefully hoist the new tempered glass into position. We align the glass with precision factory reference points, ensuring the gaps along the roofline, quarter panels, and trunk lid are perfectly symmetrical. Once aligned, we gently press the glass into the urethane bead, allowing the adhesive to collapse and form a permanent, watertight, and structurally sound seal.
Step 9: Reconnecting the Defroster and Final Reassembly
With the new glass firmly seated in the urethane, we immediately move to reestablish the vehicle's electrical systems. We reconnect the defroster wiring harnesses to the copper tabs on the new glass, testing the continuity to guarantee that your rear defogger will work flawlessly during frosty GTA mornings. We then carefully snap the interior C-pillar trims back into place, re-engage the rear seat latches, and install any exterior weatherstripping or moldings to restore the Impala’s sleek aesthetic.
Step 10: Final Inspection and Safe Drive-Away Time
Our job is not finished once the glass is in place. We perform a final, rigorous cleaning of the new back window using streak-free, ammonia-free glass cleaner. We conduct one last pass with the vacuum to ensure absolutely zero glass shards remain in the vehicle. Finally, we inform the client about the Safe Drive-Away Time (SDAT). Because we use advanced fast-curing urethane, your Chevrolet Impala will typically be safe to drive within 45 to 60 minutes after installation, depending on current humidity and temperature conditions.
Local Auto Glass Excellence Across the GTA
Navigating the busy highways of the Greater Toronto Area requires a vehicle that is in peak condition. Whether you are commuting down the DVP, navigating the industrial sectors of Vaughan, enjoying the suburban roads of Richmond Hill, or running errands in Markham, a shattered back window is an emergency that disrupts your day. Our mobile fleet at AlexWindshield is strategically dispatched throughout the GTA to ensure we can reach you swiftly. We understand the local climate, the driving conditions, and the urgent need for a secure, weather-tight vehicle.
Choose AlexWindshield for Your Chevrolet Impala
- OEM-Equivalent Glass: We source only premium tempered glass that perfectly matches the curvature, tint, and defroster specifications of the 2006-2013 Chevrolet Impala.
- Master Technicians: Our team undergoes rigorous continuous training to stay updated on the latest chemical bonding processes and vehicle extraction techniques.
- Impeccable Cleanup: We treat your vehicle as if it were our own, guaranteeing that all hazardous broken glass shards are permanently removed from your interior and trunk.
- Convenient Mobile Service: You do not need to take time out of your busy schedule; we bring our state-of-the-art auto glass shop directly to your location anywhere in the GTA.
Book Your Mobile Auto Glass Replacement Today
Do not let a broken back window compromise the safety, security, and comfort of your Chevrolet Impala. Trust the proven auto glass experts who combine technical mastery with unparalleled customer service. AlexWindshield is proud to be the premier provider of mobile auto glass replacement across the Greater Toronto Area, proudly serving Vaughan, Richmond Hill, Markham, and beyond. We stand behind our precision workmanship and premium materials by offering an industry-leading Lifetime Warranty against any leaks, whistling, or manufacturer defects. Contact AlexWindshield today to schedule your mobile repair, and let our Master Technicians get you safely back on the road with crystal-clear confidence.


