Preserving the Integrity of an American Classic: 2006-2013 Chevrolet Impala Auto Glass Care
The 9th generation 2006-2013 Chevrolet Impala is a quintessential staple of North American roads, celebrated for its spacious interior, robust reliable powertrain, and undeniable endurance as both a family cruiser and a favored fleet vehicle. However, despite its rugged build, its auto glass remains vulnerable to the unpredictability of daily driving. The rear vent glass—that small, stationary piece of glass located on the rear doors—is particularly susceptible to break-ins, vandalism, and rogue road debris. When this specific glass shatters, it compromises your vehicle's security, climate control, and interior cabin acoustics. At AlexWindshield, we specialize in precise, manufacturer-grade auto glass restoration, bringing elite technical expertise directly to your driveway.
Why the Chevrolet Impala Vent Glass Requires Expert Attention
Unlike standard roll-up windows, the vent glass on a Chevrolet Impala is an encapsulated or bonded structural component of the rear door assembly. A shattered vent glass doesn't just leave a hole in your vehicle; it drops thousands of sharp, tempered glass shards deep into the inner mechanisms of your car door and across your back seats. Because of its unique position next to the main window's division bar, a vent glass replacement is an intricate procedure that demands a Master Technician's touch. Attempting a subpar repair can lead to severe wind noise, water leaks, and rusting within the door frame.
AlexWindshield's Master Technician Step-by-Step Replacement Process
As a senior auto glass technician, I ensure every vent glass replacement adheres to strict safety and quality protocols. Here is our comprehensive, A-to-Z process for replacing the vent glass on your 2006-2013 Chevy Impala:
Step 1: Vehicle Preparation and Interior Protection
Before any tools are lifted, we secure the work environment. We apply heavy-duty protective drop cloths over the Impala's rear fabric or leather seats and the exterior door paint. We tape off the surrounding window frames to ensure that our tools and the high-quality adhesive do not come into contact with your vehicle's pristine finish. Protecting the interior from rogue glass shards and chemical residue is our absolute first priority.
Step 2: Door Panel Removal and Component Access
Because the vent glass is seated deep within the door architecture, accessing the mounting points requires meticulous disassembly. We carefully remove the interior door handles, switch panels, and trim pieces using specialized non-marring pry tools. We extract the hidden retaining bolts and gently unclip the interior door panel. Once the panel is removed, we carefully peel back the factory vapor barrier, exposing the inner door cavity and the window regulator mechanisms.
Step 3: Comprehensive Interior Vacuuming and Glass Shard Removal
When a vent glass breaks, tempered glass explodes into hundreds of tiny, pebble-like pieces. We use heavy-duty industrial vacuums with specialized, flexible crevice attachments to extract every single shard of glass. We meticulously vacuum all broken glass shards from the vehicle's interior, the seat crevices, the floor mats, and most importantly, the bottom of the internal door cavity. Leaving even a few pieces of glass inside the door will cause a maddening rattling sound every time you drive or close the door. Furthermore, trapped glass can jam the window regulator, causing the main roll-up window to fail. At AlexWindshield, we guarantee a completely glass-free cabin and door shell.
Step 4: Removing the Division Bar and Old Glass Frame
With the door cavity clean, we proceed to detach the division bar—the vertical metal post separating the main window from the vent glass. We lower the main door glass, unbolt the division bar from its top and bottom mounts, and carefully shift it aside. We then extract the remaining broken vent glass frame and cut away the old urethane or degraded rubber weatherstripping using specialized cold knives and auto glass extractors. This step requires immense precision to avoid scratching the exposed pinch weld of the door frame.
Step 5: Surface Cleaning and Primer Application
A new piece of glass will only bond as well as the surface beneath it. We thoroughly clean the mounting frame with an alcohol-based, industry-grade surface prep solution to remove dirt, grease, and old adhesive residue. Once the metal is bare and clean, we perform our primer application. We apply a specialized, fast-flashing black auto glass primer to the metal pinch weld and the ceramic band (frit) of the new glass. This primer is non-negotiable; it prevents future rust formation inside your door and acts as the crucial chemical bridge between the metal, the new adhesive, and the replacement glass.
Step 6: High-Quality Adhesive Application and Glass Installation
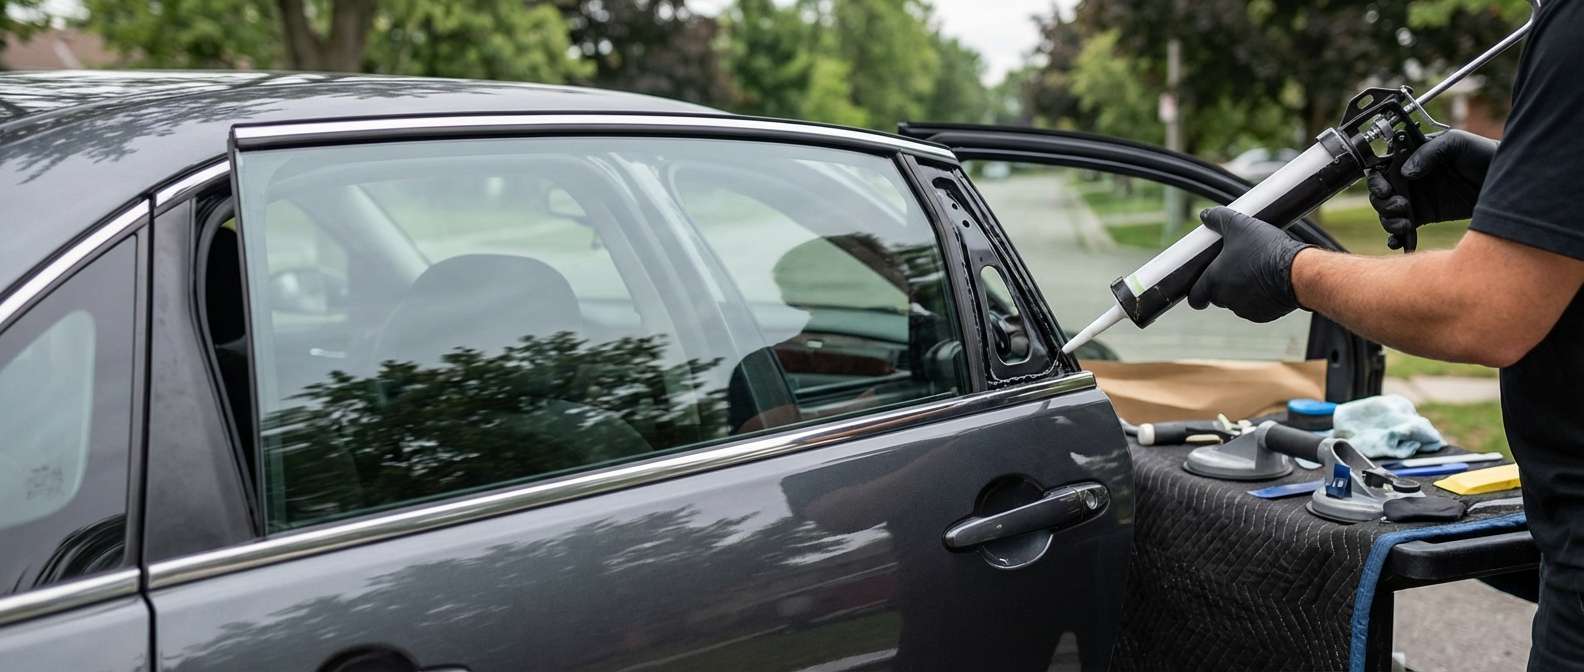
Once the primer has cured, we prepare the new OEM-quality vent glass for the 2006-2013 Chevrolet Impala. We extrude a thick, uniform bead of premium, high-quality adhesive (advanced structural polyurethane) along the mounting channel. We then carefully guide the new vent glass into position, pressing it firmly into the adhesive bead to create an instant, watertight seal. We reinstall and bolt down the division bar, ensuring the new vent glass is locked securely into its factory-correct alignment.
Step 7: Reassembly and Final Quality Assurance
With the new glass firmly set, we begin the reassembly phase. We reattach the vapor barrier, ensuring a tight seal to prevent moisture from entering the cabin. We meticulously clip the door panel back into place, reconnecting all electronic window switches and door lock harnesses. We then test the functionality of the main roll-up window to ensure it glides smoothly past the newly installed vent glass and division bar. Finally, we clean the newly installed glass with an ammonia-free cleaner, leaving it sparkling and ready for the road.
Unmatched Mobile Auto Glass Service Across the Greater Toronto Area (GTA)
Dealing with a shattered car window is stressful enough without having to take time out of your busy schedule to sit in a repair shop waiting room. That is why AlexWindshield brings the auto glass shop directly to you. We are proud to offer unparalleled mobile auto glass services across the Greater Toronto Area (GTA). Whether you are at home, at your workplace, or stranded in a parking lot, our fully equipped mobile service vans arrive ready to perform master-level repairs.
- Vaughan: From the bustling commercial sectors near Vaughan Mills to the quiet residential streets of Woodbridge and Maple, our mobile technicians navigate Vaughan quickly to secure your Impala.
- Richmond Hill: Whether you are parked near the David Dunlap Observatory or running errands along Yonge Street, we provide rapid, on-site vent glass replacements anywhere in Richmond Hill, saving you valuable time.
- Markham: Serving the thriving tech hubs and historic neighborhoods of Markham, including Unionville and Cornell. We ensure your Chevrolet Impala is secure and protected against the harsh Ontario weather without you ever having to leave your office.
Why AlexWindshield is the GTA's Top Choice for Auto Glass
Replacing the vent glass on a 2006-2013 Chevrolet Impala is a highly technical job that goes far beyond simply swapping out a pane of glass. It requires a deep understanding of automotive door anatomy, chemical adhesive properties, and meticulous cleanup procedures. By choosing AlexWindshield, you are choosing peace of mind, backed by years of elite industry experience.
- Master Technicians: Every technician is rigorously trained in advanced auto glass replacement techniques, ensuring your vehicle is handled with absolute precision and care.
- OEM-Quality Materials: We use only industry-leading glass, fast-curing primers, and high-quality polyurethane adhesives to guarantee a factory-level seal that will not leak or whistle.
- Comprehensive Cleanup: We don't just fix your window; we restore your interior by rigorously vacuuming every trace of broken glass from your seats, floors, and inner door panels.
- Convenient Mobile Service: We cover the entire Greater Toronto Area (GTA), with special rapid response times for clients in Vaughan, Richmond Hill, and Markham.
Contact AlexWindshield Today for a Lifetime Warranty Guarantee
Do not leave your 2006-2013 Chevrolet Impala exposed to the elements, potential theft, or interior water damage due to a broken vent glass. Trust the premier experts in mobile auto glass repair. At AlexWindshield, we stand proudly behind the quality of our craftsmanship. Every single replacement we perform comes backed by our comprehensive Lifetime Warranty, covering any highly unlikely issues with water leaks, wind noise, or manufacturer glass defects for as long as you own your vehicle. Experience the ultimate in automotive glass repair convenience and technical mastery. Contact AlexWindshield today to schedule your mobile vent glass replacement and let our master technicians get you back on the road safely, swiftly, and securely.


