The 2005-2011 Cadillac STS: Restoring the Acoustic Perfection of GM’s Luxury Flagship
The 2005-2011 Cadillac STS was General Motors' pinnacle of North American luxury, built on the refined Sigma platform that prioritized an incredibly quiet cabin, structural rigidity, and sleek aesthetics. When the vent glass on this iconic luxury sedan is shattered or compromised, it does not just ruin the vehicle's sophisticated profile; it completely shatters the meticulous acoustic seal that Cadillac engineers spent thousands of hours perfecting. Replacing the vent glass on an STS requires far more than a generic glass swap—it demands the precise touch of a Master Technician who understands the intricate molding, advanced sound-deadening materials, and strict structural tolerances of the 2005-2011 STS models.
Why Expert Vent Glass Replacement Matters for Your Cadillac STS
Unlike standard sedans, the Cadillac STS utilizes highly specialized glass configurations designed to block out wind noise and insulate the passenger cabin. The vent glass, though small in dimensions, plays a massive role in the overall integrity of the door assembly. Because this glass acts as an anchor point for the window run channel and is fully bonded to the vehicle frame, improper installation can lead to severe wind howling at highway speeds, catastrophic water leaks, and accelerated rust formation on the door's internal pinch weld.
At AlexWindshield, we specialize in high-end auto glass restoration. We ensure that every vent glass replacement for the 2005-2011 Cadillac STS meets or exceeds strict Original Equipment Manufacturer (OEM) specifications, restoring your luxury sedan to its original factory glory.
Premium Mobile Auto Glass Services Across the Greater Toronto Area (GTA)
Dealing with a broken vent glass is stressful, especially when your vehicle's interior is exposed to the elements and potential theft. That is why AlexWindshield brings the repair shop directly to your location. We provide fully equipped, top-tier mobile auto glass services right across the Greater Toronto Area (GTA).
Whether you are parked in your driveway in Vaughan, stationed at your corporate office building in Richmond Hill, or out running errands in Markham, our fleet of mobile master technicians is ready to be dispatched. You do not have to drive your Cadillac with a taped-up window; we bring our specialized tools, premium glass, and high-quality adhesives directly to you in Vaughan, Richmond Hill, and Markham, ensuring maximum convenience without sacrificing technical excellence.
Technical Process: Step-by-Step Cadillac STS Vent Glass Replacement
Because the vent glass on the Cadillac STS is integrated into the rear door structural frame, the replacement is a highly technical procedure. As a Master Technician, I follow a strict A-to-Z protocol that guarantees a permanent, flawless seal. Here is exactly how we execute the Cadillac STS vent glass replacement process.
Step 1: Complete Preparation and Protecting the Interior
Luxury vehicles require luxury care. Before any tools are utilized, we focus heavily on protecting the interior. The Cadillac STS features premium leather seating and wood trim that must be shielded from sharp debris and chemical adhesives. We drape heavy-duty protective blankets over the rear seats, floorboards, and center console. Additionally, we apply specialized automotive masking tape around the exterior painted surfaces surrounding the door frame to prevent any accidental scratches during the delicate removal phase.
Step 2: Removal of Door Panels and Internal Disassembly
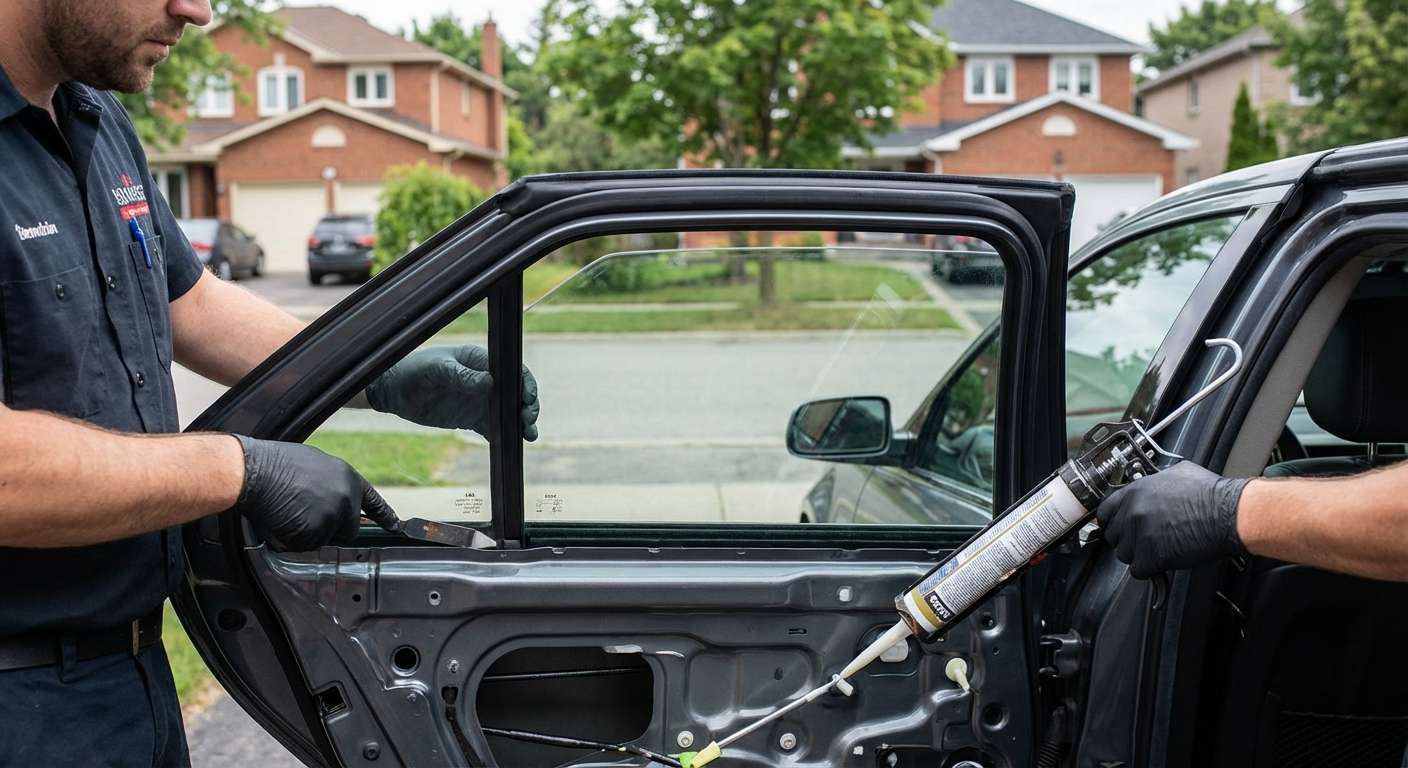
Because the vent glass is a foundational component of the door assembly, we cannot simply push the new glass in from the outside. We begin by executing the removal of door panels. Using specialized, non-marring trim tools, we carefully detach the interior door handles, switch panels, and hidden Torx screws without damaging the aging 2005-2011 plastic retainers. Once the interior door trim is removed, we carefully peel back the factory moisture barrier (vapor deflector) to access the internal skeleton of the door. The division bar—the metal track separating the roll-up window from the vent glass—is then unbolted and shifted aside to create the necessary clearance.
Step 3: Rigorous Vacuuming of Broken Glass Shards
When a vent glass shatters, thousands of tiny, tempered glass fragments fall deep into the door cavity, window regulator tracks, and interior cabin. Skipping this step leads to infuriating rattling noises every time you drive or close the door. We utilize a high-powered, industrial-grade shop vacuum to meticulously remove all broken glass shards from the vehicle's interior. We vacuum the seats, carpets, and the deepest crevices of the internal door frame, ensuring that the water drainage holes at the bottom of the door are completely clear of glass debris.
Step 4: Precision Removal of the Old Glass and Adhesive
With the cabin and door cavity pristine, we focus on the damaged vent glass frame. Using a specialized cold knife and precision extractor wire, we carefully cut through the original factory polyurethane bead holding the remnants of the old vent glass in place. The encapsulated molding and any remaining broken glass edges are safely extracted. We then meticulously trim down the old urethane adhesive layer on the door's pinch weld to a thin, level base of about 1-2 millimeters. This technique is critical, as the new adhesive requires a clean, flat surface to establish a molecular bond.
Step 5: Surface Cleaning and Primer Application
Auto glass is structural, and the bonding chemistry must be perfect. We begin by thoroughly surface cleaning the exposed pinch weld and the edges of the new replacement vent glass using an industrial-grade, alcohol-based glass cleaner. Once perfectly sanitized and free of any residual oils or dirt, we move to the primer application. We apply a high-grade black glass primer to the frit band of the new vent glass, and a specialized pinch-weld primer to any exposed bare metal on the Cadillac's door frame. This dual-primer system prevents future rust corrosion and acts as an aggressive bonding agent for the urethane.
Step 6: Installation of the New Glass Using High-Quality Adhesive
Once the primer has flashed and dried to OEM specifications, it is time for the critical structural bond. Using an electric caulking gun, we apply a consistent, triangular V-bead of fast-curing, high-quality adhesive (automotive-grade polyurethane) directly onto the primed pinch weld. The new Cadillac STS vent glass is then carefully guided into the door frame, aligning perfectly with the vehicle's exact aerodynamic contours. Gentle, even pressure is applied to compress the urethane bead, ensuring a watertight and acoustically perfect seal. We secure the glass temporarily with specialized retention tape to prevent any micro-shifting while the urethane begins its initial cross-linking cure.
Step 7: Final Reassembly and Quality Assurance Inspection
With the new vent glass securely bonded, we reverse the teardown process. The vertical division bar is bolted back into its exact factory position, and the roll-up window is tested to ensure it glides smoothly without binding. We re-seal the moisture barrier and carefully snap the luxury interior door panel back into place, securing all screws and verifying that all electronic window switches operate flawlessly. Finally, the newly installed glass is cleaned with premium, streak-free polish, and the vehicle undergoes a final visual and tactile inspection to ensure absolute perfection.
Why Choose AlexWindshield for Your Cadillac STS Auto Glass Needs?
When dealing with a luxury vehicle like the 2005-2011 Cadillac STS, you cannot afford to trust your safety and vehicle integrity to amateurs. Here is why drivers across the GTA rely exclusively on AlexWindshield:
- Master Technicians: Our team is rigorously trained in advanced automotive glass replacement, ensuring your luxury vehicle is handled with elite precision.
- High-Quality Materials: We use only premium-grade replacement glass, OEM-approved primers, and top-tier urethane adhesives to guarantee a flawless, factory-level structural bond.
- Unmatched Convenience: Our mobile service brings the shop to your doorstep anywhere in Vaughan, Richmond Hill, Markham, and the wider Greater Toronto Area (GTA).
- Immaculate Cleanup: We don't just replace the glass; we ensure every single microscopic shard of broken glass is vacuumed from your vehicle's interior and door cavities.
- Lifetime Warranty: We stand proudly behind our craftsmanship. Every vent glass installation comes with our comprehensive Lifetime Warranty against leaks, wind noise, and manufacturer defects.
Contact AlexWindshield Today
Do not let a shattered vent glass compromise the security, luxury, and quiet ride of your 2005-2011 Cadillac STS. Trust the local experts who understand the engineering behind your vehicle. Contact AlexWindshield today to schedule your mobile vent glass replacement in Vaughan, Richmond Hill, Markham, or anywhere in the GTA. Experience top-tier service, absolute precision, and the peace of mind that comes with a Lifetime Warranty. Your Cadillac deserves nothing less than the best.


