Restoring Signature Luxury: Back Glass Replacement for the Cadillac SRX 2010-2016
The Cadillac SRX 2010-2016 redefined the luxury midsize crossover segment with its unmistakable "Art and Science" design language. The aggressively raked, sculpted power liftgate is a defining feature of its bold exterior styling, seamlessly blending aerodynamics with high-end aesthetics. However, when the back glass sustains catastrophic damage—whether from a sudden impact on a busy highway, a harsh Canadian winter freeze-thaw cycle, or an unfortunate break-in—it compromises not just the visual appeal of your luxury vehicle, but its structural integrity and interior security. Unlike standard laminated windshields that crack or chip, the tempered rear glass of the SRX is designed to shatter into thousands of small, blunt pieces upon impact. This requires an immediate, highly specialized response.
At AlexWindshield, we do not believe in generic, one-size-fits-all auto glass repairs. Replacing the rear window on this specific second-generation SRX demands a master technician's profound understanding of complex liftgate electronics, integrated defroster grids, rear wiper motor assemblies, and meticulous vehicle preservation. We bring dealership-level expertise directly to your driveway, ensuring that your Cadillac is restored to its original factory condition.
Premier Mobile Auto Glass Service Across the Greater Toronto Area (GTA)
Driving a Cadillac with a shattered rear window exposes your premium interior to the unpredictable Ontario elements and leaves your vehicle highly vulnerable to theft. We know that your time is incredibly valuable, which is why AlexWindshield provides industry-leading mobile auto glass replacement services directly to your home, office, or emergency location.
Our fleet of fully equipped, state-of-the-art service vehicles operates extensively throughout the Greater Toronto Area (GTA). We are proud to offer rapid, priority dispatch to vehicle owners in key northern municipalities, including:
- Vaughan: Whether you are near Vaughan Mills or commuting down the 400, our technicians arrive promptly with the exact OEM-quality glass required for your SRX.
- Richmond Hill: From the bustling Yonge Street corridor to quiet residential neighborhoods, we secure your vehicle and restore your back glass without disrupting your day.
- Markham: Navigating through Markham's tech hubs or historic Unionville is safer and easier with our on-the-spot, mobile replacement services, guaranteeing you never have to drive a compromised vehicle.
Master Technician's Guide: The A-to-Z Replacement Process for the Cadillac SRX Back Glass
Replacing the back glass on a luxury crossover like the Cadillac SRX 2010-2016 is a highly technical procedure. Because the rear glass is tempered, a completely different set of protocols must be followed compared to a standard windshield replacement. As a Master Technician at AlexWindshield, I oversee a strict, uncompromising step-by-step process to ensure flawless execution, absolute safety, and a perfect, leak-proof seal.
Step 1: Thorough Pre-Inspection and Extensive Interior Protection
Before any tools are utilized, we conduct a comprehensive pre-inspection of the vehicle's liftgate, assessing the paint condition, the power tailgate struts, and the rear wiper assembly. Because shattered tempered glass spreads everywhere, protecting the luxurious interior of your SRX is our immediate priority. We meticulously drape heavy-duty protective blankets over the premium leather rear seats, the cargo area, and the exterior rear bumper to prevent any accidental scratches during the extraction and installation process.
Step 2: Interior Liftgate Panel Removal and Hardware Disconnection
The structural design of the 2010-2016 SRX means the back glass is intimately connected to several internal electronic components. Using specialized, non-marring trim removal tools, we carefully unclip and remove the interior plastic trim panels surrounding the interior of the liftgate. Once the internal skeleton of the liftgate is exposed, we carefully disconnect the electrical wiring harnesses for the rear defroster grid and the integrated radio antenna. Next, we unbolt and safely remove the exterior rear wiper arm and the internal rear wiper motor assembly, storing them securely for reinstallation.
Step 3: Meticulous Glass Shard Vacuuming and Extraction
When back glass or door glass breaks, the cleanup is arguably the most critical step for a luxury vehicle owner. Thousands of tiny tempered glass shards inevitably fall directly down into the hollow cavity of the liftgate shell. If left unattended, these shards will create an aggravating, constant rattling noise every time you close the trunk or drive over a bump in the Greater Toronto Area (GTA). At AlexWindshield, we utilize high-powered, industrial shop vacuums with specialized micro-crevice attachments to aggressively extract every single piece of broken glass from the cargo floor, the interior cabin, and deep within the intricate metal folds of the liftgate mechanism.
Step 4: Precision Removal of the Old Urethane Bead
With the remaining shattered glass cleared away, we must remove the original factory adhesive. Using a specialized cold knife and highly controlled automated cutting tools, we carefully slice through the existing bead of polyurethane that held the old glass in place. We trim the old urethane down to a precise, uniform 1-2 millimeter base layer. This existing layer acts as the ideal bonding substrate for the new adhesive, ensuring a chemical cross-link that mimics the original factory installation.
Step 5: Rigorous Surface Cleaning and Primer Application
The bare metal pinch weld (the frame where the glass sits) must be flawlessly prepped. We clean the entire perimeter using specialized, alcohol-based auto glass surface cleaners to remove dirt, grease, and microscopic debris. If any minor scratches occurred to the vehicle's paint during the old adhesive removal, we immediately apply a specialized anti-rust primer to the bare metal. This crucial step prevents future oxidation and rust from silently destroying your liftgate frame. We then apply a premium glass primer to the black ceramic band (the frit) on the inside perimeter of the new, OEM-quality back glass to promote maximum adhesion.
Step 6: Application of High-Quality Polyurethane Adhesive
The integrity of your new rear window relies entirely on the quality of the adhesive. We exclusively use advanced, high-quality polyurethane adhesive designed for rapid curing and maximum tensile strength. Using an electric caulking gun, we extrude a perfectly consistent "V-bead" of urethane directly onto the prepared pinch weld. The precise height and triangular shape of this bead are critical; they ensure that when the glass is compressed, the adhesive spreads evenly without gaps, creating an impenetrable, watertight, and windproof seal.
Step 7: Precision Installation of the New Glass and Reassembly
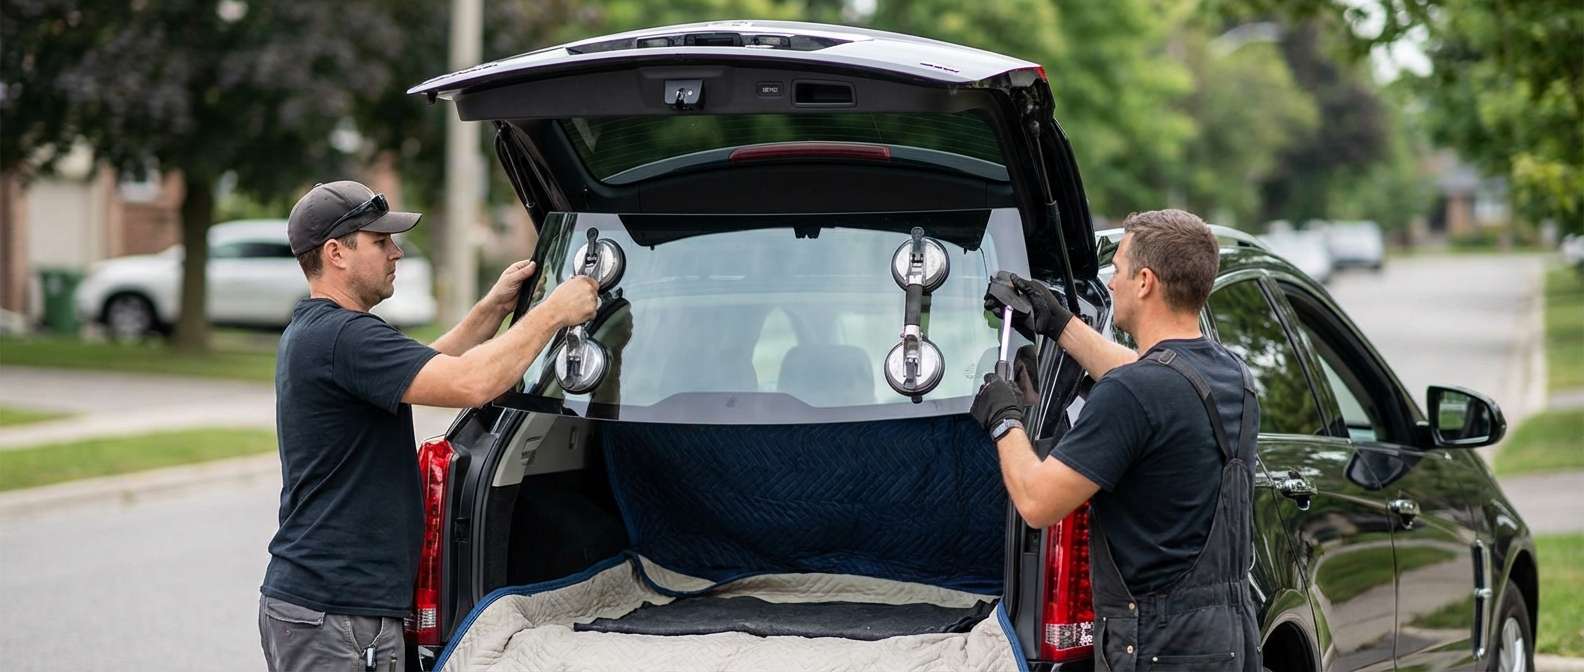
Handling the heavily contoured back glass of the Cadillac SRX requires a steady hand and precise geometry. Using heavy-duty suction cups, two master technicians carefully align the new glass, gently setting it into the fresh bed of urethane. We apply light, even pressure to ensure a perfect seating depth flush with the vehicle's body lines.
Once the glass is locked into place, the reassembly process begins:
- Electrical Reconnection: We reattach the wiring harnesses to the new rear defroster tabs and the antenna connectors, testing them instantly to ensure perfect electrical continuity.
- Hardware Reinstallation: The rear wiper motor is bolted back into the liftgate frame, and the exterior wiper arm is recalibrated and securely fastened.
- Interior Trim Replacement: The interior liftgate plastic panels are carefully snapped back into their original factory positions, ensuring no broken clips or loose fittings.
Step 8: Final Inspection and Curing Verification
The final step involves a thorough exterior cleaning of the newly installed glass using streak-free, ammonia-free glass cleaner. We verify the Safe Drive Away Time (SDAT) of our fast-curing urethane, ensuring that the vehicle is completely safe to operate, capable of withstanding structural loads and adverse weather conditions immediately upon our departure.
Trust AlexWindshield: Unmatched Expertise and a Lifetime Warranty
Your luxury vehicle deserves uncompromising care. When you require a back glass replacement for your Cadillac SRX 2010-2016, trusting a certified master technician is the only way to guarantee the safety, functionality, and aesthetic perfection of your crossover. Improperly installed rear glass can lead to disastrous water leaks, electrical shorts in your defroster, and structural whistling at highway speeds.
At AlexWindshield, we pride ourselves on being the absolute foremost experts in mobile auto glass services throughout the Greater Toronto Area (GTA), highly active in Vaughan, Richmond Hill, and Markham. We stand firmly behind our meticulous craftsmanship, premium materials, and exhaustive shard-removal protocols. That is why every single back glass replacement we perform is backed by our comprehensive Lifetime Warranty against leaks, wind noises, and manufacturer defects.
Do not let a shattered rear window disrupt your life or diminish the value of your Cadillac. Experience the seamless convergence of luxury auto care, master-level technical precision, and ultimate mobile convenience. Contact AlexWindshield today to schedule your expert Cadillac SRX rear glass replacement and get back on the road with absolute clarity and confidence.


