The Elegance of the 1998-2004 Cadillac Seville and the Importance of Pristine Back Glass
The fifth-generation Cadillac Seville (1998-2004) was a masterpiece of American automotive engineering, introducing the world to the refined Northstar V8 engine system, magnetic ride control, and a sleeker, more aerodynamic profile that redefined modern luxury. This generation of the Seville was built for those who appreciate quiet, smooth, and sophisticated driving. However, maintaining that luxurious acoustic cabin heavily relies on the structural integrity of your vehicle's auto glass. The rear window of the Seville does more than just provide visibility; it houses vital components like the integrated defroster grid and contributes significantly to the vehicle's structural rigidity. When disaster strikes and your back glass is shattered, you need a replacement service that respects the engineering of this classic luxury sedan.
At AlexWindshield, we understand that classic luxury requires meticulous care. Replacing the back window on a 1998-2004 Cadillac Seville is not a standard plug-and-play job. It requires precision, specialized tools, and a deep understanding of the vehicle's rear architecture. As a Master Technician, I have developed a rigorous, factory-standard protocol to ensure your Seville is restored to its original glory.
Dedicated Local Auto Glass Service Across the Greater Toronto Area (GTA)
Driving a classic luxury vehicle in the bustling Greater Toronto Area (GTA) means navigating unpredictable weather, road debris, and heavy traffic. Whether a stray rock on the highway or a harsh winter storm has compromised your rear window, AlexWindshield is your premier local solution. We bring our fully equipped, state-of-the-art mobile service directly to your driveway or workplace.
Our mobile auto glass replacement fleet proudly serves the entire GTA, with specialized dispatch routes ensuring rapid response times in Vaughan, Richmond Hill, and Markham. You do not need to risk driving your Seville with a shattered back window or a gaping hole in your cabin. We bring the repair shop to you, providing seamless, weather-proof, and factory-grade installations wherever your vehicle is parked.
Recognizing the Need for Immediate Back Glass Replacement
Unlike a windshield, which is made of laminated glass designed to crack but hold together, the back glass of the 1998-2004 Cadillac Seville is constructed from tempered safety glass. When damaged, tempered glass is designed to shatter completely into thousands of small, blunt pebble-like pieces to prevent severe lacerations. You will immediately know you need a replacement if you experience:
- Complete Shattering: A loud pop followed by the rear window dissolving into thousands of tiny glass shards.
- Compromised Defroster Grid: Deep scratches or gouges that sever the copper lines of your rear defroster, rendering it useless during brutal Canadian winters.
- Leaking Seals: Water intrusion around the rear parcel shelf or trunk area, indicating the original urethane seal has degraded over the last two decades.
- Severe Vandalism or Collision Damage: Any impact that blows out the rear glass entirely.
The Master Technician's Process: Step-by-Step Cadillac Seville Back Glass Replacement
Replacing the back glass on a 1998-2004 Cadillac Seville is a highly technical procedure. Because the glass shatters completely, the cleanup process is just as critical as the installation of the new glass. Here is the comprehensive, A-to-Z protocol we follow at AlexWindshield to ensure a flawless repair.
Step 1: Pre-Installation Inspection and Interior Protection
Before any tools are lifted, we perform a thorough inspection of the vehicle. We assess the damage and check the surrounding body panels, C-pillars, and trunk lid for any paint damage caused by the impact. Next, we meticulously protect the luxurious interior of your Seville. We lay down heavy-duty protective drop cloths over the leather rear seats, the rear center console, and the exterior trunk lid to prevent any scratches from tools or glass shards. If the glass has shattered, we carefully remove the rear C-pillar trim panels and the rear parcel shelf covers to expose all hidden crevices.
Step 2: Comprehensive Broken Glass Cleanup
When tempered back glass shatters, it infiltrates every conceivable gap in the rear of the vehicle. Leaving even a single shard behind can cause annoying rattles or potential damage to interior components down the road. Armed with industrial-grade, high-suction shop vacuums, we extract all broken glass shards from the vehicle's interior. We vacuum the rear seats, the floorboards, the speaker grilles on the parcel shelf, and deep inside the trunk cavity. We also check the trunk hinges and the track channels where glass loves to hide. Only when the vehicle is 100% free of broken glass do we proceed to the extraction of the old frame.
Step 3: Removing the Damaged Back Glass Frame and Seals
Even though the center of the glass may be shattered, the outer rim of the glass remains firmly bonded to the vehicle's pinch weld by the original factory urethane. To remove this, we use a specialized cold knife or an advanced wire-cutting tool to slice through the dense urethane adhesive. We take extreme care not to scratch the vehicle's pinch weld (the metal frame where the glass sits), as scratching the paint here can lead to hidden rust formation. We also disconnect the wiring harness tabs for the rear window defroster and, if applicable, the integrated glass antenna system.
Step 4: Pinch Weld Preparation and Surface Cleaning
A new windshield or back glass is only as strong as the surface it bonds to. Once the old frame is out, we use a precision scraper to pare down the old urethane bead, leaving a thin, even 1-2mm layer of the original adhesive. This "close-cut" method provides the ultimate bonding base for the new urethane. We then clean the entire pinch weld and the surrounding metal using specialized, alcohol-based auto glass cleaning agents. This removes all dirt, grease, moisture, and fine glass dust, ensuring a chemically pure surface.
Step 5: Primer Application for Rust Prevention and Adhesion
Any areas of the pinch weld where the metal was exposed—whether from previous rust or minor tooling scuffs—are treated with a high-grade anti-corrosion primer. We also apply a specialized glass primer to the black ceramic frit band (the black painted border) of the new back glass. This dual-primer system acts as a bonding promoter and a UV-blocking agent, preventing the sun's rays from degrading the new urethane adhesive over time.
Step 6: Precision Installation Using High-Quality Adhesive
For a luxury vehicle like the Cadillac Seville, we strictly utilize premium OEM-quality auto glass that matches the exact dimensions, acoustic thickness, and defroster specifications of the factory original. We load a high-grade, fast-curing urethane adhesive into an electric caulking gun and apply a perfectly uniform, triangular bead along the entire perimeter of the pinch weld. The triangular shape ensures that when the glass is set, the urethane compresses evenly, creating an impenetrable, watertight, and airtight seal.
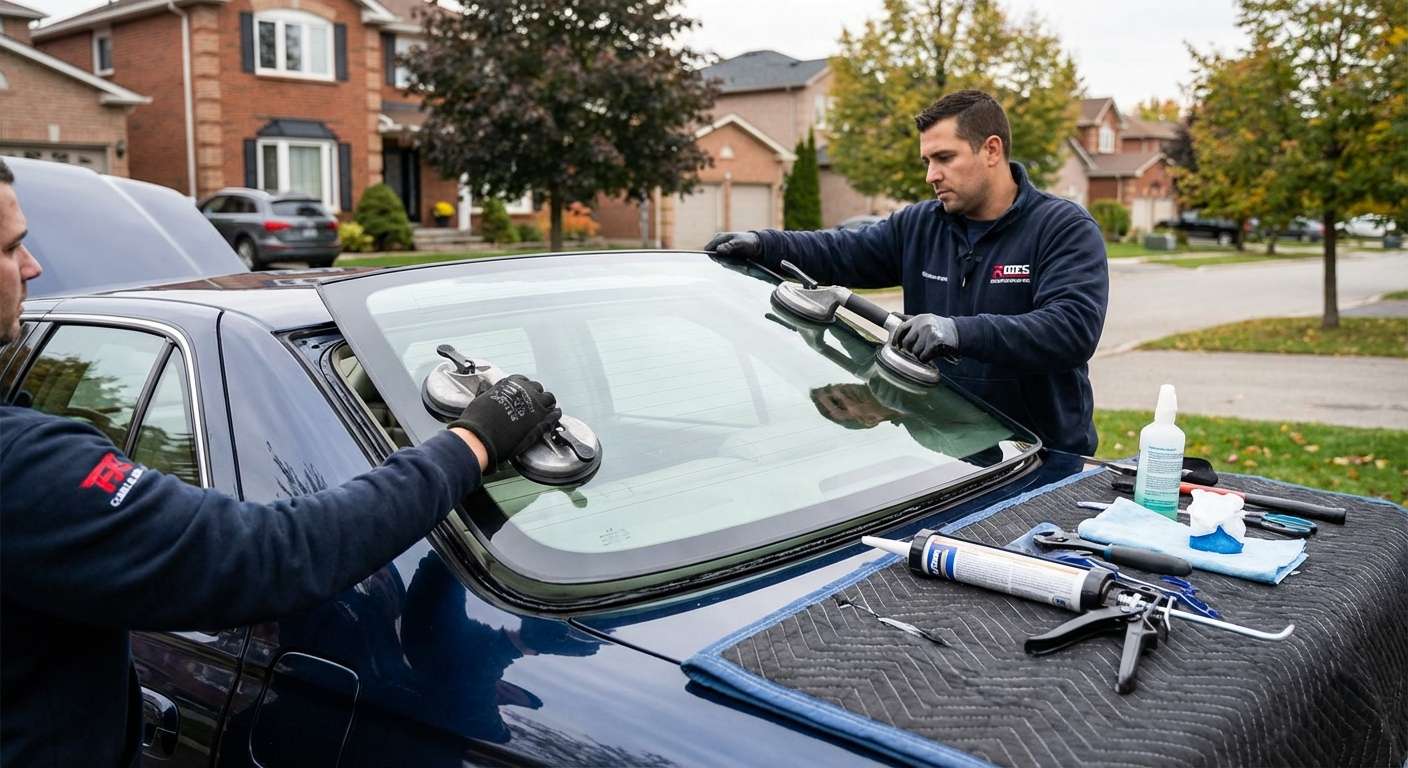
Using specialized suction cups, two technicians carefully lower the new back glass into place, ensuring perfect alignment with the roofline and trunk gaps. We apply gentle, even pressure to set the glass securely into the urethane bed. Finally, we reconnect the defroster and antenna tabs, reinstall the rear parcel shelf, C-pillar trim panels, and any exterior moldings.
The Importance of Safe Drive-Away Time (SDAT)
Once the glass is set, the premium urethane adhesive requires a specific amount of time to cure before the vehicle can be safely driven. This is known as the Safe Drive-Away Time (SDAT). Thanks to the advanced chemical properties of the adhesives we use at AlexWindshield, your Cadillac Seville will meet federal safety standards and be ready to drive in as little as 30 to 60 minutes after installation. We will provide you with clear aftercare instructions, such as leaving your windows rolled down an inch to prevent cabin air pressure from pushing against the curing seal when closing the doors.
Why AlexWindshield is the Trusted Choice for Your Cadillac Seville
Replacing auto glass on late-90s and early-2000s luxury vehicles requires a delicate touch and profound technical knowledge. Here is why drivers across the GTA trust AlexWindshield:
- Master Technician Expertise: We do not cut corners. Every step, from interior panel removal to primer application, is executed with surgical precision.
- OEM-Quality Materials: We use top-tier glass that maintains the acoustic dampening and structural integrity your Cadillac Seville was designed for.
- Immaculate Cleanup: We treat your vehicle's interior with the utmost respect, ensuring not a single shard of tempered glass is left behind in your cabin or trunk.
- Convenient Mobile Service: Whether you live in the heart of Toronto or the surrounding suburbs of Vaughan, Richmond Hill, or Markham, our mobile fleet comes directly to you at no extra cost.
Book Your Cadillac Seville Auto Glass Service Today
Do not let a shattered rear window ruin the elegance and comfort of your classic luxury sedan. If your 1998-2004 Cadillac Seville has suffered rear glass damage, trust the experts who prioritize precision, safety, and customer convenience. At AlexWindshield, we stand behind our craftsmanship with an industry-leading Lifetime Warranty on our workmanship, guaranteeing that your new back glass will be free of air leaks, water leaks, and manufacturer defects for as long as you own the vehicle.
Contact AlexWindshield today to schedule your mobile Cadillac Seville back glass replacement anywhere in the Greater Toronto Area (GTA). Experience the peace of mind that comes with hiring a true Master Technician, and get your classic Cadillac back on the road safely and stylishly.


