Vent Glass Replacement for BMW 8 Series 2019-2027 (G15): Preserving the Grand Tourer Experience
The BMW 8 Series (G15) represents the pinnacle of Bavarian grand touring—a seamless blend of aggressive performance, opulent luxury, and acoustic perfection. When you step into this cockpit, you expect silence, security, and an immersive driving experience. However, damage to the vent glass or quarter glass disrupts this harmony instantly. Unlike a standard windshield chip, a shattered or cracked side glass compromises the vehicle's security, exposes the bespoke leather interior to the elements, and shatters the aerodynamic profile of this high-performance coupe.
At AlexWindshield, we understand that replacing glass on a vehicle of this caliber is not merely a repair; it is a restoration of factory standards. A BMW 8 Series vent glass replacement requires surgical precision, intimate knowledge of the vehicle's complex door electronics, and an unwavering commitment to using premium materials. Whether you are located in Vaughan, Richmond Hill, or Markham, our mobile specialists bring dealership-level expertise directly to your driveway.
The Technical Complexity of the G15 Platform
Replacing the glass on a modern BMW 8 Series is significantly more involved than on economy vehicles. The G15 chassis utilizes frameless door designs, complex acoustic insulation, and intricate ambient lighting systems integrated into the door panels. The "vent" glass—often the stationary triangular piece located within the rear door structure or the quarter section—plays a critical role in the structural rigidity of the window guide system.
Incorrect installation can lead to wind noise (whistling at high speeds), water leaks that damage the ECU modules located in the footwells, or failure of the "short-drop" window mechanism that allows the doors to open and close smoothly. As Master Technicians, we follow a rigorous protocol to ensure your BMW remains as quiet and secure as the day it left Dingolfing.
Comprehensive Step-by-Step Replacement Process
Transparency is the hallmark of true craftsmanship. Below is the detailed, A-to-Z procedure we utilize for vent glass replacement on the BMW 8 Series 2019-2027 models. We do not skip steps, and we treat your vehicle with the utmost respect.
Phase 1: Site Preparation and Vehicle Protection
Before a single tool touches your BMW, we establish a protected work zone. The G15 often features Merino leather and crafted glass applications (CraftedClarity) on interior controls, which require absolute protection.
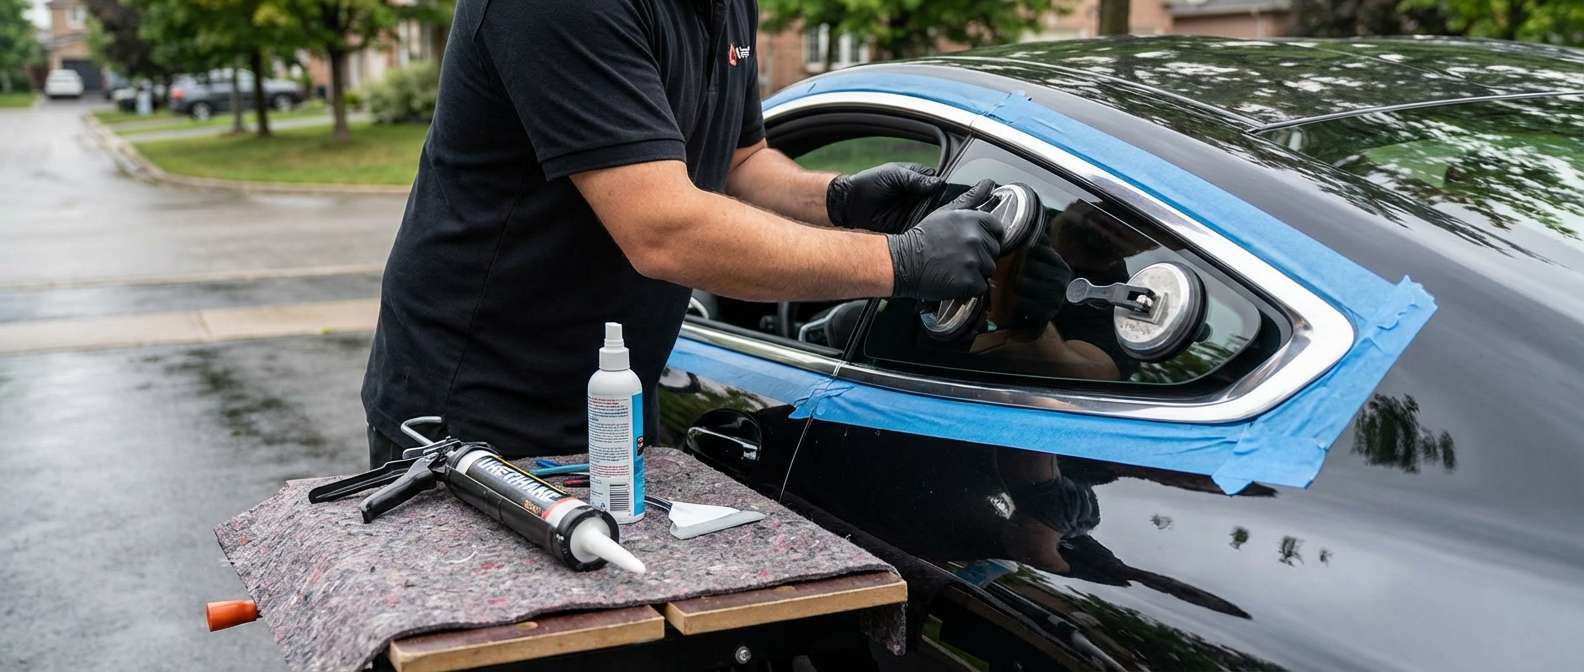
- Exterior Protection: We apply protective tape to the exterior door paint and the B-pillar trim (often high-gloss Shadowline trim) to prevent accidental scratches during glass extraction.
- Interior Shielding: We cover the driver and passenger seats, the center console, and the steering wheel with heavy-duty protective covers. This prevents glass shards or debris from embedding in the perforated leather.
- Floor Protection: Protective mats are placed in the footwells to catch any falling debris during the disassembly phase.
Phase 2: Door Panel and Trim Removal
To access the mounting points for the vent glass and to properly clean up broken glass, the interior door panel (door card) must be removed. This is a delicate process on the BMW 8 Series due to the hidden fasteners and fragile clips.
- We locate and remove the hidden Torx screws secured behind the interior door handle and decorative trim strips.
- Using specialized non-marring nylon pry tools, we gently pop the retaining clips around the perimeter of the door panel. Great care is taken not to break the plastic clips, although we carry OEM replacements just in case.
- We carefully disconnect the Bowden cable (door latch mechanism) and the complex wiring harnesses. This includes connectors for the Harman Kardon or Bowers & Wilkins tweeters, seat memory switches, window controls, and the delicate LED ambient lighting strips.
- The door panel is removed and placed on a padded stand to prevent damage to the leather or soft-touch materials.
Phase 3: Debris Management and Safety Cleanup
If the vent glass has shattered (tempered glass), millions of tiny cubes will have fallen into the door cavity ("inside the door"). Failing to remove these shards results in an annoying rattle every time you close the door or drive over a bump.
- Vapor Barrier Removal: We carefully peel back the foam vapor barrier that seals the door against moisture. Preserving the integrity of this barrier is essential to prevent water from entering the cabin later.
- Speaker Removal: On the G15, glass shards often fall behind the lower mid-range speaker magnet. We unbolt and remove the speaker to access the deepest part of the door shell.
- High-Power Vacuuming: We use an industrial-grade vacuum with flexible crevice attachments to extract glass from the bottom of the door, inside the window regulator tracks, and within the rubber window run channels.
- Compressed Air Flush: We use compressed air to dislodge trapped shards from blind corners, vacuuming them up as they are released.
Phase 4: Old Glass Extraction and Surface Prep
Once the area is clean and accessible, we proceed with removing the remnants of the old glass assembly.
- If the vent glass is a stationary piece bonded to the frame, we use a specialized oscillating cutout tool or a braided wire system to slice through the old urethane bead without scratching the vehicle’s pinch weld.
- If the glass is bolted to a divider bar, we loosen the regulator bolts and slide the guide rail out of position to release the glass mounting points.
- Pinch Weld Cleaning: We trim the old adhesive down to a thin, even layer (approx 1-2mm). This serves as the best base for the new bond. Any scratches to the metal are treated with an anti-corrosion primer to prevent future rust.
- Glass Priming: The new OEM-standard glass is cleaned with an alcohol-based solution. We then apply a specialized glass primer to the ceramic frit (the black band around the glass) to ensure maximum adhesion of the urethane.
Phase 5: Installation of the New Vent Glass
This is the critical moment where precision ensures the longevity of the repair.
- Adhesive Application: We apply a high-modulus, non-conductive Sika or Dow automotive urethane. For BMWs, we use a high-viscosity formula that prevents the glass from sagging before it cures.
- Placement: Using suction cups, the new vent glass is carefully guided into the aperture. We align it perfectly with the B-pillar and the roofline to ensure the gaps are symmetrical and consistent with factory tolerances.
- Securing the Hardware: If the vent glass includes a divider bar, it is bolted back into place. We torque the bolts to manufacturer specifications (usually 8-10 Nm) to ensure the window track is rigid but not over-tightened.
Phase 6: Reassembly and Functional Testing
With the glass securely in place, we begin the reassembly process.
- Vapor Barrier Reseal: The moisture barrier is re-adhered using butyl tape. If this seal is not perfect, water will leak onto your door sill and carpet during heavy rain or car washes.
- Component Connection: All speakers, switches, and ambient lighting plugs are reconnected. We verify that the audio system and lights function correctly before finalizing the panel installation.
- Door Panel Install: The door card is snapped back onto the frame, and all Torx screws are tightened.
- Window Initialization: On the BMW 8 Series, the power window motor must be "taught" the new limits. We perform a window initialization sequence so the main door glass knows exactly where the top and bottom stops are, ensuring the "short-drop" feature works perfectly when the door handle is pulled.
Why Professional Installation is Critical for the GTA
Driving in the Greater Toronto Area exposes your vehicle to extreme temperature fluctuations—from the freezing winters of Richmond Hill to the humid summers in Markham. These thermal cycles cause metal and glass to expand and contract.
A substandard installation using cheap adhesive or improper priming will eventually fail. The glass may detach, leak, or create unbearable wind noise on the 407 ETR. Furthermore, the vent glass is a component of the vehicle's passive safety system; in the event of a rollover, it contributes to the roof crush resistance. Only certified technicians using automotive-grade urethane with the correct safe drive-away time (SDAT) can guarantee your safety.
Mobile Service Across Vaughan, Richmond Hill, and Markham
We know that BMW 8 Series owners value their time. You shouldn't have to spend half a day sitting in a repair shop waiting room. AlexWindshield specializes in mobile service designed for the luxury market.
- Vaughan: Whether you are near Vaughan Mills or the quiet residential streets of Kleinburg, our mobile units are fully equipped to handle this repair on-site.
- Richmond Hill: From Oak Ridges to Highway 7, we service the entire municipality with rapid response times.
- Markham: We cover all of Markham, Unionville, and surrounding areas, ensuring your BMW is back on the road quickly.
Our mobile vans are essentially workshops on wheels, equipped with power inverters, vacuum systems, and all the necessary tools to perform a factory-quality replacement at your home or office.
Trust the Experts at AlexWindshield
Your BMW 8 Series is a significant investment, and it deserves the highest standard of care. Don't trust generalist glass shops with the intricacies of a G15 luxury coupe or convertible. At AlexWindshield, we combine technical mastery with premium customer service.
We stand behind our craftsmanship with a Lifetime Warranty on leakage and workmanship for as long as you own the vehicle. If you require Vent Glass Replacement for your BMW 8 Series (G15), contact us today.
Call AlexWindshield now to schedule your mobile service in the GTA. Drive with clarity, safety, and confidence.


