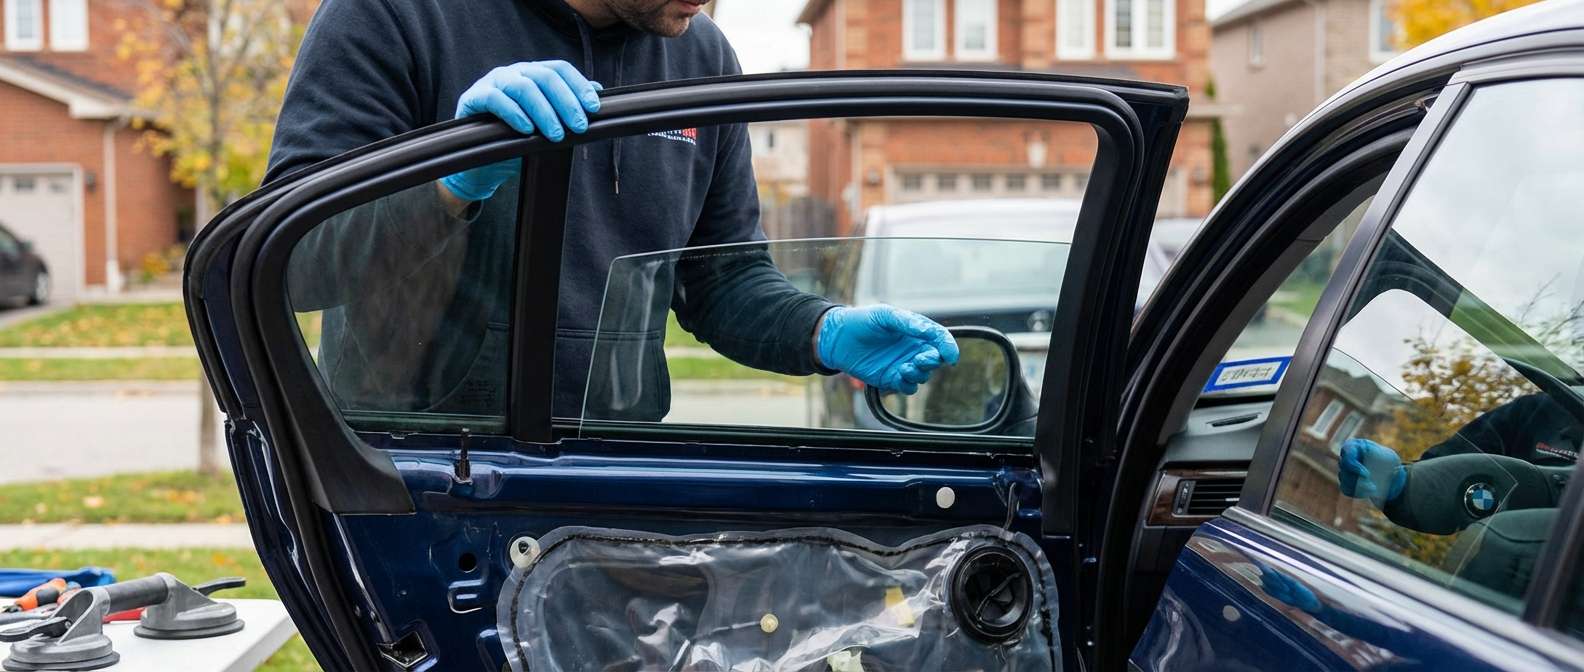
Restoring the Profile of a German Icon: Vent Glass Replacement for BMW 3 Series (E90/E92)
The BMW 3 Series, specifically the fifth generation E90 sedan and E92 coupe (2006-2012), represents a pinnacle of compact executive car design. These vehicles are renowned for their distinct body lines, including the iconic "Hofmeister kink" at the rear window pillar—a design element that relies heavily on the precise fit and finish of the rear door vent glass. When this specific piece of glass is damaged due to vandalism, road debris, or an attempted break-in, it does more than just expose your vehicle to the elements; it disrupts the structural integrity and acoustic insulation of your Ultimate Driving Machine.
At AlexWindshield, we understand that a BMW requires a technician who appreciates German engineering. Replacing a vent glass on an E90 or E92 is not a simple "pop-in" job; it requires navigating complex door cards, fragile clips, and precise regulator adjustments. This guide details our master-level approach to restoring your vehicle specifically in the Greater Toronto Area (GTA).
The Technical Complexity of BMW Vent Glass
The "vent glass" (often referred to as the quarter glass on the rear door of the sedan) is the small, triangular stationary piece of glass located next to the main roll-down window. On the 2006-2012 3 Series, this component is integral to the door frame assembly. Unlike domestic vehicles where this might be glued directly to the body, the BMW E90 vent glass is typically mounted within the door's run channel system, requiring significant disassembly to replace correctly.
Many general auto glass shops rush this process, often breaking the delicate plastic clips that hold the door interior or tearing the vapor barrier, which leads to water leaks in the footwell—a notorious issue with the E90 chassis. At AlexWindshield, our mobile specialists utilize OEM-spec protocols to ensure your replacement is undetectable from the factory installation.
Comprehensive Step-by-Step Replacement Process
As Master Technicians, we believe in transparency. Below is the detailed, A-to-Z workflow we employ when arriving at your location in Vaughan, Richmond Hill, or Markham to replace the vent glass on your BMW 3 Series.
Phase 1: Site Preparation and Interior Protection
Before touching the vehicle with tools, we secure the workspace. Since vent glass is tempered, it shatters into thousands of granular pebbles when broken.
- Surface Protection: We apply protective tape to the exterior paint surrounding the window frame to prevent scratches from glass shards or tools.
- Interior Shielding: We place heavy-duty covers over the leather seats (Dakota or Nappa leather common in these models) and the center console to prevent damage from falling debris during the removal process.
- Damage Assessment: We inspect the window run channel (the rubber seal) to ensure it wasn't sliced or damaged during the incident that broke the glass.
Phase 2: Precision Door Panel Removal
To access the mounting points for the vent glass on an E90/E92, the interior door card must be removed. This is a delicate process on aging BMW plastics.
- Trim Removal: Using non-marring polymer pry tools, we carefully pop off the decorative trim strip (wood or aluminum) across the door handle. This reveals the hidden Torx (T20) screws.
- Hardware Extraction: We remove the retaining screws located behind the trim and inside the door handle cup.
- Clip Release: Starting from the bottom, we use a specialized wedge tool to pop the friction clips holding the door card to the metal frame. We apply specific pressure to avoid snapping the clip mounts.
- Cable Disconnection: We disconnect the bowden cable for the door latch and the electrical harnesses for the window switch and speakers.
- Vapor Barrier Management: The E90 uses a foam vapor barrier sealed with butyl rubber. We carefully peel this back using heat if necessary. Preserving this barrier is critical to preventing future water ingress into the cabin electronics.
Phase 3: Debris Remediation and Vacuuming
This is the step that separates amateurs from professionals. Broken tempered glass gets everywhere.
- Interior Cabin Cleanup: We thoroughly vacuum the seats, floor mats, and crevices.
- Inside the Door Shell: This is mandatory. We insert a flexible vacuum attachment deep into the bottom of the metal door shell. If glass is left here, it will rattle incessantly every time you close the door or drive over a bump.
- Regulator Cleaning: We inspect the grease on the window regulator tracks to ensure no glass dust has adhered to it, which could cause the main window to grind or fail prematurely.
Phase 4: Extraction and Preparation
With the door stripped and cleaned, we prepare the frame for the new glass.
- Run Channel Removal: The rubber guide that holds the main window often extends to wrap around the vent glass. We may need to loosen the main window glass clamps and slide the main glass down or temporarily remove it to create clearance.
- Divider Bar Manipulation: The metal bar separating the main glass from the vent glass (the division bar) is bolted to the door frame. We remove the top and bottom securing bolts (usually 10mm or T30) to allow the bar to shift.
- Old Urethane/Seal Removal: If the previous glass was bonded, we pare back the old adhesive to approximately 1-2mm thickness to serve as a bonding base, or completely clean the channel if it is a friction-fit rubber gasket system.
- Priming: If the replacement requires adhesive, we apply a high-modulus black primer to the metal body pinch weld to prevent rust and ensure chemical adhesion.
Phase 5: Installation of the New Vent Glass
We use only high-quality glass that matches the curvature, tint, and thickness of the original BMW glazing.
- Gasket Fitting: We fit the new rubber encapsulation onto the new vent glass (if not pre-applied).
- Adhesive Application: Depending on the specific sub-model trim, we apply a bead of premium, fast-curing automotive urethane to the frame or glass edge. This structural adhesive restores the safety cage rigidity of the vehicle.
- Insertion: We carefully slide the new vent glass into the corner of the door frame. This requires a specific angle of attack to seat the glass into the run channel without tearing the rubber.
- Securing the Divider Bar: Once the glass is seated, we slide the division bar back into position, ensuring it locks the vent glass tightly against the B-pillar or C-pillar frame. We torque the bolts back to factory specifications.
- Main Window Realignment: We test the main roll-down window to ensure it slides perfectly in the channel next to the new vent glass, with no friction or wind noise gaps.
Phase 6: Reassembly and Quality Check
The final phase involves putting the vehicle back together with meticulous care.
- Vapor Barrier Reseal: We reheat and roll the butyl sealant on the vapor barrier to ensure a watertight seal against the door metal.
- Panel Installation: The door card is re-hung, ensuring the lock pin slides through correctly and all electrical connectors snap into place.
- Clip Engagement: We firmly press the door panel to engage all clips and reinstall the Torx screws and decorative trim.
- Glass Cleaning: The new glass is cleaned with professional-grade non-streaking cleaner, inside and out.
Local Expertise: Serving the Greater Toronto Area
Driving a BMW in the GTA means dealing with diverse road conditions, from the 407 ETR in Markham to the busy streets of Vaughan and Richmond Hill. AlexWindshield is optimized for local service.
Mobile Service in Vaughan
If you are located near Vaughan Mills or the industrial districts, our mobile vans can reach you same-day. We know the area well and can perform this complex replacement in your office parking lot or driveway.
Richmond Hill & Markham Coverage
Residents in Richmond Hill and Markham often face long waits at dealerships. Our mobile units are fully equipped workshops. We bring the power, the vacuum systems, and the lighting required to perform a dealership-level repair at your home, often at a fraction of the cost and time.
Why the "Vacuuming" Step is Non-Negotiable
We emphasize this because it is the most common complaint customers have with other shops. When a vent glass breaks, gravity pulls the shards down into the door structure. If a technician skips the step of removing the door panel to vacuum the shell, those shards can block the drainage holes at the bottom of the door.
Blocked drainage holes in a BMW E90 can lead to water accumulating inside the door, eventually overflowing into the cabin and damaging the sensitive FRM (Footwell Module), a costly electronic component located in the driver’s kick panel. At AlexWindshield, our thorough cleaning process protects your car’s electronics.
The AlexWindshield Guarantee
Your BMW 3 Series deserves parts and labor that match its pedigree. We do not cut corners on clips, we do not ignore the vapor barrier, and we never leave broken glass behind.
Our Promise to You:
- Lifetime Warranty: We stand behind our workmanship for as long as you own the vehicle. If you experience wind noise, water leaks, or loose moulding related to our installation, we fix it for free.
- OEM Quality Glass: We use glass that meets or exceeds Original Equipment Manufacturer standards for safety, clarity, and fitment.
- Zero-Hassle Mobile Service: We come to you, anywhere in the GTA.
Don't let a broken vent glass compromise the security or look of your E90 or E92. Trust the Master Technicians who understand the intricacies of German automotive design.
Ready to restore your BMW? Contact AlexWindshield today for a quote and experience the premier mobile auto glass service in Vaughan, Richmond Hill, and Markham.


