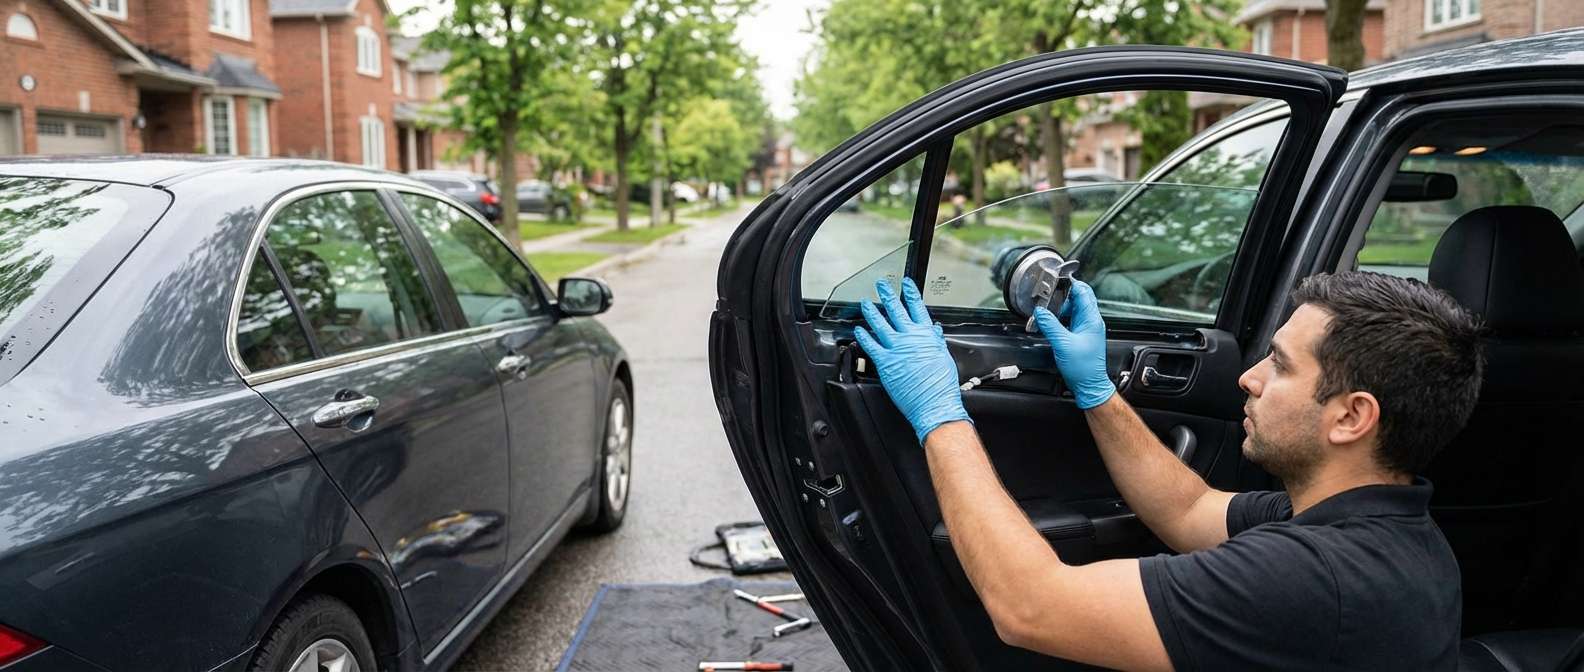
Restoring the Aesthetic Integrity of Your CL9: Vent Glass Replacement for Acura TSX 2004-2008
The first-generation Acura TSX (Chassis Code CL9), produced between 2004 and 2008, remains a standout vehicle in the entry-level luxury segment. Renowned for its sharp handling, high-revving K24 engine, and timeless design, this vehicle has cultivated a loyal following of enthusiasts across the Greater Toronto Area. However, maintaining the pristine condition of a vehicle that is now approaching classic status requires attention to detail. One of the most frustrating damages an owner can face is a broken rear vent glass. Unlike a standard windshield crack caused by a pebble, damage to the triangular vent glass is almost exclusively the result of vandalism or attempted theft, leaving your vehicle exposed to the elements and ruining its sleek profile.
At AlexWindshield, we understand that your 2004-2008 Acura TSX is more than just a commuter car; it is a precision-engineered machine that deserves the highest standard of care. Replacing a vent glass is not a simple "pop-in" procedure. It requires intricate disassembly of the rear door components, careful handling of the division bar, and rigorous cleaning of the door shell. As the premier auto glass specialists in the GTA, we provide a seamless, dealership-quality replacement service that restores your Acura’s security and sound-proofing.
Why the Vent Glass is Critical to Your Acura TSX
The rear vent glass (often called the quarter glass) on the 2004-2008 Acura TSX serves multiple functions. It is not merely a cosmetic filler; it aids in driver visibility during lane changes and contributes to the structural rigidity of the window frame. Because this piece of glass is tempered, it is designed to shatter into thousands of small, granular chunks upon impact to prevent severe injury. While safe, this creates a massive cleanup challenge and an immediate security risk.
Leaving a vent glass broken or covering it with plastic is not a viable solution. It compromises the vehicle's weather sealing, allows moisture to damage the leather interior and door electronics, and increases wind noise significantly at highway speeds—something the TSX was designed to suppress. Our specialized replacement service ensures that the new glass matches the factory tint and curvature of your original Acura specifications.
Comprehensive Mobile Service Across the GTA
We know that driving a vehicle with shattered glass is dangerous and inconvenient. That is why AlexWindshield brings the repair shop to you. Our fully equipped mobile units operate extensively throughout the Greater Toronto Area, offering same-day service to get you back on the road safely.
Our Primary Service Hubs Include:
- Vaughan: From the busy streets near Vaughan Mills to the residential quiet of Kleinburg, our technicians are always nearby.
- Richmond Hill: We service all neighborhoods along Yonge Street and Bayview Avenue, ensuring your luxury sedan is treated with respect.
- Markham: Whether you are near Unionville or the tech hubs of Markham, we provide rapid response times for all Acura owners.
The Master Technician’s Process: Step-by-Step Replacement
Replacing the vent glass on a 2004-2008 Acura TSX is a technically demanding job that involves dismantling a significant portion of the rear door. Unlike a windshield replacement which is largely external, vent glass replacement requires deep internal access to the door mechanism. Below is the detailed, A to Z protocol that our technicians follow to ensure a perfect installation.
Phase 1: Vehicle Protection and Initial Safety Assessment
Before any tools touch your vehicle, we prioritize protection. The TSX interiors from this era often feature perforated leather seats and soft-touch door cards that can be easily scratched.
- Interior Shielding: We place heavy-duty protective covers over the rear seats and the front seat backs to prevent glass shards or tools from damaging the upholstery.
- Exterior Masking: The paint surrounding the rear door window frame is taped off with non-residue automotive masking tape to prevent accidental scratches during the removal of the weatherstripping.
- Safety Gear: Our technicians wear cut-resistant gloves and eye protection, as handling shattered tempered glass carries a high risk of injury.
Phase 2: Disassembly of the Rear Door Panel
To access the mounting points for the vent glass, the interior door card (panel) must be removed. This requires knowledge of Acura’s hidden clip locations.
- Hardware Removal: We locate and remove the hidden screws typically found behind the inner door handle escutcheon and inside the armrest grip cup.
- Switch Disconnection: The power window switch panel is carefully pried up, and the electrical harness is disconnected without breaking the aging plastic locking tabs.
- Panel Separation: Using a specialized trim removal tool, we pop the perimeter clips of the door panel. We then lift the panel upward to clear the window weatherstrip and set it aside in a safe location.
- Vapor Barrier Peel: The plastic vapor barrier (water shield) is carefully peeled back to expose the inner door skin. We preserve the butyl rubber adhesive so it can be resealed later.
Phase 3: Critical Cleanup and Debris Removal
This is the step that separates AlexWindshield from budget auto glass shops. When vent glass breaks, gravity pulls the shards down inside the door shell. If left inside, they will rattle indefinitely and can jam the window regulator gears or clog the water drain holes.
- High-Power Vacuuming: We use an industrial-grade vacuum with a thin, flexible nozzle to reach the deepest crevices of the door bottom.
- Physical Inspection: The technician manually inspects the inside of the door to dislodge any shards stuck in the anti-intrusion beam or the window tracks.
- Speaker Removal (If Necessary): On some TSX trim levels with premium sound, we may temporarily remove the door speaker to gain better access to the bottom of the door shell for thorough cleaning.
Phase 4: Removing the Division Bar and Old Glass
The vent glass on the Acura TSX is separated from the main roll-down window by a metal channel called the division bar. This bar must be manipulated to install the new vent glass.
- Lowering the Main Window: The main window is lowered to a specific height to relieve tension on the run channels.
- Unbolting the Run Channel: We remove the bolts securing the division bar at the top of the door frame and the bottom (inside the door shell).
- Extraction: The division bar is tilted or pulled slightly to release the remnants of the old vent glass and its rubber encapsulation. Any remaining glass stuck in the rubber run channel is picked out with precision picks.
Phase 5: Installation of the New Vent Glass
We use only OEM-quality glass that meets or exceeds the original Acura specifications for clarity, tint, and thickness.
- Lubrication: The rubber weatherstripping and run channels are treated with a silicone-based lubricant to facilitate the sliding of the new glass without tearing the rubber.
- Positioning: The new vent glass is carefully angled and slid into the rear part of the window frame.
- Re-seating the Division Bar: This is the most delicate part. The division bar is slid back into position, sandwiching the new vent glass securely against the rear frame. We ensure the main window glass also sits correctly within the front track of the division bar.
- Securing Hardware: Once the alignment is perfect, the bolts holding the division bar are torqued to factory specifications. This ensures the glass is tight and will not leak air or water.
Phase 6: Functionality Test and Reassembly
Before closing up the door panel, we perform a rigorous quality control check.
- Window Operation Check: We cycle the main roll-down window up and down several times to ensure it moves smoothly and does not bind against the newly installed division bar.
- Leak Test: We visually inspect the seals to ensure there are no gaps between the glass and the weatherstripping.
- Panel Reinstallation: The vapor barrier is re-adhered. The door panel is clipped back onto the frame, ensuring all clips engage with a solid "click." All screws are replaced, and cover caps are snapped back into position.
- Final Polish: The new glass and the interior door panel are cleaned with high-quality glass cleaner to remove any fingerprints or lubricant residue.
The Importance of Professional Installation for ADAS and Electronics
While the 2004-2008 Acura TSX predates modern camera-based ADAS (Advanced Driver Assistance Systems) typically found in windshields, the rear doors contain sensitive electronics, including the door lock actuators and window regulators. Amateur installation can damage these components or misalign the window tracks, leading to motor burnout.
By choosing AlexWindshield, you are choosing technicians who understand the electrical and mechanical architecture of the Acura CL9 chassis. We ensure that your central locking system and power windows function exactly as they did before the damage occurred.
Why AlexWindshield is the GTA's Top Choice
For over a decade, AlexWindshield has built a reputation based on trust, technical excellence, and customer convenience. We don't just replace glass; we restore the safety and comfort of your vehicle. Our commitment to the residents of Vaughan, Richmond Hill, and Markham is unmatched.
Our Service Guarantees:
- Lifetime Warranty: We stand behind our workmanship. Our installation comes with a lifetime warranty against air leaks and water leaks for as long as you own the vehicle.
- Mobile Convenience: No need to take time off work. We come to your home or office.
- Competitive Pricing: We offer premium service without the dealership markup.
Book Your Acura TSX Vent Glass Replacement Today
Don't let a broken vent glass compromise the look and security of your Acura TSX. Trust the Master Technicians at AlexWindshield to perform a flawless repair that removes every shard of broken glass and restores your vehicle to factory standards.
Contact us now to schedule your appointment in the Greater Toronto Area. Drive with clarity and confidence with AlexWindshield.


