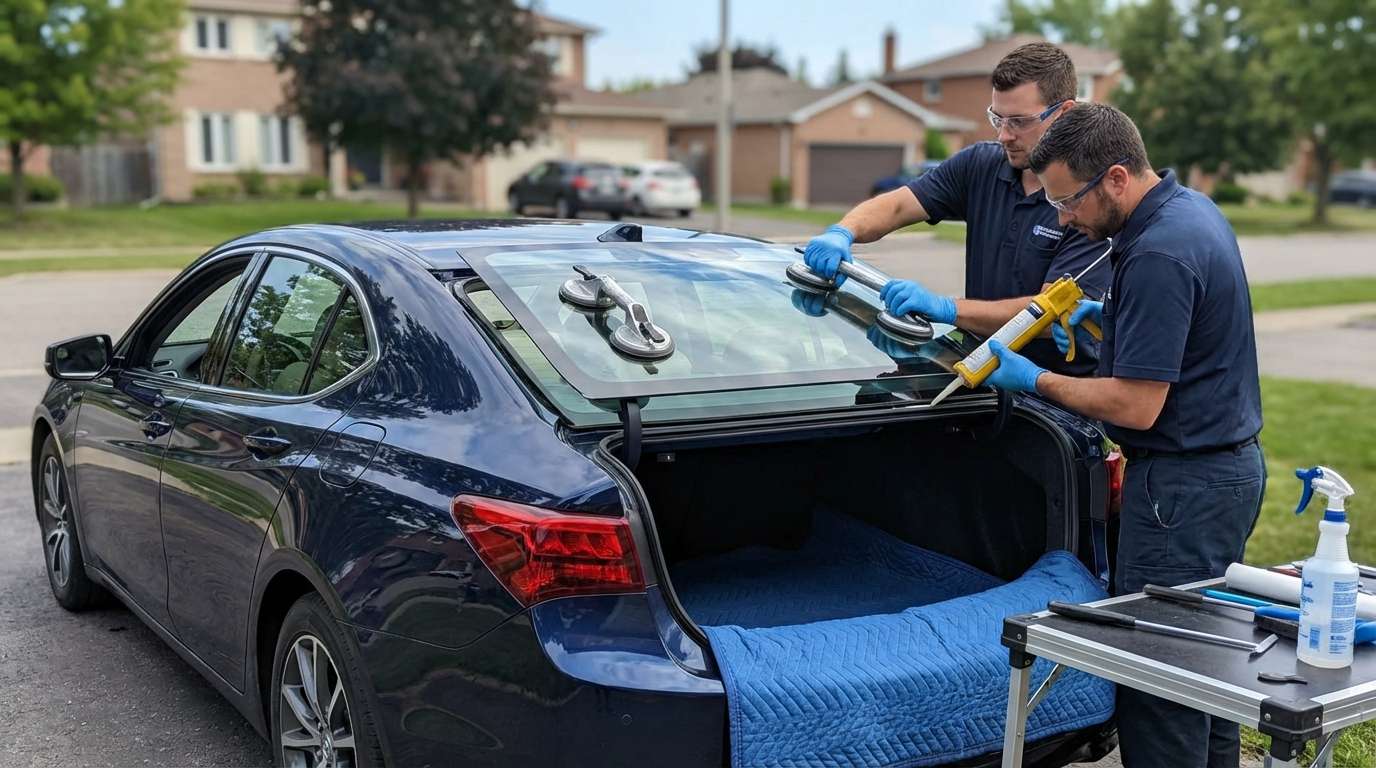
Restoring the Precision Crafted Performance: Rear Windshield Replacement for Acura TLX (2015-2020)
The Acura TLX (2015-2020) represented a bold step forward for Acura, merging the agility of the TSX with the refinement of the TL. With its Jewel Eye LED headlights and "Precision Crafted Performance" ethos, this sedan cuts a striking figure on the road. However, the sleek, aerodynamic lines of the TLX rely heavily on the structural integrity and aesthetic clarity of its glass. Unlike the laminated front windshield, the Back Glass (Rear Windshield) on your TLX is typically made of tempered glass designed to shatter into thousands of small, safe granules upon impact.
When this glass breaks—whether due to a rogue baseball, stress fracture from extreme temperature shifts, or vandalism—it exposes your luxury interior to the elements and theft. At AlexWindshield, we do not simply swap glass; we restore the structural rigidity and acoustic quietness your Acura was built to provide. As Master Technicians, we understand the specific wiring harnesses, heating elements, and trim nuances of the first-generation TLX.
Mobile Service Across the Greater Toronto Area (GTA)
We understand that driving an Acura TLX with a shattered rear window is dangerous and often impossible due to visibility issues and loose glass. That is why AlexWindshield brings the auto glass shop to you. We offer comprehensive mobile service availability throughout the Greater Toronto Area (GTA).
Our specialized mobile units are frequently deployed in:
- Vaughan: From the busy lots of Vaughan Mills to residential driveways in Kleinburg.
- Richmond Hill: Servicing the Yonge Street corridor and Oak Ridges.
- Markham: Covering everything from Unionville to major corporate centers.
Our mobile vans are equipped with generators, climate-controlled urethane heaters, and industrial vacuums, ensuring that we can perform a factory-quality installation wherever your vehicle is parked.
The Technical Difference: Tempered vs. Laminated Glass
Before detailing our process, it is vital to understand what you are dealing with. The 2015-2020 Acura TLX utilizes tempered safety glass for the rear window. Unlike the front windshield, which cracks but stays in one piece, tempered glass is heat-treated to hold high surface compression. When this tension is broken, the glass "explodes" into pebble-sized pieces.
This creates a unique challenge: Glass Shard Contamination. Shards can migrate deep into the rear deck, the C-pillar trim, and even into the trunk mechanism. A standard glass shop might just sweep the seat. At AlexWindshield, our cleanup process is as rigorous as the installation itself.
Step-by-Step Replacement Protocol: The AlexWindshield Standard
Replacing the back glass on an Acura TLX is a surgical procedure. We adhere to the Auto Glass Safety Council (AGSC) standards. Below is the A-to-Z process our technicians follow for your vehicle.
Phase 1: Interior Protection and Debris Management
The most critical step in back glass replacement is protecting the vehicle's luxury interior, especially the leather seats and rear console found in higher trims of the TLX.
- Interior Shielding: We place heavy-duty protective covers over the front seats, rear seats, and the center console to prevent damage from glass shards or tools.
- Exterior Protection: Fender covers and tape are applied to the trunk lid and rear quarter panels to protect the Acura’s paint from scratches during the removal process.
- Initial Vacuuming: We use industrial-grade vacuums to remove the bulk of the shattered glass from the rear seats, floor mats, and trunk carpet.
Phase 2: Trim Removal and Deep Cleaning
To ensure a leak-proof seal, we must access the bare metal frame (pinch weld). This requires dismantling specific interior components.
- Panel Removal: For the Acura TLX, we carefully remove the rear C-pillar interior trims and, if necessary, partially detach the rear deck panel (parcel shelf). While we remove door panels for side glass replacement, for the back glass, we focus on the rear interior trim panels to access the glass channel.
- Hidden Glass Removal: This is a step amateurs miss. We vacuum all broken glass shards from inside the rear deck cavities and behind the seat bolsters. Leaving glass here results in a permanent "rattle" sound whenever you hit a bump.
- Connector Access: We disconnect the electrical harness for the rear defroster (heating element) and the embedded radio antenna, ensuring the plugs are not damaged.
Phase 3: Removing the Old Adhesive
With the frame exposed and cleaned of debris, we proceed to remove the remains of the old installation.
- We use the Full Cut Method. Using a specialized oscillating tool or a cold knife, we cut the old urethane bead down to approximately 1-2mm. This thin layer of old factory adhesive serves as the best bonding surface for the new glue.
- We inspect the pinch weld for any signs of rust or scratches. If the metal was scratched during the shattering of the glass or removal, we sand it down to bare metal to prepare for priming.
Phase 4: Surface Preparation and Priming
Adhesion failure is the number one cause of leaks. We use a multi-step chemical preparation process.
- Contaminant Removal: The new glass and the vehicle frame are cleaned with a specialized glass cleaner to remove silicone, grease, or road tar.
- Black Primer Application: We apply a high-quality Sika or Dow chemical primer to the pinch weld and the glass frit (the black band around the edge). This primer performs three functions:
- It acts as a bonding agent between the glass and the glue.
- It prevents the urethane from degrading under UV sunlight.
- It serves as a rust inhibitor for the vehicle body.
Phase 5: Adhesive Application and Glass Installation
This is the moment of truth. We use only OEM-grade, high-modulus, non-conductive urethane adhesive.
- The V-Bead: We apply a triangular "V-bead" of urethane. This shape ensures that when the glass is compressed, the glue spreads evenly without air pockets, mimicking the factory robot installation.
- Setting the Glass: Using dual suction cups, two technicians (or a specialized setting tool) carefully lower the new Acura TLX Back Glass into the opening. Precision is key here to ensure the glass is centered perfectly between the roof and the trunk lid.
- Decking: We gently press the glass to ensure full contact with the adhesive around the entire perimeter.
Phase 6: Reassembly and Electrical Testing
The glass is in, but the job isn't done.
- Reconnecting Electronics: We reconnect the rear defroster tabs and the antenna leads. We conduct a continuity test to ensure the heating grid is functional.
- Trim Reinstallation: The rear deck panels, C-pillar trims, and any other removed interior parts are snapped back into place.
- Final Cleanup: We perform a secondary vacuum of the vehicle interior to ensure no stray shards remain. We clean the new glass inside and out to a streak-free shine.
Critical Considerations for Acura TLX Owners
Heating Elements and Antennas
The 2015-2020 Acura TLX integrates vital electronics into the back glass. The defroster grid is standard, but many models also utilize the glass for radio and GPS signal reception. Installing cheap, low-quality aftermarket glass often results in poor radio reception or defroster lines that fail after one winter. AlexWindshield sources glass that meets or exceeds OEM (Original Equipment Manufacturer) specifications to ensure your electronics work exactly as they did before the breakage.
Safe Drive-Away Time (SDAT)
Because the back glass contributes to the structural rigidity of the cabin (stiffening the roof and sides), the adhesive must cure before the vehicle is driven. We use fast-curing urethane that allows for a Safe Drive-Away Time of typically 30 to 60 minutes, depending on ambient temperature and humidity in the GTA.
Why Choose AlexWindshield for Your Acura?
Your Acura TLX is a precision machine, and it deserves a technician who treats it with respect. Here is why drivers in Vaughan, Richmond Hill, and Markham trust us:
- Master Technicians: Our team is trained specifically on luxury imports. We know how to remove Acura trim clips without breaking them.
- Lifetime Warranty: We stand behind our workmanship. Our auto glass replacement comes with a Lifetime Warranty against leaks, air noise, and manufacturer defects for as long as you own the vehicle.
- Zero Hassle Insurance Claims: We work directly with all major Canadian insurance providers. If your policy covers glass replacement, we handle the paperwork for you.
Don't let a shattered back window compromise the safety or look of your Acura TLX. Trust the experts who go the extra mile to clean every shard and seal every gap.
Contact AlexWindshield today to schedule your mobile service. Get back on the road with clear vision and peace of mind.


