Vent Glass Replacement for Acura MDX 2001-2006: Expert Service by AlexWindshield
The first-generation Acura MDX (2001-2006) redefined the luxury crossover segment, blending Honda’s legendary reliability with seven-seater utility and SH-AWD performance. While the "YD1" chassis is known for its robust engineering, the glass components—specifically the rear door vent glass or quarter glass—remain vulnerable. Whether due to an unfortunate break-in attempt, road debris impact, or accidental damage, a shattered vent glass is more than just a cosmetic issue; it exposes your vehicle’s cabin to the elements and compromises security. At AlexWindshield, we specialize in the intricate replacement of these triangular glass pieces, ensuring your classic MDX remains sealed, secure, and quiet on the road.
Understanding the Vent Glass on the Acura MDX (YD1)
On the 2001-2006 Acura MDX, the vent glass (often referred to as the partition glass) is the stationary triangular window located in the rear door, separated from the main roll-down window by a division bar (or sash channel). Unlike the main door glass which moves up and down on a regulator, the vent glass is a static component. However, replacing it is significantly more complex than replacing a standard windshield due to its integration with the door frame and the weatherstripping channels.
Because this glass is tempered, it is designed to shatter into thousands of dull, pebble-like pieces upon impact. This safety feature prevents large, jagged shards from injuring passengers, but it creates a massive cleanup challenge inside the door panel. As Master Technicians, we do not simply swap the glass; we perform a comprehensive restoration of the door’s integrity.
Service Availability: Mobile Auto Glass in the GTA
We understand that driving with a broken window is unsafe and uncomfortable, especially during Canadian winters or rainy seasons. AlexWindshield brings the repair shop to your driveway or workplace. Our fully equipped mobile units service the entire Greater Toronto Area (GTA). We have a particularly strong presence providing rapid response times in:
- Vaughan: From Woodbridge to Maple, we navigate the suburbs to get you back on the road fast.
- Richmond Hill: We service all neighborhoods along Yonge Street and Bayview Avenue.
- Markham: Whether you are near Unionville or Cornell, our technicians are ready to assist.
The Step-by-Step Replacement Process: A Master Technician’s Guide
Replacing the vent glass on an Acura MDX 2001-2006 requires patience, specialized tools, and a deep understanding of the door assembly. A hurried job can result in wind noise, water leaks, or "ghost rattles" from broken glass left inside the door. Below is the detailed, A-to-Z process we follow at AlexWindshield.
Phase 1: Vehicle Preparation and Safety
Before touching the vehicle with tools, we prioritize protection. The Acura MDX features leather interiors and painted door sills that must be shielded.
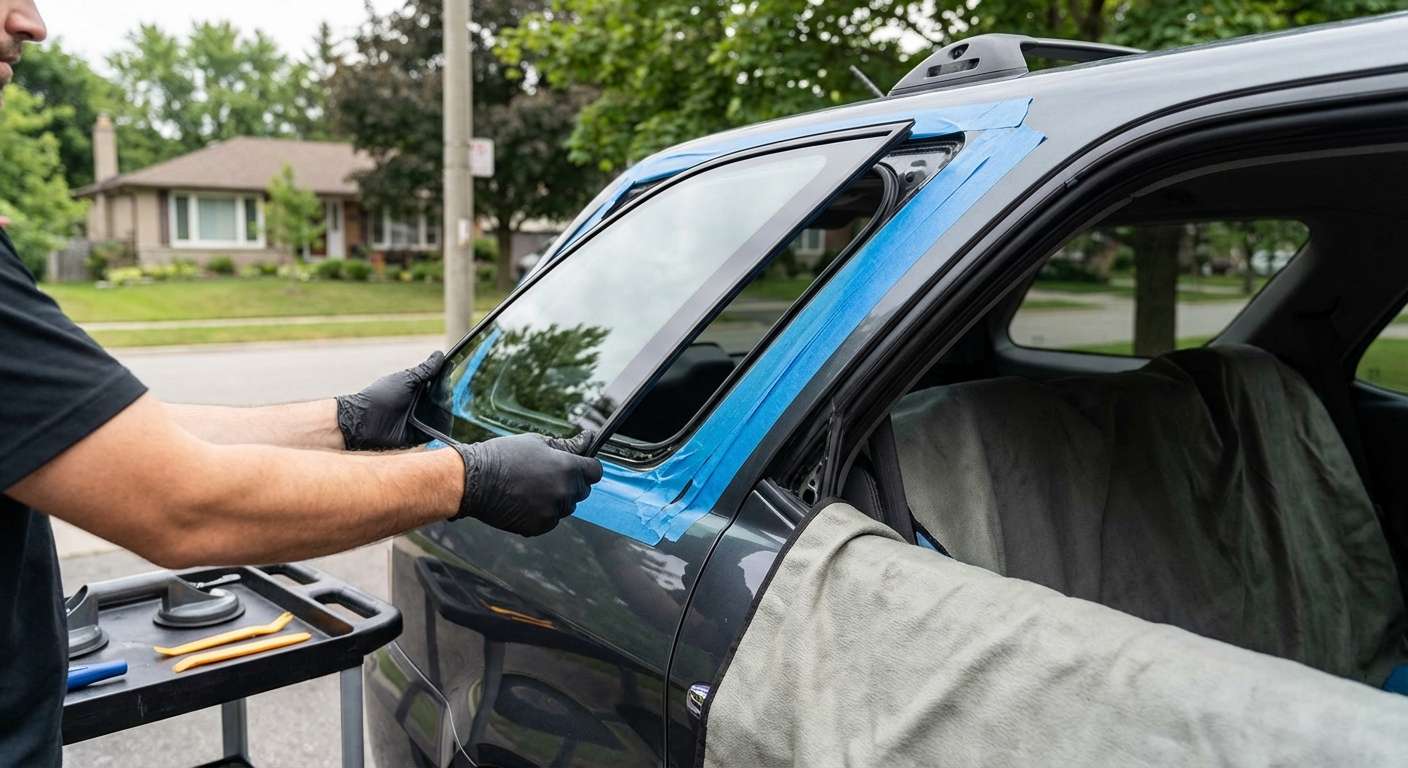
- Exterior Protection: We apply protective automotive tape to the exterior door paint and the B-pillar and C-pillar areas to prevent accidental scratches during glass extraction.
- Interior Coverings: A heavy-duty cover is placed over the rear seats and floor mats to catch any falling glass debris during the disassembly process.
- Technician Safety: Our technicians utilize cut-resistant gloves and safety eyewear, as handling shattered tempered glass presents a high risk of injury.
Phase 2: Interior Door Panel Removal
To access the mounting points for the vent glass and the division bar, the interior door card (panel) must be removed. This is a delicate process on older vehicles like the 2001-2006 MDX, as plastic clips can become brittle over time.
- We locate and remove the hidden screws positioned behind the inner door handle release and the armrest grip.
- Using a specialized non-marring trim tool, we gently pry the perimeter of the door panel to release the plastic retention clips without snapping them.
- Once the panel is loose, we disconnect the electrical harness for the power window switch and the courtesy light.
- The door panel is lifted upward off the window sill and set aside in a safe, clean location.
- We carefully peel back the vapor barrier (the plastic sheet sealing the door shell). It is crucial to preserve the butyl adhesive so it can be resealed later to prevent moisture form entering the cabin.
Phase 3: Debris Extraction and Vacuuming
This is the step that separates amateur installers from AlexWindshield Master Technicians. When vent glass breaks, gravity pulls the shards down into the bottom of the door shell.
- Initial Vacuuming: We use an industrial-grade vacuum to remove all visible glass from the window tracks, the seat, and the carpet.
- Internal Door Cleaning: We insert a flexible vacuum attachment deep into the door cavity. We physically reach inside to feel for hidden shards trapped in the corners or stuck in the door drain holes.
- Drain Hole Clearance: We ensure the water drain holes at the bottom of the door are clear of glass. If these are blocked, rainwater will accumulate inside the door, leading to rust and regulator failure.
Phase 4: Division Bar and Run Channel Manipulation
The vent glass on the Acura MDX is held in place by the main door frame on two sides and a vertical division bar on the third side. You cannot force the new glass in; the structure must be loosened.
- We remove the bolt securing the bottom of the division bar (located inside the door shell).
- We lower the main roll-down window to create clearance.
- We pull the rubber glass run channel out of the top and back of the door frame.
- By manipulating the division bar, we create enough of a gap to extract the remaining rubber gasket from the old vent glass and prepare the opening for the new part.
Phase 5: Priming and Adhesive Application
If the replacement vent glass is an encapsulated unit requiring urethane bonding (common on quarter glasses, though some MDX rear door vents are gasket-set), we follow a strict chemical protocol.
- Surface Cleaning: The metal pinch weld is cleaned with a specialized solvent to remove dirt, old grease, and contaminants.
- Primer Application: We apply a high-quality black primer to any exposed metal scratches caused by the removal of the old glass. This prevents rust (the "cancer" of auto body work) and ensures the adhesive bonds molecularly to the vehicle frame.
- Urethane Selection: We use Sika or Dow automotive-grade urethane adhesive. This structural adhesive is heated to the correct temperature to ensure a perfect bead and rapid curing time.
Phase 6: Installation of the New Vent Glass
With the preparation complete, the installation requires precision.
- Gasket Fitting: We fit the rubber weatherseal gasket onto the new vent glass (if not pre-applied).
- Insertion: The glass is angled carefully into the door frame. We slide the straight edge into the division bar channel first, then rotate the glass into the rear frame channel.
- Securing the Division Bar: Once the glass is seated perfectly, the division bar is pushed back into position, locking the vent glass in place.
- Torque Check: We reinstall the mounting bolts for the division bar and tighten them to the manufacturer's specified torque settings. This ensures the bar is rigid and the main window slides smoothly without binding.
Phase 7: Reassembly and Quality Control
The job isn't done until the vehicle is back to factory condition.
- Window Test: Before putting the panel back, we cycle the main power window up and down multiple times. We check for smooth operation, ensuring it doesn't catch on the new vent glass gasket.
- Vapor Barrier Seal: We re-adhere the vapor barrier, ensuring a watertight seal against the door metal.
- Panel Reinstallation: The door panel is clipped back into place, screws are tightened, and screw covers are replaced.
- Final Cleanup: A final vacuum and glass cleaner wipe-down are performed to leave the vehicle spotless.
Why Choose High-Quality Glass?
For a vehicle like the 2001-2006 Acura MDX, fitment is everything. Cheap, aftermarket glass often suffers from poor dimensional accuracy. A vent glass that is even 2 millimeters too small will result in annoying wind whistles at highway speeds. A glass that is too large can cause stress cracks or prevent the main window from rolling up. At AlexWindshield, we utilize only OEM-equivalent (Original Equipment Equivalent) glass that matches the curvature, tint, and thickness of the original Acura factory specifications.
The AlexWindshield Advantage
Choosing AlexWindshield means choosing peace of mind. We are not just glass installers; we are automotive preservationists. We treat your 2001-2006 Acura MDX with the respect a classic SUV deserves.
- Lifetime Warranty: We stand behind our workmanship. Our lifetime warranty covers against wind noise, water leaks, and loose moldings for as long as you own the vehicle.
- Mobile Convenience: We service Vaughan, Richmond Hill, Markham, and the wider GTA at no extra convenience cost to you.
- Certified Technicians: Our team is trained in the latest safety standards and urethane protocols.
Book Your Vent Glass Replacement Today
Don’t let a broken vent glass compromise your Acura MDX’s security or expose your interior to the unpredictable Canadian weather. Trust the Master Technicians at AlexWindshield to restore your vehicle to its original condition with precision and care.
Contact AlexWindshield today to schedule your mobile service in the GTA. Drive with confidence knowing your glass was installed by the best in the business.


