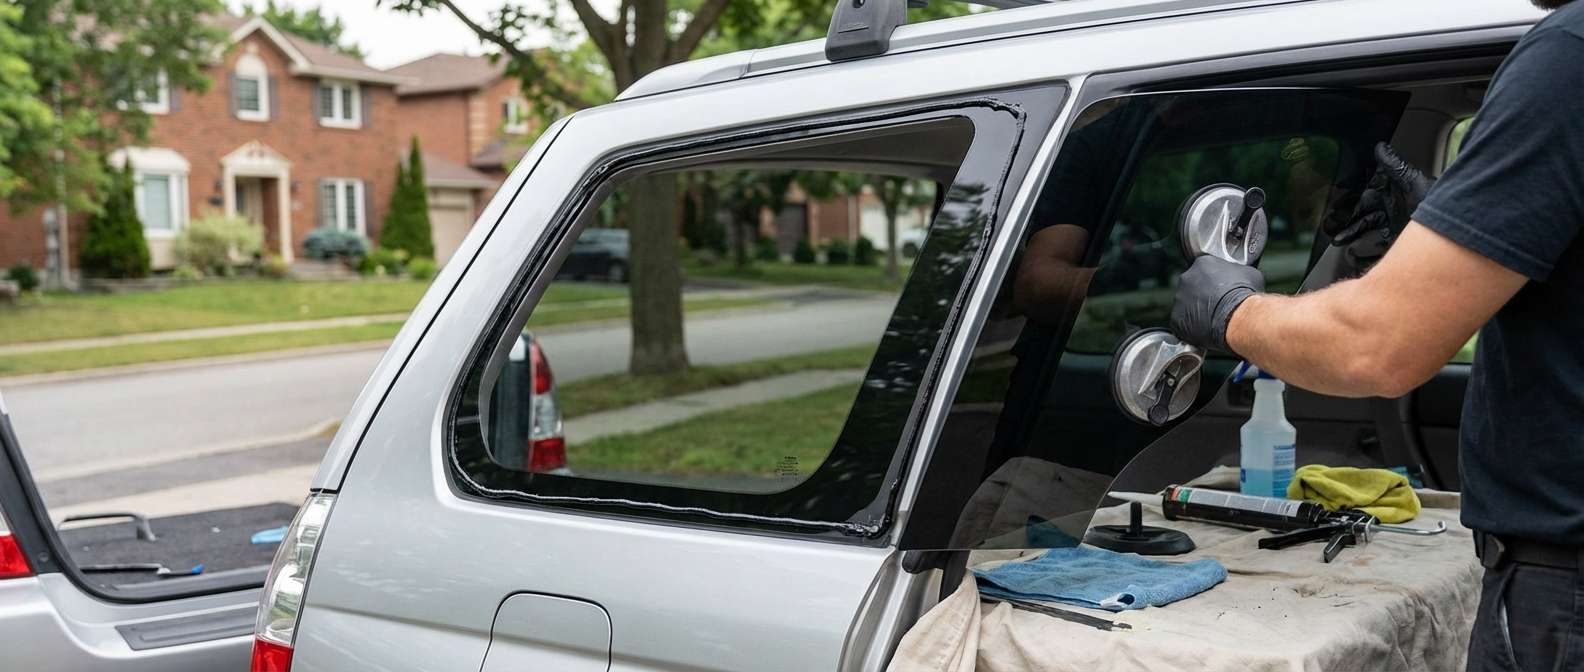
Subaru Forester 2003-2008 Quarter Glass Replacement: Restoring the Iconic SG Generation
The 2003-2008 Subaru Forester, widely celebrated by enthusiasts as the SG generation, is renowned for perfectly bridging the gap between a rugged utility vehicle and a nimble daily driver. One of its most defining architectural features is its expansive "greenhouse" design. The large rear quarter glass on these models provides unmatched panoramic visibility, effectively eliminating blind spots while flooding the cabin with natural light. However, when this crucial piece of auto glass is shattered by a rogue pebble on the highway, a break-in, or an unexpected collision, it leaves your vehicle's interior entirely exposed to the elements and security threats. At AlexWindshield, we understand the specific engineering of this beloved crossover, and we deliver unmatched precision in replacing its quarter glass.
As a Master Technician, I have personally serviced countless Subaru vehicles. The quarter glass on the 2003-2008 Forester requires a highly meticulous replacement process. Unlike a simple bolt-on part, this glass is urethane-bonded directly to the vehicle's body. A flawless installation is non-negotiable to maintain the structural integrity of the vehicle and to prevent water intrusion. Below, I will walk you through our comprehensive, step-by-step master replacement protocol that guarantees a factory-quality seal.
Why Your 2003-2008 Subaru Forester Demands Professional Auto Glass Expertise
The rear quarter glass of a Subaru Forester is manufactured using high-strength tempered glass. By design, when tempered glass sustains an impact that exceeds its tensile strength, it shatters into thousands of tiny, pebble-like pieces. While this is a critical safety feature engineered to prevent severe lacerations from large, jagged shards, it creates an absolute mess inside your vehicle's cargo area. Furthermore, the 2003-2008 models feature specific encapsulated moldings and interior C-pillar and D-pillar trims that must be delicately handled to avoid breaking aged plastic clips.
Choosing an amateur for this replacement often results in scratched body paint, damaged interior panels, annoying rattles from un-vacuumed glass shards, and ultimately, severe water leaks that can cause rust and electrical damage. AlexWindshield utilizes specialized tools and premium materials to ensure that your Forester is treated with the utmost care, returning it to you in pristine condition.
Master Technician's Guide: Step-by-Step Quarter Glass Replacement Process
Transparency is the cornerstone of our service. As a senior auto glass specialist, I ensure that every technician at AlexWindshield follows a strict, standardized operating procedure. Here is exactly how we perform a complete, A-to-Z quarter glass replacement on your 2003-2008 Subaru Forester.
Step 1: Vehicle Preparation and Interior Protection
Before any tools are lifted, we secure the work area. We lay down heavy-duty protective drop cloths over your Forester's rear seats, cargo floor, and bumper. We also apply low-tack protective tape around the exterior painted surfaces surrounding the quarter window to ensure absolutely no scratches occur during the extraction process. Proper preparation separates top-tier technicians from the rest.
Step 2: Interior Trim Removal and Comprehensive Glass Shard Extraction
Because the quarter glass is tempered, a break means thousands of shards have exploded into your vehicle. To perform a proper repair, we must safely remove the interior cargo panels, specifically the C-pillar and D-pillar trims.
- Precision Trim Removal: We use specialized, non-marring nylon pry tools to carefully disengage the retaining clips of the interior panels. Given that 2003-2008 Forester plastics can be brittle with age, this step requires a gentle, experienced touch.
- Deep Vacuuming: Once the interior structure is exposed, we deploy industrial-grade vacuums to extract all broken glass shards from the vehicle's interior. We vacuum the cargo floor, inside the seat crevices, and most importantly, deep inside the quarter panel cavities. Leaving glass behind guarantees infuriating rattles when driving, so we are obsessively thorough in our cleanup.
Step 3: Removing the Damaged Glass and Old Urethane
With the interior protected and clear of debris, we move to the exterior extraction. The quarter glass is bonded to the pinch weld using a strong polyurethane adhesive.
- Cutting the Bead: We utilize advanced wire-cutting systems or a specialized cold knife to slice through the original urethane bead from the outside in. This separates the encapsulated molding and any remaining glass chunks from the vehicle body.
- Trimming the Pinch Weld: Once the old glass is completely removed, we use a razor-sharp scraper to trim down the existing urethane bead to a flat, thin layer (about 1-2 millimeters). This remaining layer serves as an excellent base for the new adhesive to bond to, provided it is perfectly clean and intact.
Step 4: Pinch Weld Preparation and Cleaning
A flawless seal is only possible on a perfectly clean surface. We scrub the trimmed pinch weld and the surrounding body using specialized, alcohol-based auto glass cleaners. This removes any accumulated dirt, road grime, tree sap, or leftover oils. If we notice any minor scratches on the pinch weld that occurred prior to our arrival or during the cut-out, we immediately treat them to prevent future rust—a common issue in our local climate.
Step 5: Primer Application for Ultimate Adhesion
The chemical bonding process is critical for the structural integrity of your Subaru. We apply an advanced, fast-drying automotive glass primer.
- Body Primer: Applied to any exposed bare metal on the pinch weld to inhibit corrosion and promote adhesive grip.
- Glass Primer: Applied to the frit band (the black painted edge) of the brand-new quarter glass. This chemically activates the glass surface, ensuring the urethane will bond aggressively and permanently. We allow the primer to flash (dry) for the exact time specified by the manufacturer.
Step 6: High-Quality Urethane Adhesive Application
At AlexWindshield, we never compromise on materials. We load our electric caulking guns with premium, OEM-grade polyurethane adhesive. I carefully run a continuous, precision "V-bead" of urethane directly onto the prepared pinch weld. The V-shape is an industry-standard technique that ensures the adhesive compresses perfectly flat when the glass is applied, eliminating any chance of air gaps or water leaks.
Step 7: Precision Installation of the New Quarter Glass
With the urethane applied, time is of the essence. We utilize heavy-duty suction cups to handle the new quarter glass. Carefully aligning the glass with the specific contours of the 2003-2008 Forester's body lines, we press the glass firmly into the wet urethane bed. We apply specialized retention tape to hold the glass tightly in place, ensuring it does not shift while the adhesive undergoes its initial curing phase.
Step 8: Reassembly and Final Quality Inspection
While the urethane cures to a Safe Drive-Away Time (SDAT), we begin reassembly.
- Panel Reinstallation: We carefully reinstall the D-pillar and C-pillar interior trims, ensuring every clip snaps securely into its factory position.
- Final Cleanup: We perform a secondary vacuuming of the interior, wipe down all surrounding interior panels, and clean the newly installed quarter glass with streak-free, ammonia-free glass cleaner.
- Leak Test and Inspection: We conduct a thorough visual inspection of the urethane seal from both the inside and outside. We ensure the exterior encapsulation molding sits flush with the Subaru's bodywork, restoring the factory-fresh look of your SG Forester.
Premium Auto Glass Services Across the Greater Toronto Area (GTA)
Driving with a shattered quarter glass is not an option, especially with the unpredictable weather in Ontario. AlexWindshield brings the auto glass shop directly to your driveway, workplace, or garage. We are proud to offer our top-tier mobile auto glass repair and replacement services across the Greater Toronto Area (GTA).
Whether you are navigating the busy commercial districts of Vaughan, parked at a GO Transit station in Richmond Hill, or at your home in the suburban neighborhoods of Markham, our fully equipped mobile service vans will reach you. We understand that residents in the GTA require fast, reliable, and highly professional service. By choosing our mobile team, you save time, avoid the danger of driving a compromised vehicle, and receive dealership-level service right at your doorstep in Vaughan, Richmond Hill, Markham, and beyond.
The AlexWindshield Guarantee: Trusted Experts with a Lifetime Warranty
Your 2003-2008 Subaru Forester is a rugged, dependable machine that deserves nothing but the highest standard of care. When it comes to specialized auto glass replacements, technical expertise and uncompromising material quality are what separate a temporary fix from a permanent solution.
At AlexWindshield, our Master Technicians execute every step of the replacement process with absolute precision. From the initial extraction of broken glass shards to the final curing of our premium urethane adhesive, we guarantee a flawless installation. We stand proudly behind our craftsmanship, which is why every quarter glass replacement we perform comes backed by our comprehensive Lifetime Warranty against leaks, wind noise, and manufacturer defects.
Do not let a broken window compromise your safety or your Subaru's interior. Trust the leading mobile auto glass experts in the GTA. Contact AlexWindshield today to schedule your seamless, professional quarter glass replacement and get back on the road with total confidence.


