Oversized Glass Failures and Motor Issues in Montero Roofs
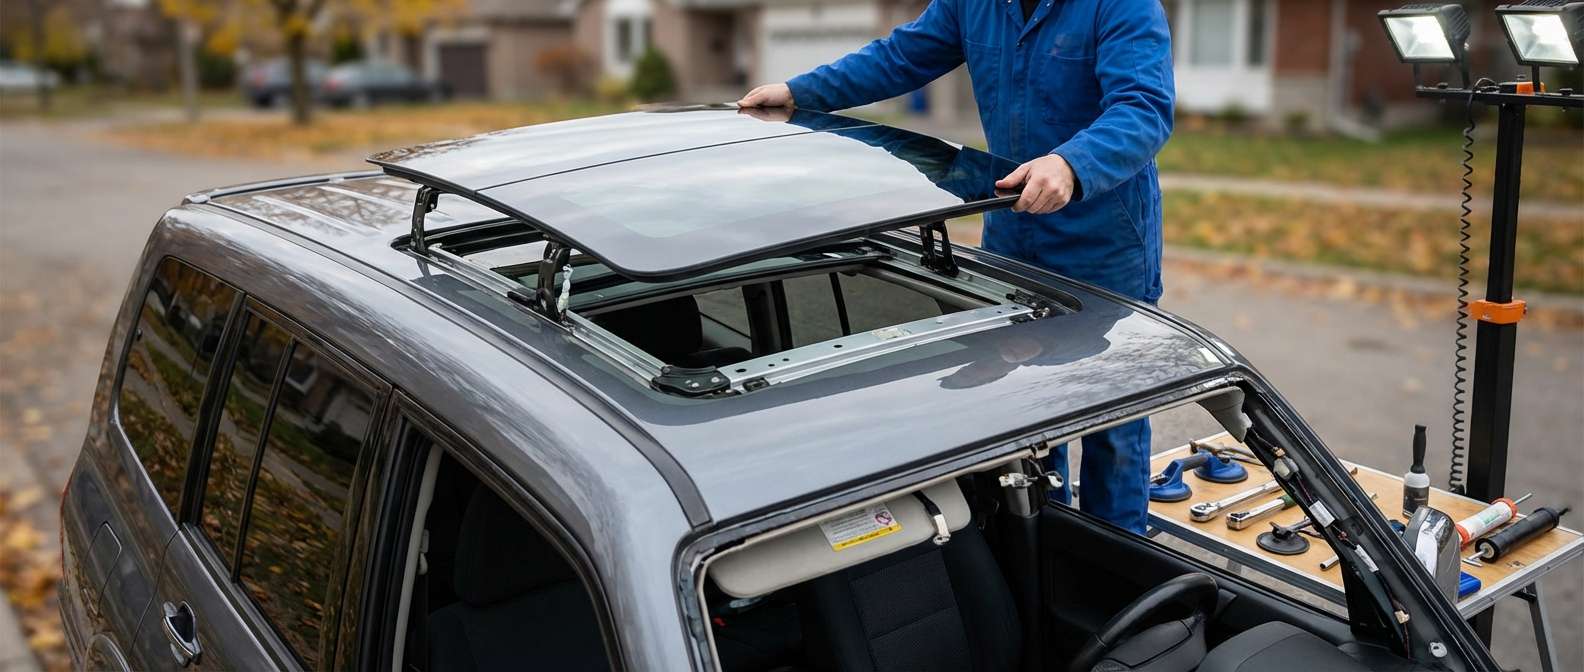
The massive electric moonroof on this vehicle is one of its standout features, but its sheer size introduces specific structural and mechanical issues. On the North American V75W and V77W models, this panoramic-style panel came standard on the Limited trim and as an option on the XLS. In owner communities and forums, the most common complaint is a sunroof that chatters, groans, or suddenly stops sliding altogether. While many assume the drive cables have snapped, the usual culprit is the drive motor mounting hardware working itself loose over rough washboard roads. When the motor tilts away from the drive gears, it strips the tooth engagement, making an aggressive clicking sound while the heavy panel stays put.
Another frequent issue is water pooling in the footwells or soaking into the A-pillars. The cassette housing relies on four corner drain spouts routed into rubber hoses running down the front pillars and the rear quarters. Because of the sheer area of the roof aperture, debris collects quickly along the front tray, blocking the forward ports and causing water to spill past the inner headliner flange instead of draining underneath the vehicle. If you notice your roof glass binding or if water begins dripping from the grab handles, I can typically arrive at your location roughly an hour after you get in touch to diagnose the assembly and handle the replacement.
Mechanical Fastening and Production Revisions
Unlike modern panoramic roofs that rely on expansive urethane beads glued directly to the sheet metal, this assembly uses a modular mechanical design. The tempered safety glass panel is held to the side lift linkages using six specific machine screws (part MR523601). This allows the glass lid to be serviced without dropping the entire inner cassette or cutting through structural adhesives, provided the internal tracks and sliding sunshade are undamaged.
Mitsubishi updated the glass lid assembly mid-cycle, meaning replacement panels must match the year break of your vehicle:
| Model Years | OEM Assembly Reference | Key Hardware Detail |
|---|---|---|
| 2001–2002 (Early V75W) | MR462381 | Includes pre-fitted perimeter seal MR523599; secured by 6 side bracket screws |
| 2003–2006 (Updated V77W) | MN142564 | Updated frame carrier design; integrated deep solar tint |
The panel does not house any embedded wire grids, antennas, or rain sensors, but it does carry the factory perimeter weatherstrip pre-mounted to its edge. Replacing the glass requires precise height alignment against the outer roof skin; if the panel sits even two millimeters too low, wind noise becomes deafening at highway speeds, and if it sits too high, it catches the pop-up aerodynamic wind deflector when closing from the tilt position.
Post-Replacement Inspection Checklist
Whenever a replacement glass panel is bolted into the track carriage or the drive motor has been serviced, verify the following points before driving:
- Electronic anti-pinch reset: Confirm the switch re-initialization routine was executed so the panel closes completely without automatically reversing when it reaches the front wind deflector.
- Panel height alignment: Check that the glass sits flush with the front roof edge and roughly one millimeter above the trailing roof skin to deflect airflow cleanly.
- Weatherstrip seal compression: Inspect the outer rubber edge around the entire perimeter to ensure it is not pinched, buckled, or folded into the track channel.
- Wind deflector clearance: Slide the roof open and watch the front spring-loaded deflector rise freely, then ensure it folds flat into its recess without contacting the glass bracket as the roof slides forward.
- Manual sunshade movement: Slide the interior fabric sunshade back and forth by hand to verify it glides smoothly along its lower guides without catching on the side bracket screws.


