Expert Door Glass Replacement for the 2006-2012 Mitsubishi Eclipse
The fourth-generation Mitsubishi Eclipse (2006-2012) brought back the muscular, aggressive curves that automotive enthusiasts originally fell in love with, but its signature heavy, frameless door windows are notorious for requiring absolute precision when serviced. Whether you drive the sleek Coupe or the breezy Spyder Convertible, these frameless windows form a critical seal against the vehicle's weatherstripping. When an accident, vandalism, or harsh weather leaves you with a shattered side window, it completely exposes your beautifully designed interior to the unpredictable elements and poses a massive security risk. At AlexWindshield, we do not just swap out parts; we meticulously restore the quiet, watertight, and secure cabin environment your Eclipse was engineered to provide.
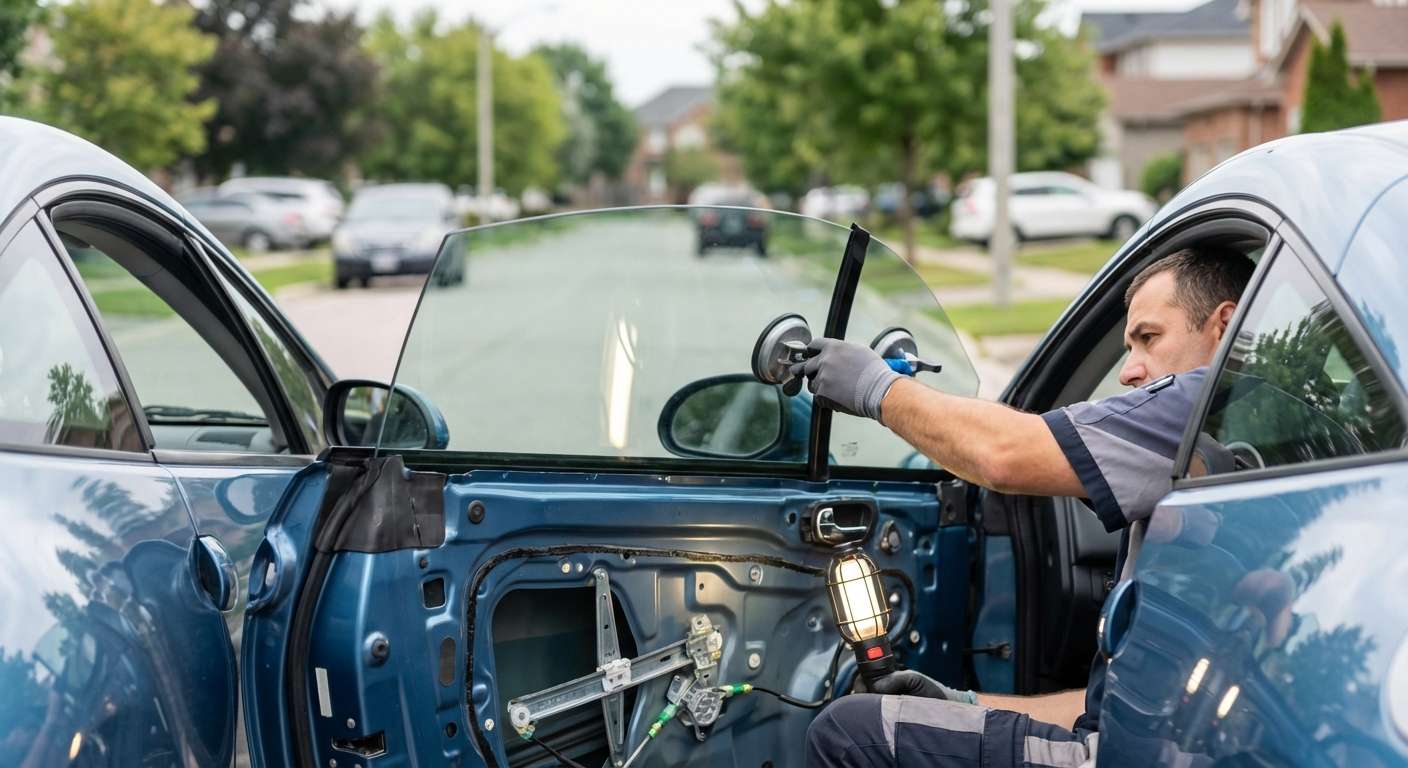
Replacing the door glass on a 2006-2012 Mitsubishi Eclipse is a highly technical procedure that goes far beyond a standard window swap. Because the Eclipse utilizes a frameless door design, the glass must be pitched, angled, and bonded with absolute accuracy. As your dedicated Master Technicians, we ensure that every millimeter of the new glass aligns perfectly with the factory weather seals, eliminating the dreaded highway wind whistle and preventing water intrusion.
Unmatched Mobile Auto Glass Services in the GTA
Driving with a shattered window is dangerous, uncomfortable, and often illegal. That is why AlexWindshield operates a fleet of fully equipped mobile service vehicles designed to bring dealership-level auto glass repair directly to you. We proudly serve the entire Greater Toronto Area (GTA), with specialized rapid-response routes dedicated to our clients in Vaughan, Richmond Hill, and Markham.
Whether your Eclipse is parked in a residential driveway in Vaughan, a corporate parking lot in Richmond Hill, or outside a shopping mall in Markham, our mobile technicians arrive fully prepared. We bring the exact 2006-2012 Eclipse door glass, all necessary specialized tools, premium adhesives, and heavy-duty shop vacuums right to your location, ensuring your day is interrupted as little as possible.
The AlexWindshield A-to-Z Door Glass Replacement Process
As a Master Technician, I believe in complete transparency. Our clients deserve to know exactly how their beloved Mitsubishi Eclipse is being treated. We follow a rigorous, step-by-step technical protocol to ensure every door glass replacement meets and exceeds original equipment manufacturer (OEM) standards.
Step 1: Meticulous Vehicle Preparation and Interior Protection
The moment our technician arrives on-site, the first priority is protecting the interior of your Mitsubishi Eclipse. Broken glass is highly abrasive and can easily permanently scratch leather seats, tear fabric, or damage the center console. We begin by:
- Draping thick, protective heavy-duty blankets over the driver or passenger seat, steering wheel, and floor mats.
- Applying specialized, low-tack automotive masking tape around the exterior painted surfaces of the door frame to prevent accidental scratches during the extraction and installation process.
- Isolating the work area to ensure no rogue glass shards are blown into the vehicle's interior by the wind during the repair.
Step 2: Safe Removal of Door Panels and Component Disassembly
To access the internal window regulator and the shattered remains of the old glass, the interior door card must be carefully removed. The 2006-2012 Eclipse has specific hidden mounting points that require expert knowledge to avoid breaking brittle interior plastics.
- We carefully pry off the interior mirror cover and the plastic bezel surrounding the interior door release handle.
- Using specialized non-marring trim tools, we extract the hidden Philips-head screws located behind the armrest pull cup and the door latch.
- We gently pop the perimeter retaining clips, lifting the heavy door panel away from the frame while simultaneously disconnecting the master power window switch harness, the door lock actuator cables, and the speaker wires.
- The factory vapor barrier (the plastic weather shield glued to the inner door shell) is carefully peeled back using a heat gun, ensuring we preserve it to prevent future water leaks into the cabin.
Step 3: Comprehensive Vacuuming of Broken Glass Shards
When a door glass shatters, thousands of tiny, razor-sharp pieces fall directly into the hollow cavity of the door shell. Leaving these behind is the number one cause of post-installation rattling, speaker damage, and rust. At AlexWindshield, we consider this one of the most critical steps in the entire process.
- We utilize high-powered, industrial-grade shop vacuums equipped with specialized micro-crevice tools to reach deep into the bottom of the Eclipse's door shell.
- We meticulously vacuum the rubber window run channels, ensuring no microscopic glass fragments are embedded in the track, which would instantly scratch the brand-new glass upon its first use.
- We extract all glass shards from the window regulator gear assembly, the door speaker magnet, and the interior floorboards.
- Finally, we clear out the factory weep holes (drainage holes) at the bottom of the door shell. If glass blocks these holes, rainwater will pool inside the door, eventually causing catastrophic rust and electrical failure.
Step 4: Surface Cleaning, Primer Application, and Adhesive Use
While urethane adhesive is traditionally associated with windshields, the frameless window design of the 2006-2012 Mitsubishi Eclipse Coupe and Convertible often requires unique bonding for the window regulator mounting brackets and weather shields. To ensure a flawless, long-lasting repair, we follow strict chemical preparation protocols:
- Surface Cleaning: We thoroughly clean the glass mounting points, the window regulator brackets, and the interior door shell using an alcohol-based, lint-free automotive surface prep cleaner. All dirt, old grease, and factory residue are stripped away.
- Primer Application: We apply a specialized bonding primer to the specific glass-to-bracket contact points. This primer chemically activates the surface of the tempered glass and the metal/plastic regulator clips, ensuring an unbreakable bond.
- High-Quality Adhesive Application: We use a high-quality, industrial automotive adhesive to securely bond the new glass into the regulator mounting tabs. This step is crucial for the Eclipse; because there is no upper window frame to support the glass, the bottom adhesive bond must absorb the full shock of the heavy door slamming shut. We also apply a fresh bead of high-quality butyl adhesive to reseal the vapor barrier tightly to the door frame, guaranteeing zero water leaks.
Step 5: Precision Installation and Alignment of the New Door Glass
Once the brackets are primed and glued, the new, OEM-quality tempered door glass is ready to be installed.
- The glass is carefully angled and lowered into the door cavity, slotting perfectly into the front and rear vertical run channels.
- We lower the glass into the freshly prepared regulator brackets, tightening the 10mm mounting bolts to the exact factory torque specifications.
- The Frameless Adjustment: This is where Master Technician expertise shines. We perform a complex "tip-in" and "height" adjustment. Using the built-in mechanical adjustment screws on the Eclipse's regulator, we tilt the glass inward so that it presses firmly and evenly against the convertible top or coupe roofline weatherstripping. Without this precise calibration, the vehicle will suffer from severe wind noise and highway rain leaks.
Step 6: System Testing, Reassembly, and Final Quality Check
Before putting the interior back together, we rigorously test the window's performance.
- We reconnect the window switch and cycle the glass up and down multiple times. We listen for any binding, grinding, or strain on the window motor.
- We perform a targeted water pressure test along the exterior seals to guarantee the new alignment is 100% watertight.
- Once validated, we carefully remount the vapor barrier, reattach the interior door panel, secure all hidden screws, and snap the trim bezels perfectly back into place.
- The new glass is then polished inside and out using a streak-free, tint-safe glass cleaner.
Your Trusted Local Auto Glass Experts in the GTA
When you drive a beautifully designed vehicle like the Mitsubishi Eclipse, you shouldn't have to settle for sub-par, rushed repairs. AlexWindshield has built a reputation across the GTA for combining technical mastery with ultimate convenience. We know that residents of Vaughan demand prompt service to get back on the busy Highway 400. We know our clients in Richmond Hill value meticulous craftsmanship for their premium vehicles. And we understand that commuters in Markham need reliable, on-the-spot mobile service that works around their busy tech-sector schedules.
By bringing our state-of-the-art mobile auto glass shop to your driveway, we completely eliminate the need for expensive towing or dangerous drives across town with a plastic bag taped over your window.
Trust AlexWindshield: Backed by a Lifetime Warranty
Your vehicle's integrity and your personal safety are our highest priorities. Replacing the complex frameless door glass on a 2006-2012 Mitsubishi Eclipse Coupe or Convertible is a job that demands the touch of a Master Technician. At AlexWindshield, we are so confident in our precision techniques, our high-quality adhesives, and our OEM-standard glass that we back every single installation with an industry-leading Lifetime Warranty. This warranty covers any issues related to workmanship, air leaks, or water leaks for as long as you own your vehicle.
Don't let a shattered window ruin the driving experience of your Eclipse. For unmatched expertise, superior customer service, and fast mobile repair anywhere in the GTA, contact AlexWindshield today and experience the gold standard in auto glass replacement.


