The Intersection of Kodo Design and Structural Integrity: Restoring Your Mazda CX-9
The 2016-2023 Mazda CX-9 redefined the three-row midsize SUV segment with its flowing "Kodo: Soul of Motion" design philosophy. The sweeping rear liftgate and precisely angled rear window are not just aesthetic triumphs; they are vital aerodynamic and structural components of the vehicle. However, when a rogue pebble on the highway, a severe temperature fluctuation, or an unfortunate impact shatters this crucial piece of glass, the pristine look and safety of your premium SUV are instantly compromised. Unlike laminated front windshields, the back glass of your Mazda CX-9 is constructed from tempered safety glass. When breached, it does not merely crack—it detonates into thousands of granular pieces, exposing your luxurious interior to the elements.
As a Master Technician at AlexWindshield, I have witnessed firsthand the panic and inconvenience a shattered rear window causes families. You need more than just a quick fix; you require a meticulous, factory-standard Mazda CX-9 back glass replacement that respects the sophisticated engineering of your vehicle. From managing the integrated defroster grids to ensuring the rear wiper assembly functions flawlessly, our comprehensive replacement protocol guarantees that your CX-9 is returned to its showroom condition.
Trusted Local Experts: AlexWindshield Servicing the Greater Toronto Area
Navigating the busy corridors of the Greater Toronto Area (GTA) with a missing or taped-up rear window is both a safety hazard and an uncomfortable experience. Exhaust fumes, road noise, and unpredictable Ontario weather can quickly turn a daily commute into a nightmare. At AlexWindshield, we eliminate the stress of driving an unsafe vehicle by bringing our specialized auto glass shop directly to your driveway or workplace.
We proudly offer priority mobile auto glass replacement services across the GTA, with dedicated dispatch zones specifically highlighting Vaughan, Richmond Hill, and Markham. Whether you are parked near the bustling Vaughan Mills, at an office complex in Markham's tech sector, or in a quiet residential neighborhood in Richmond Hill, our fully equipped mobile service vans arrive on site with the exact OEM-quality glass and premium adhesives required for your 2016-2023 Mazda CX-9.
Understanding the Complexities of the 2016-2023 Mazda CX-9 Rear Glass
Replacing the back glass on the second-generation Mazda CX-9 is not a task for amateurs. Depending on your specific trim—whether it is the GS, GS-L, GT, or the top-tier Signature—the rear liftgate glass incorporates several integrated technologies that must be expertly handled during the replacement process. Key features we manage include:
- Advanced Defroster Grids: Essential for cutting through ice and fog during brutal Canadian winters, requiring precise electrical reconnections.
- Privacy Tint Matching: Ensuring the new glass matches the factory solar management and privacy tint of the rear passenger windows.
- Integrated Rear Wiper Assembly: The wiper motor shaft passes directly through a specialized aperture in the glass, necessitating careful disassembly and re-sealing.
- Upper Spoiler and Third Brake Light: The aerodynamic spoiler housing the high-mount stop lamp sits directly above the glass edge, leaving zero margin for error during installation.
The Master Technician's Step-by-Step Back Glass Replacement Process
At AlexWindshield, we adhere to a strict, rigorous replacement protocol. This ensures that every Mazda CX-9 auto glass replacement meets and exceeds original equipment manufacturer (OEM) safety standards. Here is the detailed A to Z process our certified technicians execute.
Step 1: Comprehensive Interior Protection and Damage Assessment
The very first step is safeguarding the luxurious interior of your CX-9. Tempered glass explosions send shards flying into the third-row seating, cargo area, and even the second-row floorboards. We begin by laying down heavy-duty protective drop cloths over the leather upholstery, cargo floor, and exterior paint surrounding the liftgate. We tape off the edges of the liftgate frame to prevent any accidental scratches to the clear coat while we work. A thorough visual inspection is then conducted to assess any collateral damage to the rear wiper motor, spoiler, or the painted pinch weld.
Step 2: Liftgate Panel Disassembly and Hardware Removal
Unlike a front windshield, a back glass replacement requires significant interior disassembly. We carefully unclip and remove the interior plastic trim panels on the inside of the rear liftgate. This step is critical to access the electrical harnesses for the rear defroster and the wiper motor. Using specialized trim-removal tools to prevent breaking the fragile plastic retaining clips, we expose the inner metal skeleton of the liftgate. We then unbolt the rear wiper arm from the exterior, disconnect the wiper motor assembly from the inside, and safely store these components.
Step 3: Meticulous Glass Extraction and Deep Interior Vacuuming
This is arguably the most vital step in a rear window service. Tempered glass shards fall down inside the hollow cavity of the liftgate door. If left uncleaned, these pieces will rattle every time you close the trunk or drive over a bump, and they can even jam the electronic liftgate latch mechanism. We use specialized, high-powered industrial vacuums with flexible crevice tools to extract every single piece of broken glass.
- Interior Cabin: We thoroughly vacuum the third-row seats, cup holders, carpet, and cargo area.
- Liftgate Cavity: We vacuum deep inside the metal liftgate door shell, shaking the door gently to dislodge any hidden shards trapped in the lower seams.
- Frame Clearing: We remove the larger remaining chunks of glass that are still stubbornly glued to the frame.
Step 4: Pinch Weld Preparation and Primer Application
With the shattered glass fully cleared, we focus on the vehicle's pinch weld—the metal frame where the glass adheres. Using a professional cold knife and specialized scraper tools, we trim down the old polyurethane adhesive bead to a perfectly smooth, thin layer (about 1-2 millimeters thick). This provides the optimal base for the new adhesive to bond. We then use a high-grade chemical glass prep solvent to clean the area of all dirt, dust, and microscopic debris. If there are any bare metal scratches on the pinch weld, we apply an anti-corrosion black glass primer to prevent future rust. The black frit band on the new OEM-quality glass is also treated with a glass-activating primer to ensure maximum adhesion.
Step 5: Precision Installation Using High-Quality Adhesive
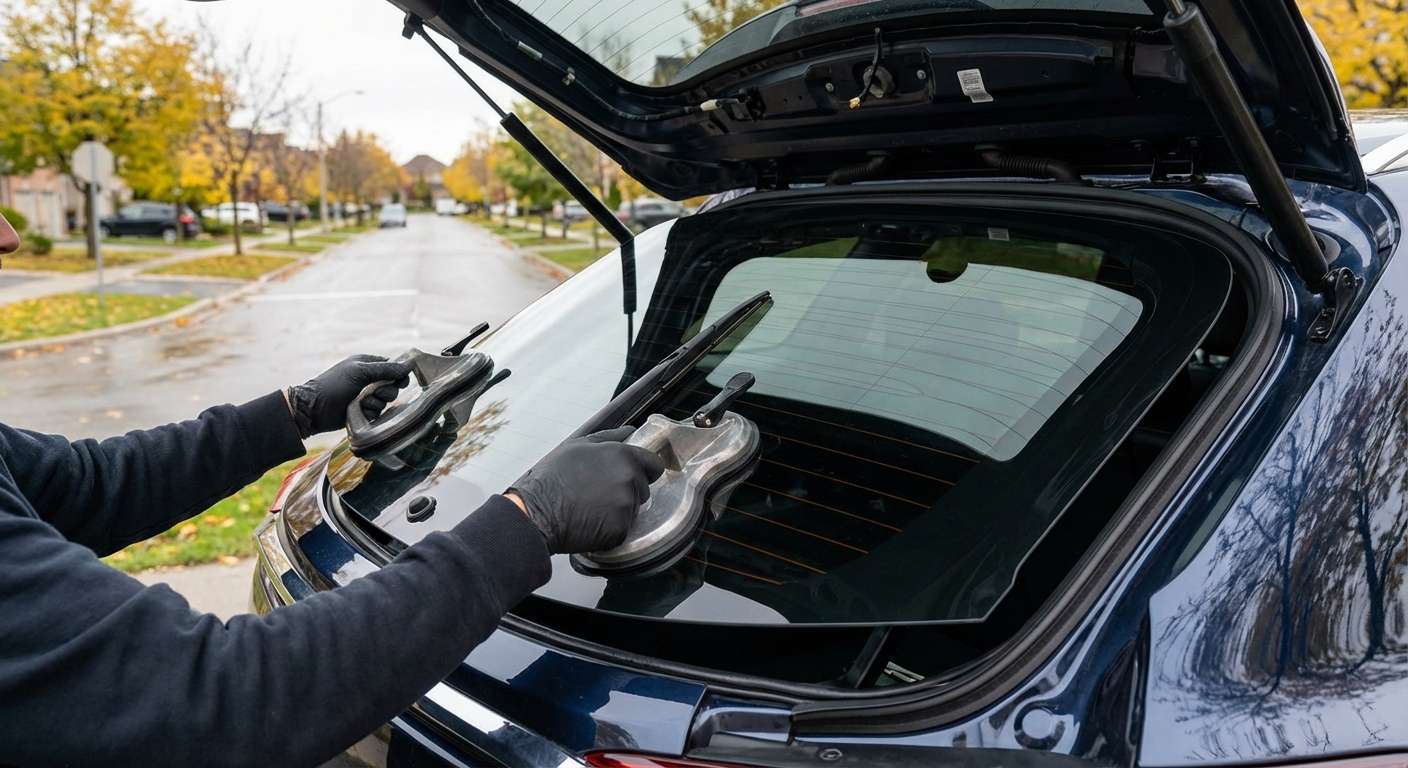
A flawless seal dictates the longevity of the replacement. Using an electric caulking gun, we apply a consistent, V-notch bead of premium, fast-curing polyurethane auto glass adhesive around the entire perimeter of the pinch weld. This high-quality adhesive is chemically engineered to provide exceptional tensile strength and structural support in the event of a rollover. Two of our technicians then use heavy-duty suction cup lifters to carefully hoist the new Mazda CX-9 back glass. With absolute precision, the glass is gently lowered into the fresh urethane. We press firmly along the edges to ensure a watertight seal and apply specialized retention tape to hold the glass perfectly in place while the curing process begins.
Step 6: Hardware Reassembly and Electrical Reconnection
Once the glass is set, we immediately begin the reassembly process. The rear wiper motor is re-bolted into place, ensuring the shaft aligns perfectly through the new glass aperture with its protective rubber grommet. We reconnect the defroster grid wiring harnesses and test the electrical current to ensure your rear defogger will work flawlessly. The exterior wiper arm is reattached and calibrated to its correct resting position. Finally, we meticulously snap the interior liftgate trim panels back into place, leaving the inside of your CX-9 looking exactly as it did before the incident.
Why Immediate Replacement is Crucial for Your SUV
Driving with a missing back glass in your Mazda CX-9 is not just an aesthetic issue. The rear window is a structural element of the liftgate. Without it, the cabin is vulnerable to carbon monoxide exhaust entering from the tailpipes, creating a severe health risk for you and your passengers. Furthermore, open exposure allows rain, snow, and humidity to ravage your interior electronics and premium leather seating. Promptly securing a professional auto glass replacement protects your vehicle's resale value and the health of your family.
Your Premier Mobile Auto Glass Service in the GTA
Finding the time to visit an auto glass shop can be difficult when you are juggling work, family, and daily errands. AlexWindshield eliminates the hassle entirely. Our mobile auto glass fleet is fully equipped to perform this complex, high-level technical replacement right in your driveway. We proudly serve the entire Greater Toronto Area (GTA), with rapid response times available for our neighbors in Vaughan, Richmond Hill, and Markham. We bring the expertise, the premium materials, and the professional vacuuming equipment directly to you, so you can carry on with your day uninterrupted.
Trust AlexWindshield for Your Auto Glass Needs
Do not let a shattered rear window disrupt your life or compromise the luxury of your 2016-2023 Mazda CX-9. When you choose AlexWindshield, you are choosing unmatched technical expertise, meticulous attention to detail, and a commitment to customer safety. We stand firmly behind the quality of our materials and the precision of our Master Technicians.
Every back glass replacement we perform is backed by our comprehensive Lifetime Warranty against air leaks, water leaks, and any defects in workmanship. We guarantee that your new auto glass will perform exactly as the manufacturer intended for as long as you own your vehicle. If you are located in the GTA, Vaughan, Richmond Hill, or Markham, contact AlexWindshield today to schedule your mobile Mazda CX-9 back glass replacement and experience the highest standard of auto glass service in Ontario.


