The Rugged Revival: Preserving the 2008-2012 Jeep Liberty (KK) Cargo Integrity
The 2008-2012 Jeep Liberty (KK generation) successfully revived the classic, ruggedly boxy styling of the legendary Jeep Cherokee. With its squared-off roofline, robust flared fenders, and distinctive rear cargo area, it quickly became a staple for both urban commuters and weekend off-road enthusiasts. However, this iconic, utilitarian design features large rear quarter glass panels that are highly exposed to potential hazards. Whether from a targeted vehicle break-in, flying debris on the highway, or an unexpected tree branch on a rough trail, a shattered quarter glass instantly compromises the security, structural integrity, and weatherproofing of your cherished Jeep Liberty.
Unlike a simple rolled-down door window, the quarter glass on the Jeep Liberty KK is a fixed, encapsulated panel that is directly bonded to the vehicle's body using high-strength urethane. When it breaks, the tempered glass shatters into thousands of tiny, sharp cubes that scatter throughout the rear cargo area, lodging themselves deep into the interior trim, carpeting, and under the rear seats. Addressing this specific replacement requires the meticulous precision and technical expertise of a seasoned professional.
Premier Mobile Quarter Glass Replacement Across the Greater Toronto Area (GTA)
Driving a vehicle with a blown-out quarter window is not just uncomfortable; it is fundamentally unsafe. At AlexWindshield, we understand that your time is valuable and that a shattered window is a stressful emergency. That is why we bring our state-of-the-art, fully equipped mobile auto glass shop directly to your driveway, office, or workplace.
Our premium mobile quarter glass replacement services are available throughout the entire Greater Toronto Area (GTA). We specifically cater to the rapidly growing municipalities of Vaughan, Richmond Hill, and Markham. Whether you are parked near the Vaughan Mills shopping center, working in the tech hubs of Markham, or residing in the quiet suburban streets of Richmond Hill, our master technicians arrive promptly with the exact OEM-quality replacement glass required for your 2008-2012 Jeep Liberty.
Master Technician's Guide: Step-by-Step Jeep Liberty (KK) Quarter Glass Replacement
As a Senior Auto Glass Technician, I approach the Jeep Liberty quarter glass replacement with a strict, methodical process. Because this glass is urethane-bonded and situated next to interior cargo panels, the replacement is far more complex than simply dropping in a new pane. Here is our comprehensive, A-to-Z technical workflow to ensure a factory-quality seal and a pristine vehicle interior.
Step 1: Pre-Installation Inspection and Interior Protection
Before any tools are utilized, we perform a comprehensive walk-around of the vehicle to assess the damage and inspect the surrounding paintwork for any pre-existing scratches or dents. Because tempered quarter glass explodes upon impact, our first priority is protecting the vehicle’s interior and exterior. We lay down heavy-duty protective blankets over the rear bumper and exterior quarter panel. Inside the Jeep Liberty, we cover the rear seats and the cargo floor to prevent any further spread of microscopic glass dust during the extraction process.
Step 2: Interior Trim Removal and Extensive Glass Vacuuming
The rear quarter glass on the KK Liberty sits flush against the interior C-pillar and D-pillar plastic trim panels. To ensure a perfect installation and to access all hidden shards of glass, we must temporarily loosen or remove these interior panels.
- Trim Removal: Using specialized, non-marring nylon pry tools, we carefully unclip the upper and lower interior cargo trim panels, ensuring the retaining clips are preserved.
- Deep Vacuuming: This is a critical step. Tempered glass shards fall deep into the inner body cavities and wheel well gaps. Using a high-powered industrial shop vacuum with specialized crevice attachments, we extract every single shard of broken glass from the cargo area, the tracks, beneath the folded rear seats, and inside the metal body panels. Leaving even one shard behind can cause annoying rattles while driving.
Step 3: Removing the Old Glass Encapsulation and Urethane
With the interior safely exposed and cleaned, we turn our attention to the exterior pinch weld. The remaining jagged pieces of glass are still firmly held in place by the factory polyurethane adhesive.
- Cutting the Bead: Using an automated cold knife, power exacto tool, or wire-cutting system, we meticulously slice through the existing urethane bead from the outside of the vehicle.
- Protecting the Paint: We slide a protective barrier between the cutting blade and the exterior painted body to ensure zero damage to the Jeep's clear coat.
- Extraction: The remaining perimeter of broken glass and encapsulation rubber is pulled away from the vehicle frame.
Step 4: Pinch Weld Preparation and Cleaning
A new piece of auto glass is only as secure as the surface it is bonded to. Once the old quarter glass frame is removed, we must prepare the vehicle's metal frame—known as the pinch weld.
- Trimming the Old Urethane: We use a razor-sharp scraper to carefully trim down the old factory urethane, leaving a smooth, flat baseline layer measuring approximately 1 to 2 millimeters thick. This existing urethane provides an excellent base for the new adhesive to bond with.
- Decontamination: The entire perimeter is cleaned with a specialized, alcohol-based auto glass cleaner to remove dust, dirt, grease, and any microscopic glass dust that could compromise the chemical bond.
Step 5: Applying High-Performance Primer
The priming process prevents future rust and ensures maximum adhesion. On an off-road capable SUV like the Jeep Liberty, preventing water leaks and rust is non-negotiable.
- Treating Bare Metal: If any minor scratches occurred to the painted pinch weld during the removal process, we apply a specialized metal primer to seal the exposed metal and prevent future oxidation or rust.
- Glass Preparation: The replacement quarter glass—which features a black ceramic border known as the frit band—is rigorously cleaned. We then use a wool dauber to apply a specialized glass-and-frit primer to the bonding edge of the new glass. This activates the ceramic band to accept the urethane adhesive.
Step 6: Precision Urethane Adhesive Application
With both the vehicle body and the new quarter glass meticulously primed and prepped, it is time for the structural adhesive. We utilize a premium, fast-curing, high-modulus, non-conductive automotive urethane.
- Using an electric caulking gun, we apply a continuous, uniform V-notch bead of urethane directly on top of the trimmed factory urethane track.
- The V-notch shape is a critical technician standard; as the glass is pressed into place, the tip of the "V" collapses, spreading the adhesive perfectly without any internal air pockets or external squeezing, guaranteeing a permanent, waterproof seal.
Step 7: Setting the New Quarter Glass
Because the urethane begins to cross-link and cure rapidly, the installation must be precise.
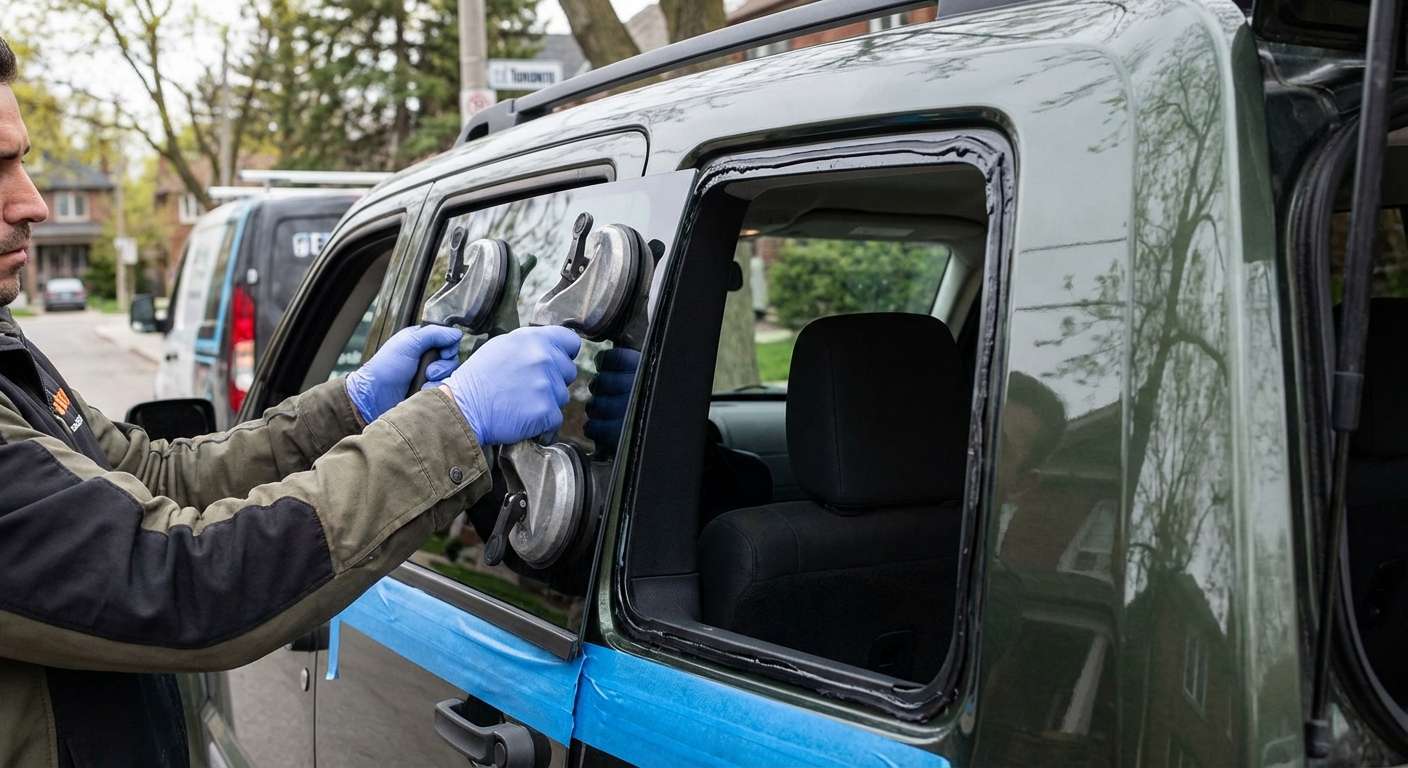
- Equipped with heavy-duty suction cups, we carefully align the new quarter glass with the Jeep Liberty’s body contours.
- The glass is gently pressed into the urethane bed. We use specialized alignment pins and factory reference marks to ensure the gap around the quarter panel is perfectly symmetrical.
- Once set, we apply specialized retention tape to hold the glass firmly in place and prevent it from shifting downwards while the urethane chemically cures.
Step 8: Reassembly, Final Cleanup, and Safe Drive-Away Verification
The physical installation of the glass is complete, but our service is not finished until the vehicle is restored to a pristine condition.
- Reassembling Interior Trim: We carefully reinstall the D-pillar and C-pillar interior cargo plastics, ensuring every clip snaps back securely into its original factory position.
- Secondary Vacuuming: We run the industrial vacuum through the Jeep Liberty’s cargo area a second time to guarantee absolute perfection.
- Final Polish: The newly installed quarter glass is treated with a streak-free, foaming glass cleaner, polished to a brilliant shine inside and out.
- Cure Time Instructions: We provide the vehicle owner with strict Safe Drive-Away Time (SDAT) instructions, typically requiring the vehicle to remain stationary for an hour while the structural urethane achieves safety-rated hardness.
Why Choose AlexWindshield for Your Jeep Liberty (KK) Auto Glass Needs?
Replacing a bonded quarter window requires far more than just swapping out glass; it requires a deep understanding of automotive structural adhesives, precise interior trim handling, and an obsessive attention to detail regarding post-breakage cleanup. When you trust AlexWindshield with your 2008-2012 Jeep Liberty, you are guaranteed industry-leading craftsmanship.
- Lifetime Warranty: We proudly stand behind our work. Every installation is backed by an industry-leading Lifetime Warranty covering air leaks, water leaks, and manufacturer defects in the glass.
- Unmatched Local Convenience: We bring our fully mobile auto glass shop to you. Whether you are at home in Vaughan, at a business park in Markham, or visiting family in Richmond Hill, our GTA-wide mobile service means you never have to drive an unsafe vehicle to a garage.
- Master Technician Expertise: Our technicians are highly trained, fully certified, and strictly adhere to all Auto Glass Replacement Safety Standards (AGRSS).
Book Your Auto Glass Replacement Today
Do not let a shattered quarter glass expose your Jeep Liberty to the unpredictable Greater Toronto Area weather or compromise the security of your belongings. Experience a seamless, professional, and stress-free auto glass replacement. Contact AlexWindshield today to schedule your mobile service and let our master technicians restore your vehicle to factory perfection.


