Restoring the British Elegance: Jaguar X-Type (2002-2008) Windshield Replacement
The Jaguar X-Type, produced between 2002 and 2008, represented a bold and beautiful step for the legendary British marque, blending the brand's unmistakable grace with everyday all-wheel-drive practicality. From its fluted hood to its signature quad halogen headlamps and the iconic leaping cat ornament, the X-Type carries a distinct aesthetic that demands respect. However, preserving that sophisticated driving experience means paying close attention to the structural integrity of the vehicle. When the windshield of your Jaguar sustains irreparable damage—whether from a stray stone or the harsh temperature fluctuations of a Canadian winter—restoring its safety and acoustic comfort is not a job for amateurs. At AlexWindshield, we combine Old World craftsmanship with cutting-edge auto glass technology to ensure your Jaguar remains a masterpiece on the road.
Replacing the windshield on an early 2000s Jaguar involves navigating unique luxury features. Many X-Type models were heavily optioned with highly specific glass components, including heated windshields featuring finely embedded tungsten wire meshes (quick-clear technology), acoustic dampening layers for whisper-quiet highway cruising, and specialized electrochromic mirror mounts. Handling these complex electrical connections and intricate moldings requires the steady hand of a Master Technician. We do not just replace auto glass; we restore the factory-level safety and luxury of your Jaguar X-Type.
Premium Mobile Auto Glass Services Across the Greater Toronto Area (GTA)
Dealing with a cracked or shattered windshield is stressful enough without the added burden of navigating through heavy traffic to sit in a waiting room. AlexWindshield eliminates this hassle by offering a premium, fully equipped mobile service fleet that brings our Master Technicians directly to your driveway, office parking lot, or garage anywhere in the Greater Toronto Area (GTA).
We proudly serve auto enthusiasts and daily commuters across the region, specifically highlighting our rapid-response service areas in Vaughan, Richmond Hill, and Markham. Whether you are parked near the busy commercial hubs of Highway 7 in Richmond Hill, residing in the quiet suburban enclaves of Markham, or working near the bustling industrial sectors of Vaughan, our mobile units arrive with exactly the right Jaguar-specific glass, premium urethanes, and advanced tools required for a flawless installation. We understand the local driving conditions of the GTA, and our robust installations are designed to withstand everything from the freezing sleet of a Vaughan winter to the blistering summer heat on the DVP.
Our Master Technician's Step-by-Step Windshield Replacement Process
At AlexWindshield, we adhere to strict OEM (Original Equipment Manufacturer) guidelines. The windshield of your Jaguar X-Type provides up to 30% of the vehicle's structural integrity in the event of a rollover crash and serves as the backstop for passenger airbag deployment. A poorly installed windshield is a critical safety hazard. Below is our meticulous, step-by-step process for replacing your Jaguar X-Type windshield safely and flawlessly.
Step 1: Vehicle Preparation and Interior Protection
Before any tools touch your vehicle, our first priority is protecting the luxurious interior and pristine exterior paint of your Jaguar. We begin by:
- Draping heavy-duty protective blankets over the X-Type's distinctive leather seats, steering wheel, and center console.
- Applying specialized automotive tape to the delicate paint along the A-pillars and the leading edge of the roofline to prevent any accidental scratches during removal.
- Conducting a pre-installation inspection to test the functionality of wipers, heated glass connections, and rain sensors prior to disassembly.
Step 2: Careful Removal of Cowls, Wipers, and the Old Windshield
The exterior dismantling must be executed with precision so that the delicate plastic and rubber components from the 2002-2008 era are not snapped or degraded.
- We carefully unbolt the windshield wiper arms and remove the plastic cowl panel spanning the bottom of the glass.
- Next, we meticulously disconnect the wiring harnesses for the heated windshield elements (if equipped) and the rear-view mirror assembly.
- To cut through the factory or old urethane adhesive, we utilize advanced wire-cutting technology (such as a fiber line system) rather than archaic cold knives. This specialized tool slices through the tough adhesive from the inside out, completely eliminating the risk of gouging the metal pinch weld hidden beneath the glass.
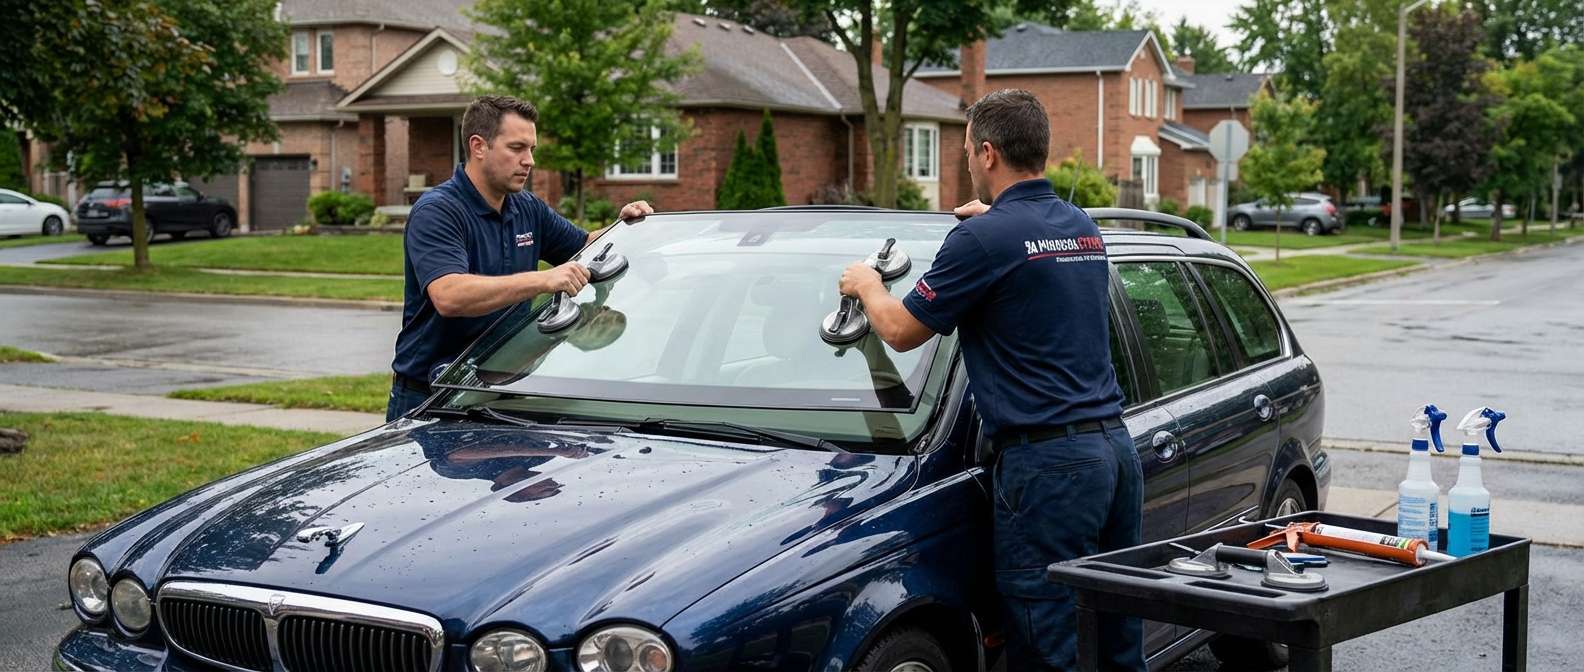
- Once the old urethane is severed, two technicians use heavy-duty suction cups to lift the damaged windshield up and away from the Jaguar's frame.
Step 3: Pinch Weld Preparation and Surface Cleaning
The secret to a lifetime-guaranteed windshield replacement lies in the preparation of the metal frame holding the glass, known as the pinch weld.
- Using specialized scrapers, we trim the old bead of urethane down to a flat, uniform base of approximately 1 to 2 millimeters. We never strip the adhesive down to bare metal, as the old urethane provides the best bonding surface for the new adhesive.
- We rigorously clean the entire perimeter using specialized, alcohol-based auto glass foaming cleaners. This removes all dirt, road salt, moisture, and debris that may have accumulated under the Jaguar's moldings over the past two decades.
Step 4: Applying Advanced Auto Glass Primer
Chemical preparation is vital to prevent future rust and ensure chemical cross-linking with the adhesive.
- If any microscopic scratches occurred on the pinch weld, or if rust is discovered from a previous shoddy installation, we treat the area immediately. We apply an advanced, fast-drying auto glass primer specifically designed to seal bare metal and prevent the spread of corrosion.
- We then apply a specialized primer to the ceramic frit band (the black border) of the brand-new Jaguar X-Type windshield. This primer acts as a chemical bridge, ensuring the urethane bites securely into the molecular structure of the glass.
Step 5: High-Quality Urethane Adhesive Application
The bonding agent is the most critical safety component of the installation.
- Our Master Technicians apply a continuous, precisely measured V-bead of premium, fast-curing automotive urethane adhesive directly onto the prepared pinch weld.
- We use a battery-operated caulking gun to ensure the bead is flawlessly uniform, eliminating any thin spots or gaps that could lead to annoying wind noise or dangerous water leaks.
- This high-quality adhesive is chemically engineered to cure rapidly, offering high-modulus and non-conductive properties that are entirely safe for your Jaguar's electrical systems.
Step 6: Precision Installation of the New Jaguar Windshield
With the adhesive precisely laid, the final installation window is extremely brief before the urethane begins to skin over.
- Utilizing specialized glass-handling suction cups, our technicians carefully align the new windshield over the opening, using visual reference points to ensure perfectly uniform gaps on all sides.
- The glass is gently set into the V-bead of urethane. We press firmly along the edges, ensuring the glass makes 100% contact with the adhesive, compressing it to the exact OEM height so that it sits flush with the X-Type's A-pillars and roofline.
- Finally, we reattach the heated glass electrical connectors, carefully reinstall the cowl panel, bolt the wiper arms back to their exact factory sweep positions, and mount the interior rear-view mirror.
The Mandatory ADAS Camera Calibration Process
While the 2002-2008 Jaguar X-Type hails from an era prior to modern complex lane-keeping assist cameras, automotive technology continues to advance, and so do our industry safety protocols. For any vehicle equipped with windshield-mounted sensors—including the X-Type's sensitive rain sensors and automatic headlight light-sensing diodes—exact alignment is critical. Furthermore, if your vehicle has been updated or retrofitted with aftermarket Advanced Driver Assistance Systems (ADAS), we must heavily emphasize the mandatory ADAS camera calibration process.
When a windshield is replaced, the angle of the glass and the position of the sensor brackets can be altered by fractions of a millimeter. Without the mandatory ADAS camera calibration process, optical cameras and sensors will suffer from a distorted field of view. A misaligned sensor can cause your automatic wipers to malfunction during a sudden downpour on the highway, or cause retrofitted forward-collision warning systems to miscalculate distances, posing a severe safety risk. At AlexWindshield, we utilize state-of-the-art diagnostic computers and precise optical targeting boards to perform static and dynamic calibrations. We guarantee that every sensor, laser, and camera mounted to your new windshield is recalibrated to absolute zero, ensuring your safety systems function exactly as the manufacturer intended.
Post-Installation Care and Safe Drive-Away Time
Once the windshield is installed and calibrated, the urethane adhesive must undergo a chemical curing process. Our Master Technicians will brief you on the Safe Drive-Away Time (SDAT) specific to the temperature and humidity of the day, ensuring the adhesive has hardened enough to pass Federal Motor Vehicle Safety Standards for roof-crush and airbag deployment.
To protect your new installation, we strongly advise the following post-care steps for the first 48 hours:
- Leave the windows slightly cracked: Keeping the windows down about an inch prevents air pressure build-up inside the cabin when you close the vehicle's doors, which could otherwise blow out the fresh urethane seal.
- Avoid high-pressure car washes: Hand wash only for the first two days. The extreme pressure from commercial car washes can force water through the urethane before it has completely cross-linked and cured.
- Drive carefully: Avoid deep potholes, aggressive cornering, or slamming doors, which can shift the heavy glass in the semi-cured adhesive bed.
Choose AlexWindshield: The Trusted Auto Glass Experts in the GTA
Your Jaguar X-Type is a classic piece of British automotive history, and it deserves the highest caliber of care. Trusting a discount, corner-cutting shop with your luxury vehicle's structural safety can result in severe rust, electrical shorts, and catastrophic seal failures. By choosing AlexWindshield, you are opting for the absolute highest standard of auto glass repair and replacement in the Greater Toronto Area (GTA).
Our commitment to excellence extends far beyond the installation. We stand behind every job our Master Technicians perform with an industry-leading, comprehensive Lifetime Warranty covering both workmanship and water leaks for as long as you own your Jaguar. Whether you are at home in Vaughan, at your office in Richmond Hill, or running errands in Markham, AlexWindshield provides unparalleled convenience, crystal-clear optics, and uncompromising safety. Contact us today to schedule your mobile auto glass appointment and experience the AlexWindshield difference.


