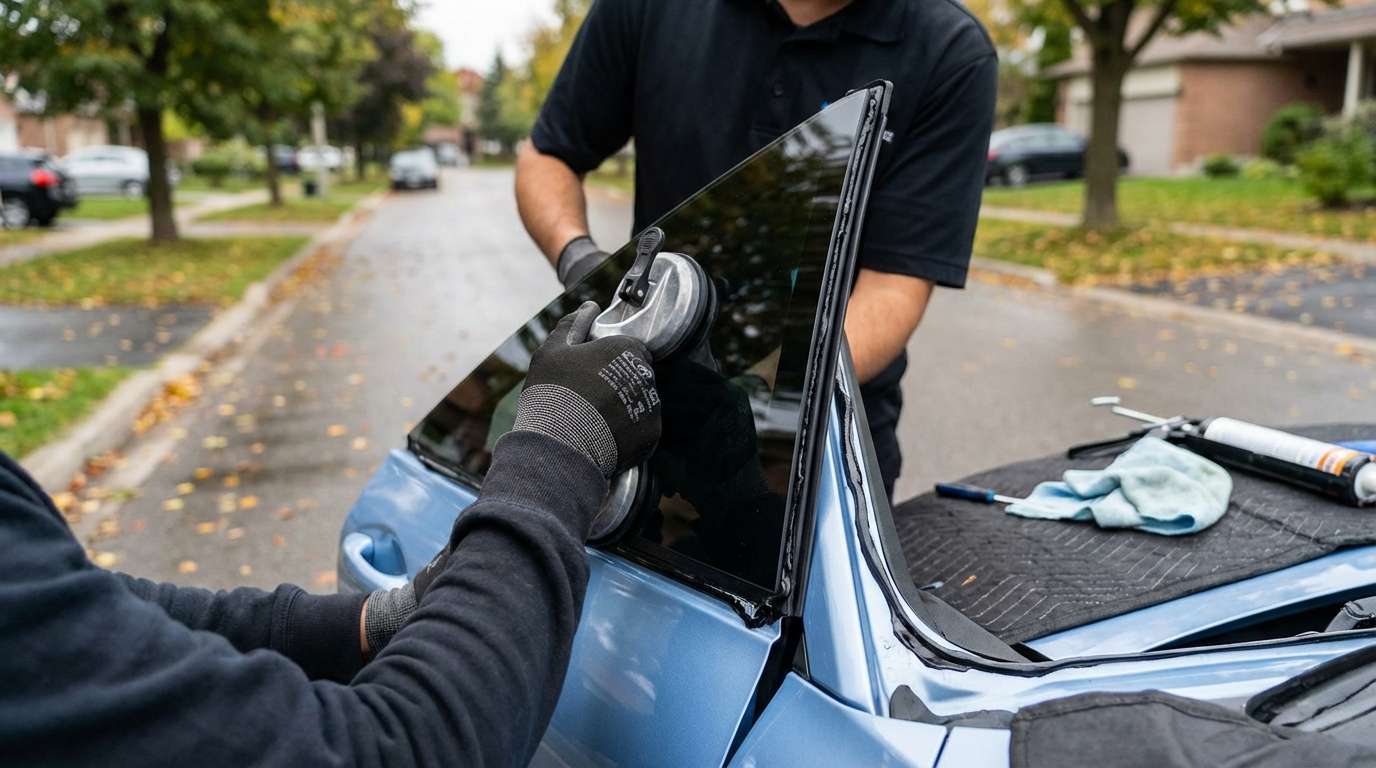
The Bold Asymmetry of the Hyundai Veloster Meets Uncompromising Auto Glass Expertise
The 2019-2022 Hyundai Veloster is celebrated across the automotive world for its striking, aggressively styled asymmetrical three-door design. This unique layout, combining the sporty appeal of a coupe on the driver's side with the practicality of a hatchback on the passenger side, makes it an absolute standout on the roads of the Greater Toronto Area (GTA). However, this distinctive aesthetic heavily relies on the precise fit and finish of its structural components, including the sleek, aerodynamic auto glass. When your Veloster suffers damage to its vent glass—whether due to a break-in, road debris, or an unfortunate collision—it does more than just ruin the sporty look of your vehicle; it compromises your security, exposes your interior to the harsh Canadian weather, and disrupts the meticulously engineered cabin acoustics.
As a Senior Master Technician at AlexWindshield, I have replaced countless auto glass components on this specific generation of the Veloster. Replacing the vent glass on a 2019-2022 Hyundai Veloster is an intricate procedure that demands much more than a simple "swap and go" approach. Because this glass is typically tempered, it shatters into thousands of tiny, granular pieces upon impact, infiltrating the deepest crevices of your vehicle's interior. You need a specialist who understands the exact tolerances of the Veloster's unique frame. That is exactly where our expert mobile team steps in, bringing dealership-level precision directly to your driveway.
Why Your 2019-2022 Hyundai Veloster Demands Expert Vent Glass Replacement
The vent glass on your Hyundai Veloster isn't just a cosmetic filler; it plays a crucial structural and aerodynamic role. A compromised vent glass leaves your vehicle vulnerable to theft and interior water damage. Choosing the right experts for your Hyundai Veloster vent glass replacement ensures that your car retains its value and safety standards. Here is why drivers across the GTA trust AlexWindshield for this specialized service:
- Vehicle-Specific Expertise: We understand the exact interior trim configurations and clip mechanisms specific to the 2019-2022 Veloster models (including the Turbo and N variants), ensuring no interior plastics are damaged during the repair.
- Premium OEM-Quality Glass: We source only top-tier auto glass that perfectly matches the factory tint, curvature, and acoustic properties of your Hyundai.
- Advanced Urethane Systems: We use industry-leading, fast-curing automotive adhesives to guarantee a leak-proof, factory-grade seal.
- Unmatched Convenience: Our mobile auto glass replacement service operates directly at your home or workplace, saving you the hassle of driving a vehicle with an open, shattered window.
Master Technician's A to Z Process: Replacing Your Veloster's Vent Glass
At AlexWindshield, transparency and precision are at the core of our operations. We don't just replace your glass; we restore your vehicle to its factory condition. Below is my detailed, step-by-step technical breakdown of how we execute a flawless vent glass replacement on the 2019-2022 Hyundai Veloster.
Step 1: Pre-Inspection and Extensive Interior Protection
Before any tools touch your vehicle, a comprehensive pre-inspection is conducted. I assess the extent of the damage and check the surrounding auto body frame for any hidden scratches or dents caused by the impact. Because shattered tempered vent glass can easily scratch your vehicle's paint and damage its upholstery, the first active step is protecting the interior and exterior. I apply high-grade automotive masking tape around the exterior window frame to safeguard your Veloster's clear coat. Inside the cabin, heavy-duty protective drop cloths are draped over the sporty bucket seats, center console, and floor mats to catch any stray glass fragments.
Step 2: Careful Interior Trim and Door Panel Removal
Depending on which side of your asymmetrical Veloster the damaged vent glass is located, access to the structural mounting points requires precise interior disassembly. Using specialized non-marring nylon pry tools, I carefully disengage the retaining clips holding the interior plastic trim and door panels in place. The 2019-2022 Veloster features tightly fitted interior components; forcing them can lead to broken tabs or unwanted rattles down the road. I meticulously disconnect any electrical harnesses for the power locks and window switches, safely setting the interior panels aside on a protective blanket.
Step 3: Exhaustive Vacuuming of Shattered Glass Shards
This is arguably one of the most vital steps in any door or vent glass replacement. Tempered glass explodes into thousands of tiny, sharp cubes. These shards fall into the door cavity, lodge themselves inside the window regulator tracks, and scatter under the seats. Using a high-powered, industrial-grade shop vacuum fitted with specialized micro-crevice attachments, I systematically extract all broken glass shards from the vehicle's interior. I vacuum the inner door shell, the window mechanisms, the seat tracks, and the carpets. Leaving even a few pieces of glass inside the door cavity will cause an irritating rattling noise every time you close the door or drive over a bump, so this step is executed with absolute perfectionism.
Step 4: Removal of the Old Urethane Seal and Glass Remnants
With the interior safely cleared and exposed, attention turns to the window frame. The factory vent glass is bonded to the pinch weld using strong polyurethane adhesive. To remove the remaining glass chunks embedded in the seal, I use a specialized cold knife and an advanced wire cutting system. I carefully slice through the original urethane bead, ensuring that the blade never makes contact with the Veloster's painted metal frame. Once the old adhesive track is cut, the perimeter is cleaned, leaving a thin, flat layer of the original urethane—typically about 1-2 millimeters thick. This acts as a perfect base for the new adhesive to bond to, a technique known in the auto glass industry as a "close cut."
Step 5: Rigorous Surface Cleaning and Primer Application
Contamination is the enemy of a safe windshield or vent glass installation. I treat the exposed window frame and the edge of the new vent glass with an aggressive, alcohol-based glass cleaner to remove fingerprints, dust, and grease. Next comes the critical step of primer application. If there are any microscopic bare metal scratches on the pinch weld from the removal process, I apply a specialized anti-rust metal primer to prevent future corrosion. Subsequently, a chemical glass primer is applied to the black ceramic frit band on the edge of the new OEM-quality vent glass. This primer acts as a chemical bridge, ensuring that the urethane adhesive creates an unbreakable molecular bond with the glass.
Step 6: Application of High-Quality Automotive Adhesive
With the surfaces prepped and primed, it is time to apply the bonding agent. I utilize a premium, fast-curing, high-viscosity urethane adhesive. Using an electric caulking gun for absolute consistency, I extrude a perfect, continuous "V-bead" of urethane along the prepared pinch weld. The V-shape is highly technical; as the glass is pressed into place, the peak of the "V" collapses uniformly, pushing outward to create a flawless, watertight, and airtight seal that meets all OEM safety standards for structural integrity.
Step 7: Precision Installation of the New Vent Glass
Timing is critical once the urethane is applied. I carefully align the new Hyundai Veloster vent glass with the vehicle's body lines. Given the aggressive, sloping roofline of the 2019-2022 Veloster, exact positioning is required to ensure the glass sits flush with the exterior trim. Once perfectly aligned, I gently press the glass into the urethane bed. Specialized retention tape is then applied to hold the glass firmly in place, preventing any micro-shifting while the high-quality adhesive begins its chemical curing process.
Step 8: Reassembly and Final Quality Checks
As the urethane sets, I begin the reassembly process. The interior door panels, vapor barriers, and interior plastic trims are meticulously clipped back into their factory positions. All electrical connections are re-established and tested. I perform a final, comprehensive vacuum of the interior to ensure absolute cleanliness. Finally, the newly installed vent glass is treated with an ammonia-free glass cleaner, leaving it crystal clear and completely devoid of smudges. I conduct a final inspection of the seals to guarantee there will be zero wind noise or water leaks when you get back on the highway.
Premium Mobile Auto Glass Services Across the Greater Toronto Area
Driving with shattered vent glass is not just a nuisance; it is a profound safety hazard and leaves your prized Hyundai Veloster exposed to the unpredictable Ontario elements. At AlexWindshield, we eliminate the stress of auto glass damage by bringing our state-of-the-art repair shop directly to you. We are proud to offer our premium mobile auto glass replacement services across the Greater Toronto Area (GTA).
Whether you are parked at a busy office complex in Markham, relaxing at your home in the quiet suburbs of Richmond Hill, or running errands in the bustling commercial districts of Vaughan, our fully equipped mobile service vans will arrive promptly at your location. We understand that your time is valuable, which is why we have engineered our mobile services to be as efficient, clean, and unobtrusive as possible, allowing you to go about your day while we restore your Veloster's integrity.
Trust AlexWindshield: Your Auto Glass Experts with a Lifetime Warranty
When it comes to the specialized, asymmetrical design of the 2019-2022 Hyundai Veloster, you cannot afford to trust your vent glass replacement to just anyone. You need a Master Technician who treats your vehicle with the utmost respect and technical precision. At AlexWindshield, we stand behind the quality of our materials and the superiority of our craftsmanship.
That is why every single auto glass replacement we perform comes backed by our comprehensive Lifetime Warranty. This warranty covers you against any leaks, wind noise, or manufacturer defects for as long as you own your vehicle. If you are dealing with a broken window, do not wait for the weather to ruin your interior or for your security to be compromised. Contact AlexWindshield today—the GTA's most trusted, reliable, and expert mobile auto glass specialists. Let us bring crystal clear perfection right to your doorstep.


