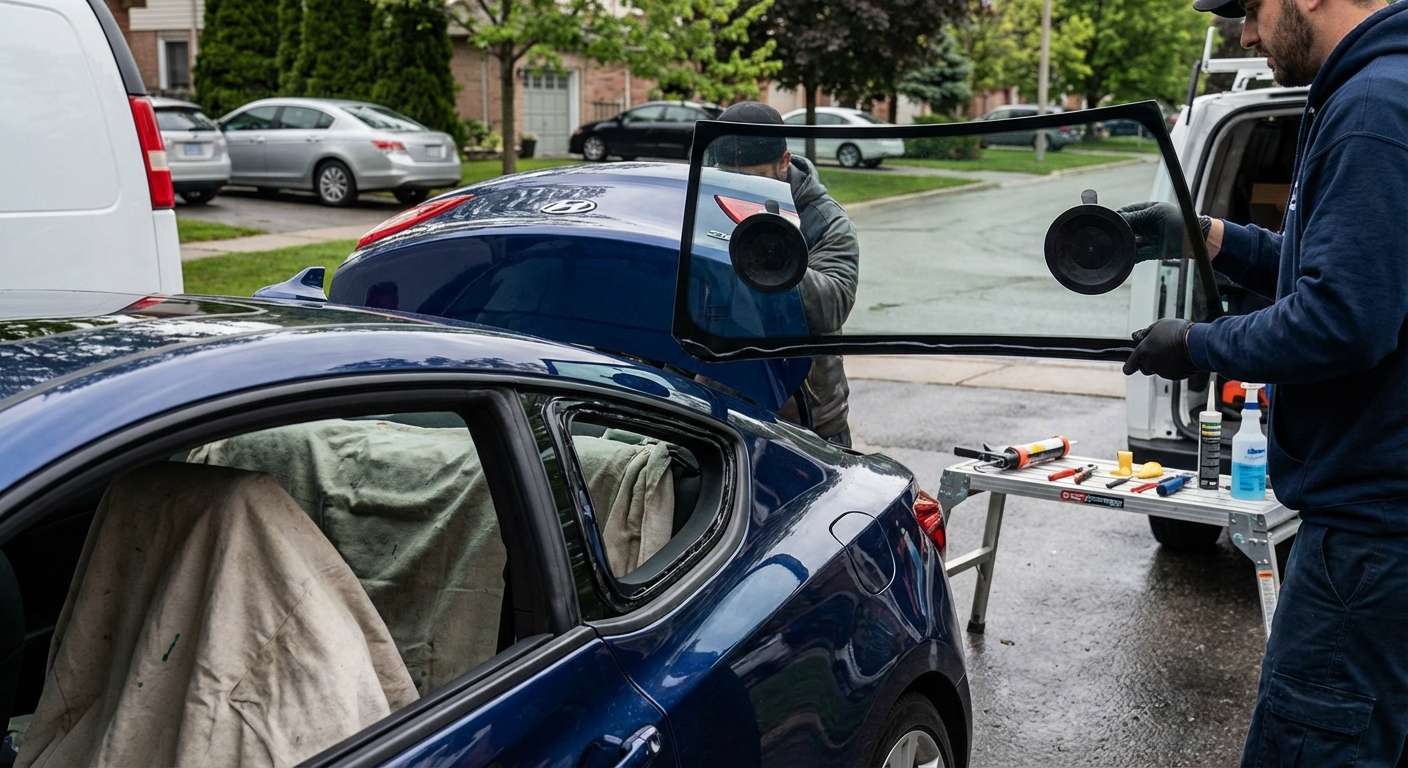
Reviving the Sleek Profile of Your Hyundai Genesis Coupe (2010-2016)
The Hyundai Genesis Coupe (2010-2016) redefined the modern rear-wheel-drive sports car market, offering a perfect blend of aggressive styling, track-ready performance, and a beautifully sweeping roofline. That iconic fastback silhouette relies heavily on the structural integrity and pristine condition of its rear window. When the back glass shatters—whether due to an unexpected highway impact, extreme temperature fluctuations, or an unfortunate act of vandalism—it does more than just ruin your coupe's aesthetics. It compromises your vehicle's aerodynamics, interior security, and overall driving safety.
As a Master Technician at AlexWindshield, I have worked extensively on the first and second generations of the Genesis Coupe. Replacing the rear glass on this specific sports car requires a highly specialized touch. The steep rake angle of the back window, the integrated rear defroster grid, and the proximity to the trunk lid mean that precision is non-negotiable. You cannot trust this intricate job to just anyone. You need a dedicated auto glass specialist who understands the exact engineering of the 2010-2016 Genesis Coupe.
Expert Mobile Auto Glass Solutions Across the Greater Toronto Area
Dealing with a shattered rear window is incredibly stressful, especially knowing that driving the vehicle in that condition is highly dangerous. That is why AlexWindshield brings the repair shop directly to your driveway. We are proud to offer premium, fully mobile auto glass services across the Greater Toronto Area (GTA).
Whether you are parked at your home in Vaughan, at your workplace in Richmond Hill, or stranded at a shopping center in Markham, our fully equipped mobile service vans arrive promptly with the exact glass required for your Hyundai Genesis Coupe. Local SEO and community trust are built on reliability, and our technicians know the GTA roads inside and out, ensuring a rapid response time so your sports car is safely back on the road without unnecessary towing fees or long waiting room delays.
Understanding the 2010-2016 Genesis Coupe Back Glass
Before diving into the replacement process, it is essential to understand the technical components of the glass we are replacing. The Hyundai Genesis Coupe back glass is not just a piece of tempered safety glass; it is an active component of your vehicle's electrical and safety systems. Key features include:
- Tempered Safety Glass: Unlike the laminated windshield, the rear glass is designed to break into thousands of small, blunt pieces upon impact to prevent severe lacerations.
- Integrated Defroster Grid: Essential for the harsh Canadian winters in the GTA, the embedded heating element must be carefully connected to the vehicle's electrical harness.
- Curvature and Aerodynamics: The sweeping, aerodynamic curve must align perfectly with the roof and trunk gaps to prevent wind noise and water leaks.
- OEM-Equivalent Quality: We use only premium quality glass that meets or exceeds Original Equipment Manufacturer standards to guarantee a flawless fit.
The Master Technician's A-to-Z Replacement Process
At AlexWindshield, we do not cut corners. Our back glass replacement procedure follows strict industry safety standards. Here is the detailed, step-by-step technical process we use to restore your 2010-2016 Hyundai Genesis Coupe.
Step 1: Comprehensive Vehicle Preparation and Interior Protection
The process begins long before the new glass touches your vehicle. Our first priority is protecting your Genesis Coupe's interior. We lay down heavy-duty protective drop cloths over the rear seats, the parcel shelf, and the trunk area. We also apply protective automotive tape to the exterior paint along the roofline and C-pillars to ensure our tools do not cause any accidental scratches to your clear coat during the extraction process.
Step 2: Interior Trim Removal and Wiring Disconnection
To properly install the new glass and access the wiring, we must carefully remove the interior C-pillar trim panels and the rear parcel shelf cover. Using specialized non-marring pry tools, we unclip these plastic trims without breaking the delicate retaining clips. Once the interior framework is exposed, we locate and safely disconnect the electrical harness plugs that power the rear defroster grid. This ensures the wiring remains intact and ready to plug into the new glass.
Step 3: Meticulous Broken Glass Vacuuming and Debris Removal
Because the Genesis Coupe's back glass is tempered, a blowout results in thousands of tiny glass shards spreading throughout the cabin. As part of our strict protocol for back and door glass replacements, we perform an exhaustive industrial vacuuming of the vehicle's interior. We vacuum the rear seats, the floor mats, down inside the gaps of the folding rear seats, and thoroughly throughout the trunk cavity. We also use high-pressure compressed air to blow out any hidden shards trapped inside the structural channels of the trunk lid and parcel shelf. Leaving glass behind is a safety hazard and can cause annoying rattles, so we guarantee a thoroughly clean cabin.
Step 4: Removal of the Old Urethane Seal and Remaining Glass
With the interior cleared, we move to the exterior. Using professional cold knives, specialized wire-cutting systems, and power extractors, we carefully cut through the original urethane adhesive bead that secures the perimeter of the window. We extract the remaining ring of broken glass attached to the frame. The goal here is a precision cut that leaves a thin, even layer of the original factory urethane on the metal frame, which provides the best possible base for the new adhesive to bond to.
Step 5: Surface Cleaning, Pinch Weld Preparation, and Primer Application
The structural integrity of your new rear window depends entirely on the cleanliness of the pinch weld (the metal frame where the glass sits). We use specialized chemical cleaners to remove dirt, grease, and moisture from the bonding surface. Next, we meticulously inspect the pinch weld for any scratches down to bare metal. If any bare metal is exposed, we apply a high-quality corrosion-preventative primer. This is a critical step; skipping the primer can lead to invisible rust forming under the glass, which eventually causes leaks and structural failure. We also apply a specialized glass primer to the black ceramic frit band on the new back window to ensure maximum chemical adhesion.
Step 6: Application of Premium Urethane Adhesive
Once the primers have flashed (dried), we apply a continuous, precisely measured V-bead of premium, fast-curing automotive urethane adhesive around the perimeter of the pinch weld. Utilizing an electric caulking gun ensures an unbroken, uniform bead. We use industry-leading urethane that is specifically formulated for structural bonding, ensuring that your new back glass will contribute to the roof-crush strength of the vehicle, exactly as the factory intended.
Step 7: Precision Installation of the New Back Glass
Handling the new back glass for the Genesis Coupe requires a steady hand and perfect alignment. Using professional heavy-duty suction cups, two technicians (or one highly skilled technician using a specialized lifting rig) carefully lower the new glass onto the fresh urethane bead. We align the glass perfectly with the roofline and trunk gaps, ensuring the depth is flush with the surrounding body panels. Gentle, even pressure is applied to seat the glass securely into the adhesive, locking it into place.
Step 8: Reconnection, Reassembly, and Final Cleaning
With the glass seated, we move back inside the cabin. We reconnect the electrical harness to the new defroster tabs and test the circuit to ensure the heating grid functions perfectly. Next, we carefully reinstall the rear parcel shelf, C-pillar trims, and any other interior components removed during step two. Finally, we clean the new back glass with an ammonia-free, streak-less foaming glass cleaner, and perform a final inspection of the vehicle's interior to ensure no stray glass shards were missed.
Step 9: Safe Drive-Away Time and Post-Installation Briefing
Premium urethane requires a specific curing time to guarantee safety. We monitor the temperature and humidity to determine the Safe Drive-Away Time (SDAT). We instruct the vehicle owner to leave a window slightly cracked for the first 24 hours to prevent cabin air pressure from pushing against the curing seal when closing the doors, and advise against high-pressure car washes for at least 48 hours.
Your Trusted Mobile Auto Glass Experts in the GTA
Your Hyundai Genesis Coupe deserves the highest standard of care, and at AlexWindshield, we treat every vehicle as if it were our own. Attempting to drive with a broken back window leaves you exposed to the elements, theft, and severe safety risks. By choosing our specialized mobile services, you are choosing unparalleled convenience, top-tier craftsmanship, and immediate peace of mind.
Whether you are situated in the bustling commercial districts of Markham, the quiet residential neighborhoods of Richmond Hill, or anywhere throughout Vaughan and the wider Greater Toronto Area (GTA), our master technicians are ready to deploy to your exact location.
We stand behind our technical expertise and the quality of our materials. That is why every back glass replacement performed by AlexWindshield is backed by our comprehensive Lifetime Warranty. This warranty guarantees that your new rear window will be free from air leaks, water leaks, and manufacturer defects for as long as you own your Genesis Coupe. Do not let a shattered window keep your sports car off the road. Contact AlexWindshield today to book your expert mobile back glass replacement and experience the ultimate in automotive glass service.


