The Engineering Behind the 8th Generation Honda Accord and the Reality of Shattered Rear Glass
The 8th generation Honda Accord, produced between 2008 and 2012, completely redefined the mid-size sedan segment with its aggressive, widened stance, advanced aerodynamics, and remarkably spacious cabin. A defining characteristic of this iconic vehicle is its sweeping, heavily sloped rear roofline, which accommodates an expansive pane of rear auto glass. While this design offers excellent rearward visibility and aesthetic appeal, it presents a significant vulnerability. When the back glass of a 2008-2012 Honda Accord sustains severe impact—whether from flying road debris, extreme temperature fluctuations, or a break-in—the tempered auto glass is engineered to shatter instantly into thousands of granular, pebble-like shards. This safety feature prevents lethal jagged shards but creates an overwhelming, hazardous mess inside your beloved vehicle.
At AlexWindshield, we understand the intricate architecture of the 2008-2012 Honda Accord. Unlike a standard windshield replacement, a Honda Accord back glass replacement requires specialized expertise. The rear glass of this specific model is not merely a window; it is a complex component housing high-voltage defroster grids and, in many trim levels, an integrated AM/FM radio antenna matrix. Restoring your vehicle to factory specifications requires the hands of a Master Technician, precision tools, and a meticulous, step-by-step approach.
Premium Mobile Auto Glass Services Across the Greater Toronto Area (GTA)
Driving a Honda Accord with a shattered rear window is not only dangerous due to compromised visibility and structural integrity, but it also leaves your vehicle's interior entirely exposed to the unpredictable Ontario weather and potential theft. That is why AlexWindshield brings our state-of-the-art auto glass shop directly to your location. We provide elite, on-demand mobile auto glass services spanning the entire Greater Toronto Area (GTA).
Whether you are safely parked in your residential driveway in Vaughan, at a corporate office building in Richmond Hill, or out running errands at a shopping plaza in Markham, our fully equipped mobile service vans arrive promptly. We spare you the danger and hassle of driving a compromised vehicle across town, delivering dealership-quality rear glass replacement right at your doorstep.
The Complete, Step-by-Step Back Glass Replacement Process for the 2008-2012 Honda Accord
As a Master Technician at AlexWindshield, I adhere to a strict, rigorous protocol for every rear auto glass replacement. Our process goes far beyond merely swapping out the glass; it encompasses comprehensive damage control, structural preparation, and precision calibration of the vehicle's electronic components.
Step 1: Pre-Installation Inspection and Interior Protection
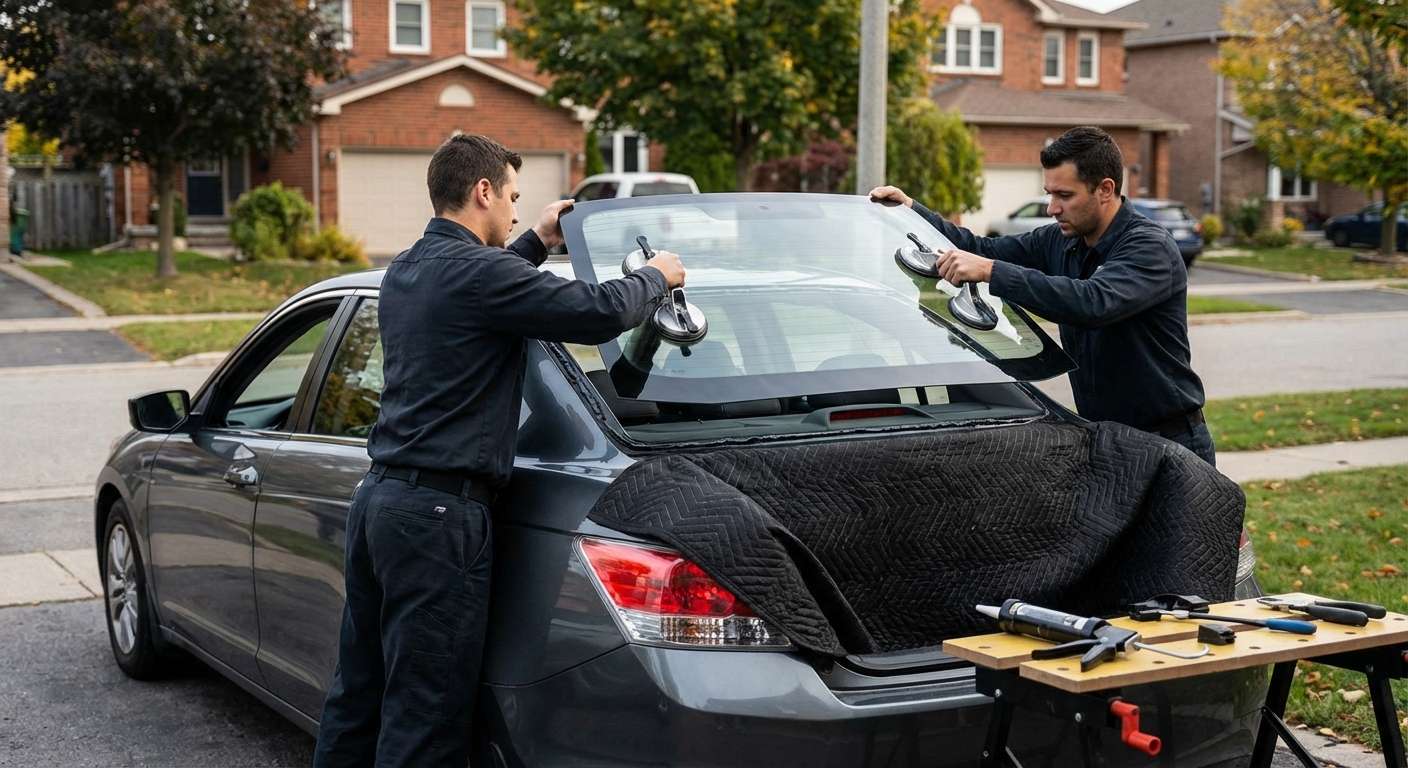
The moment our mobile unit arrives at your location in the GTA, the first priority is securing the vehicle. We begin with a thorough pre-installation inspection of your 2008-2012 Honda Accord, assessing the extent of the damage to the glass, the surrounding pinch weld, and the vehicle's paint. Because a shattered back glass exposes the interior, we immediately deploy heavy-duty protective drop cloths and protective blankets over the rear passenger seats, the center console, and the exterior trunk lid. We also apply high-grade automotive painter's tape to the vehicle's exterior body panels surrounding the rear window cavity to ensure no tools or loose debris scratch the clear coat during the extraction process.
Step 2: Interior Panel Removal and Extensive Glass Shard Vacuuming
Tempered glass explosions are notoriously messy. The tiny glass fragments infiltrate every crevice of the Accord's rear cabin. To perform a flawless installation and ensure passenger safety, we initiate a deep-cleaning protocol. First, we carefully remove the rear interior C-pillar trim panels and the rear parcel shelf (the deck located directly beneath the rear window). Removing these panels is essential, as massive amounts of glass tend to fall behind them and into the trunk cavity.
Once the interior framework is exposed, we spend significant time meticulously vacuuming all broken glass shards from the vehicle's interior. We fold down the 60/40 split rear seats, vacuuming the seat crevices, the floor mats, the speaker grilles on the rear deck, and the entirety of the trunk. At AlexWindshield, we guarantee that your family will not find dangerous glass fragments hiding in the upholstery weeks after the repair.
Step 3: Extracting the Damaged Glass and Old Adhesive
With the interior pristine and the vehicle protected, we shift our focus to the perimeter of the rear window. Using specialized auto glass extraction tools—such as an industry-grade cold knife, wire-cutting systems, and automated power extractors—we carefully slice through the original factory urethane holding the shattered remnants of the back glass in place. The 2008-2012 Accord has tight tolerances between the glass edge and the roofline, requiring a steady hand to avoid damaging the vehicle's structural frame. Once the perimeter is successfully cut, we lift away the damaged glass encapsulated in the old adhesive and dispose of it responsibly.
Step 4: Precision Surface Cleaning and Primer Application
A new back glass is only as strong as the surface it bonds to. After removing the broken glass, we perform a critical procedure known as pinch weld preparation. We use precision scraping tools to trim the old urethane down to a thin, uniform layer of approximately 1 to 2 millimeters. This thin base provides the ideal bonding substrate for the new adhesive.
Next, we thoroughly clean the bare pinch weld using specialized, alcohol-based glass cleaners to remove all dirt, moisture, and debris. If any microscopic scratches down to the bare metal occurred during the removal process, we meticulously apply a specialized, anti-corrosive black glass primer. This step is absolutely crucial in the GTA, where winter road salts can easily cause hidden rust to form beneath the glass over time. The primer seals the metal, prevents oxidation, and promotes maximum chemical adhesion for the urethane.
Step 5: Applying the High-Quality Urethane Adhesive
Once the primer has fully flashed and dried, it is time to apply the bonding agent. At AlexWindshield, we never compromise on materials. We load an electric caulking gun with an advanced, rapid-curing, high-quality adhesive (OEM-grade urethane). We apply the urethane in a perfectly uniform "V-bead" pattern around the entire perimeter of the pinch weld. The V-bead technique is critical for the Honda Accord; as the glass is pressed into place, the peak of the "V" collapses, spreading the urethane evenly without creating air pockets or water leaks. This premium urethane boasts an exceptionally fast Safe Drive Away Time (SDAT), meaning your vehicle achieves factory-level structural integrity shortly after the installation is complete.
Step 6: Precision Installation of the New Back Glass
Setting the rear glass requires perfect alignment on the very first try. The 8th generation Honda Accord features subtle curves that must align flawlessly with the roof and trunk lines. Using heavy-duty suction cups, two master technicians will gently hover the brand-new, OEM-equivalent back glass over the urethane bed. We utilize the vehicle's original alignment pins and factory reference points to lower the glass directly into the channel. Once seated, we apply gentle, even pressure around the perimeter, ensuring the glass makes full contact with the high-quality adhesive for a permanent, watertight, and airtight seal.
Step 7: Electronic Reconnection and Final Quality Assurance
Because the 2008-2012 Honda Accord relies heavily on rear glass electronics, the physical installation is only part of the job. Once the glass is set, we move back to the interior to reconnect the vehicle's electrical components. We carefully reattach the heavy-duty wiring harnesses to the rear defroster grids and plug in the connectors for the integrated radio antenna. We then run a diagnostic test to ensure both the defroster and the radio signal are functioning flawlessly.
Finally, we reinstall the rear parcel shelf, secure the interior C-pillar panels, and perform one last inspection of the cabin. We use a premium foaming glass cleaner to polish the new rear window inside and out, leaving your Honda Accord looking as immaculate as the day it rolled off the assembly line.
Trust AlexWindshield for Unmatched Auto Glass Expertise
Your Honda Accord is a masterpiece of Japanese engineering, and it deserves to be serviced by technicians who respect its design. Choosing the right auto glass shop is the difference between a loud, leaky cabin and a silent, structurally sound ride.
When you choose AlexWindshield, you are partnering with the most trusted experts in mobile auto glass services across the GTA. From Vaughan to Richmond Hill and Markham, we deliver unparalleled craftsmanship directly to your door. We stand proudly behind every pane of glass we install, which is why every back glass replacement comes with our comprehensive Lifetime Warranty against leaks, whistling, and manufacturer defects. Do not let a shattered rear window disrupt your life or compromise your safety. Contact AlexWindshield today for swift, professional, and flawless auto glass replacement.


