Reviving the Sweeping Profile of Your 2007-2010 Chrysler Sebring
The 2007-2010 Chrysler Sebring was engineered with a distinctive ribbed hood and a deeply raked, aerodynamic front cabin. While this sleek, sweeping design contributes to a remarkably smooth highway ride, the low-slung angle of the front glass unfortunately acts as a highly efficient catcher for wayward rocks, gravel, and construction debris. When that inevitable impact turns into a sprawling spiderweb crack, your vehicle's structural integrity and your on-road safety are immediately compromised. As a Master Technician, I have seen firsthand how ignoring a damaged windshield on this specific generation of the Sebring can lead to whistling wind noise, water leaks, and weakened roof crush resistance. At AlexWindshield, we do not merely replace auto glass; we meticulously restore the factory-level safety standards of your mid-size Chrysler sedan or convertible.
Premium Local SEO Auto Glass Solutions Across the GTA
Navigating the busy commuting corridors of the Greater Toronto Area (GTA) exposes your windshield to constant environmental hazards. Whether you are battling construction debris on the 400-series highways near Vaughan, commuting through the stop-and-go traffic of Richmond Hill, or running daily errands in the sprawling suburban grids of Markham, a pristine, uncompromising windshield is non-negotiable for safe driving.
At AlexWindshield, we understand that your time is valuable. That is why we bring our state-of-the-art mobile auto glass services directly to your driveway, workplace, or stranded location anywhere within the GTA. Our fully equipped mobile service vans carry all the specialized tools, climate-controlled adhesives, and premium OEM-equivalent glass necessary to perform a flawless installation on site, ensuring you never have to drive a compromised vehicle to a repair shop.
Step-by-Step Windshield Replacement Process for the Chrysler Sebring (2007-2010)
Replacing the windshield on a 2007-2010 Chrysler Sebring requires precision, patience, and a deep understanding of automotive structural integrity. Below is our comprehensive, A-to-Z Master Technician process to ensure a perfect, leak-proof installation every single time.
Step 1: Comprehensive Vehicle Preparation and Interior Protection
Before any tools touch your vehicle, preparation is paramount. We begin by shielding the interior and exterior of your Chrysler Sebring. Heavy-duty protective blankets are draped over the grooved hood and front fenders to prevent any accidental tool drops from scratching the paint. Inside the cabin, we place protective covers over the steering wheel, dashboard, and front seats to catch any stray debris. We then meticulously remove the wiper arms and the plastic cowl panel at the base of the windshield, exposing the lower edge of the glass and the factory polyurethane seal.
Step 2: Precision Removal of the Damaged Glass
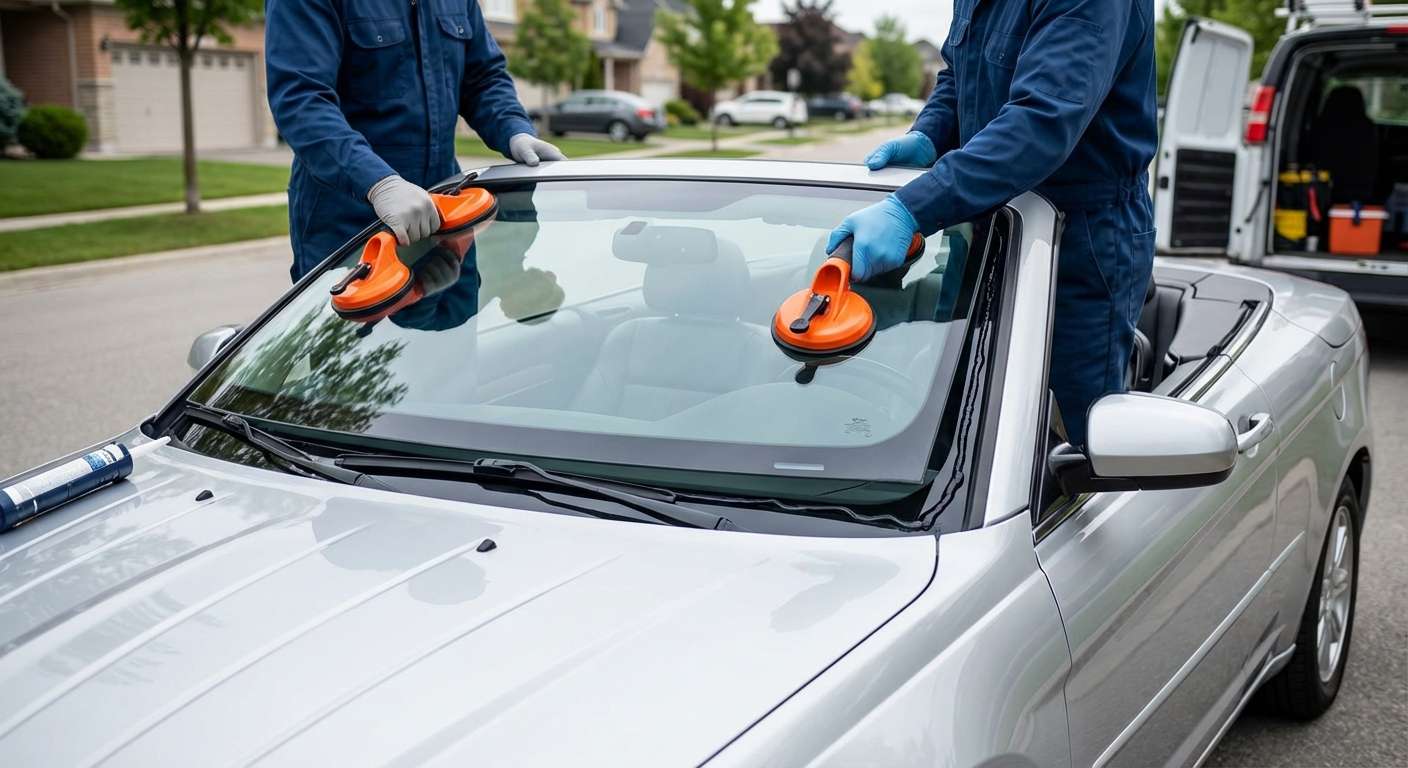
Extracting the broken windshield requires specialized extraction techniques to avoid damaging the vehicle's pinch weld (the metal frame that holds the glass). We utilize an advanced cold knife and a braided wire-cutting system to slice through the old, hardened factory urethane adhesive. By carefully pulling the cutting wire along the perimeter of the glass, we sever the bond without scraping the underlying metal. Once the adhesive is completely cut, two technicians use heavy-duty suction cups to safely lift the heavy damaged glass away from the Sebring's frame.
Step 3: Pinch Weld Preparation and Contaminant Cleaning
The success of a new windshield installation depends entirely on the condition of the pinch weld. After the old glass is removed, a thick ridge of old urethane remains on the metal frame. Using a specialized razor scraper, we trim this old adhesive down to a thin, uniform base layer of approximately 1-2 millimeters. This process is highly delicate; exposing bare metal can lead to galvanic corrosion and devastating rust over time. Once trimmed, the entire perimeter is thoroughly scrubbed using a specialized, alcohol-based chemical cleaner to remove all dirt, grease, and microscopic debris.
Step 4: Advanced Primer Application
To guarantee a watertight and structurally sound chemical bond, primer application is critical. We apply an advanced, fast-drying black glass primer to any microscopic scratches on the pinch weld to seal the metal and prevent future oxidation. We also apply a specialized glass prep and primer to the frit band (the black painted edge) of the new OEM-quality windshield. We strictly adhere to the manufacturer's specified "flash-off" time, allowing the primer to dry and chemically activate, which ensures the highest possible adhesion level for the urethane.
Step 5: High-Quality Urethane Adhesive Application
Once the primer has fully cured, we load our heated caulking gun with an industry-leading, high-viscosity automotive urethane adhesive. We apply the adhesive to the pinch weld using a precise "V-bead" profile. The V-bead ensures that when the new windshield is set, the urethane compresses uniformly, pushing out any trapped air pockets and creating a flawless, structural, and watertight seal around the entire perimeter of your Chrysler Sebring.
Step 6: Precision Installation of the New Windshield
Timing is critical once the urethane is applied. Utilizing high-grade suction grip tools, our technicians carefully align the new acoustic-grade windshield above the Sebring's frame. We use specialized guide pins and pre-marked alignment points to lower the glass perfectly into place on the first attempt. Shifting the glass after it touches the urethane can compromise the seal. Once seated, we gently press the perimeter to ensure proper "decking" of the glass, locking it into the vehicle's structural matrix. We then reinstall the cowl panel, wiper arms, and reattach the rearview mirror.
Mandatory ADAS Camera Calibration: A Critical Safety Step
In the modern auto glass industry, a windshield replacement is no longer just a physical repair; it is an advanced electronic alignment process. If your 2007-2010 Chrysler Sebring is equipped with aftermarket forward-facing camera systems, early-generation rain sensors, or advanced driver safety modules mounted near the rearview mirror, mandatory ADAS (Advanced Driver Assistance Systems) camera calibration is required immediately following the glass installation.
The forward-facing camera looks precisely through the glass. A difference of even one millimeter in the installation angle or the microscopic optical curvature of the new windshield can distort the camera's line of sight. At highway speeds traversing the GTA, a millimeter of camera misalignment can translate to meters of error on the road, causing features like lane departure warnings or automatic emergency braking to trigger incorrectly or fail entirely.
At AlexWindshield, we utilize sophisticated, computerized targeting equipment to perform both static and dynamic ADAS recalibration. We interface directly with your vehicle's onboard computer to realign the camera's optical center to the vehicle's thrust angle. We test the system extensively to ensure that all safety sensors are functioning precisely to OEM specifications, guaranteeing your utmost safety before we hand back the keys.
Essential Aftercare Instructions for Your Chrysler Sebring
To ensure the longevity and safety of your newly installed windshield, we strongly advise adhering to the following post-installation protocols:
- Observe Safe Drive-Away Time (SDAT): Do not drive the vehicle for at least 1 to 2 hours post-installation to allow the high-quality urethane adhesive to reach its initial structural cure.
- Keep the Windows Slightly Cracked: Leave your side windows open about an inch for the first 24 hours. Closing vehicle doors creates a sudden spike in cabin air pressure that can push the fresh urethane outward, creating microscopic, leak-prone air channels.
- Leave Retention Tape Intact: If we applied special retention tape to the top edge of the windshield, leave it in place for a minimum of 24 hours to hold the glass firmly against gravity while the adhesive cures.
- Avoid High-Pressure Car Washes: Do not subject your Chrysler Sebring to commercial, high-pressure car washes for at least 48 hours. The heavy water jets and spinning brushes can degrade the sealant before it has achieved a full chemical cure.
- Drive Cautiously: Avoid massive potholes, aggressive speed bumps, and rough dirt roads for the first few days to prevent undue chassis flex from straining the curing adhesive.
Lifetime Warranty and Your Trusted GTA Experts
Your vehicle's windshield provides up to 30% of your car's structural roof support in the event of a rollover collision. Entrusting this critical component to unqualified technicians is a risk you should never take. As the premier Master Technicians in the industry, AlexWindshield is dedicated to delivering unparalleled precision and safety with every installation.
We are proud to serve the entire Greater Toronto Area (GTA), offering rapid, reliable mobile service directly to your location in Vaughan, Richmond Hill, Markham, and beyond. Every single windshield replacement we perform is backed by our comprehensive, industry-leading Lifetime Warranty, covering any manufacturer defects, air noises, and water leaks for as long as you own your Chrysler Sebring. When you demand OEM-quality materials, meticulous step-by-step craftsmanship, and ultimate peace of mind, choose the mobile auto glass experts at AlexWindshield.


