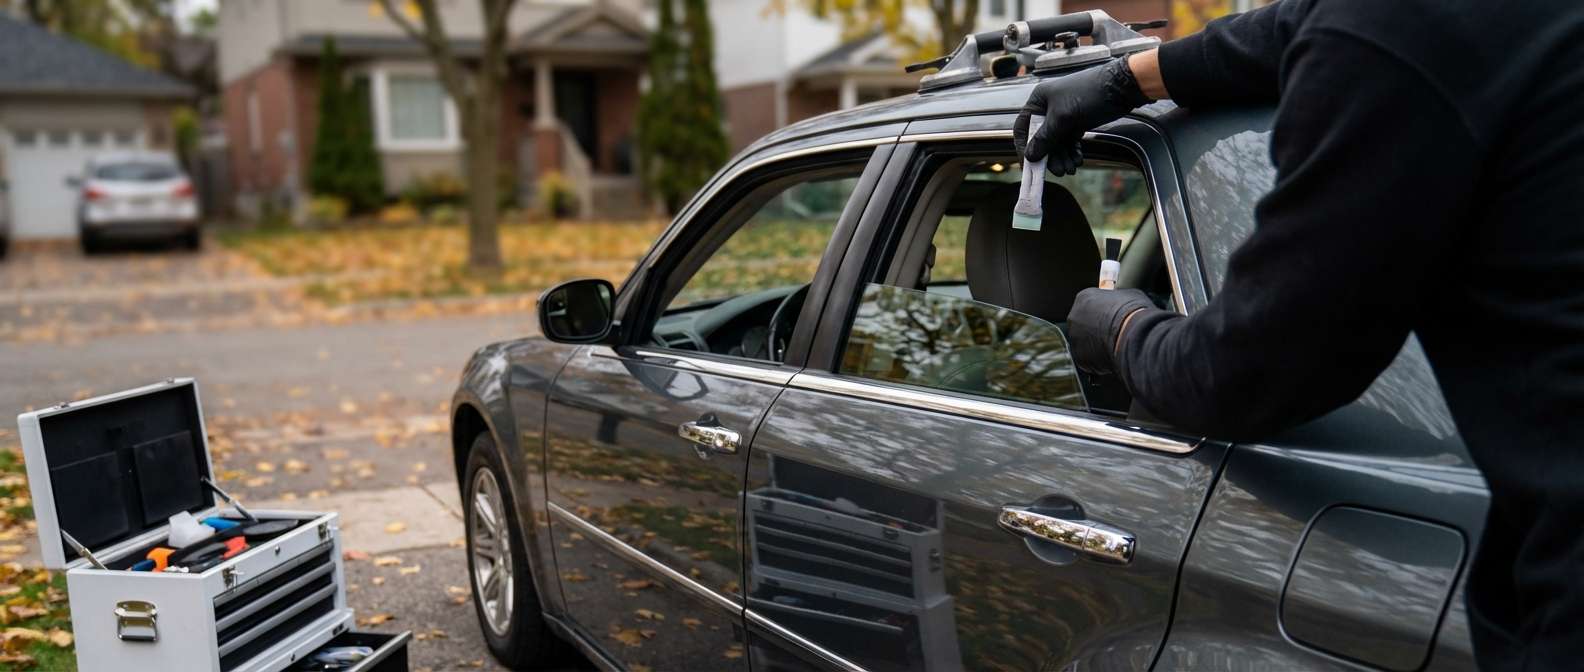
Restoring the "Baby Bentley" Profile: Professional Vent Glass Replacement for Your 2005-2010 Chrysler 300
The 2005-2010 Chrysler 300, built on the legendary rear-wheel-drive LX platform, revolutionized the modern American sedan with its aggressive, chopped-roof stance and bold, muscular lines. Often affectionately dubbed the "Baby Bentley" by automotive enthusiasts, this vehicle's distinctive aesthetic relies heavily on its narrow greenhouse and precisely angled auto glass. The rear door vent glass, while a small automotive component, plays a critically outsized role. It completes the iconic side profile of the vehicle while structurally sealing the rear cabin against harsh wind noise, rain, and road debris. Unfortunately, when this specific piece of glass is compromised—whether struck by a rogue stone on the highway or shattered during an unfortunate break-in attempt—it breaks into thousands of dangerous, granular pieces, leaving your prized interior exposed to the elements and security threats.
At AlexWindshield, we understand that replacing the vent glass on a first-generation Chrysler 300 is never just a simple patch job; it is about restoring the vehicle's structural integrity, passenger security, and iconic showroom look. As a senior SEO specialist and Master Technician, I have seen firsthand the extensive secondary damage that improper glass installations can cause. That is why our highly specialized auto glass replacement service is meticulously engineered to meet and exceed strict original equipment manufacturer (OEM) standards, ensuring your Chrysler 300 looks, feels, and performs exactly as it did rolling off the Brampton assembly line.
The Hidden Threat of Shattered Chrysler 300 Vent Glass
The vent glass on the 2005-2010 Chrysler 300 is strategically located at the rear edge of the back doors. Because of its proximity to the interior locking mechanisms, it is frequently the primary target for thieves attempting to gain quick access to the vehicle. When this tempered glass is broken, it results in an explosive shattering effect. The glass completely infiltrates the rear cabin, lodging deep into the premium leather or cloth seating, disappearing into the floor mats, and tumbling down into the inner mechanical cavity of the rear door itself.
Ignoring a shattered vent glass, or opting for a sub-par discount repair, can lead to severe long-term consequences for your vehicle. Water leaks from poor seals can quickly short out power window regulator motors, breed hazardous mold in your carpets, and damage interior electrical components. Furthermore, wind whistling through an improperly seated vent glass at highway speeds will completely ruin the quiet, luxurious ride the Chrysler 300 is globally known for. Our masterful, step-by-step replacement process guarantees a factory-tight seal every single time.
Master Technician's Step-by-Step Chrysler 300 Vent Glass Replacement Process
To guarantee a flawless, permanent repair, our master technicians follow a strict, A-to-Z standard operating procedure. We do not cut corners, and we do not rush the process. Here is exactly how we execute a premium vent glass replacement on your 2005-2010 Chrysler 300.
Step 1: Vehicle Preparation and Interior Protection
Before a single mechanical tool is lifted, our primary focus is on protecting your vehicle. The Chrysler 300 boasts a spacious, comfortable interior that must be heavily shielded from sharp debris and industrial auto glass chemicals. We carefully drape heavy-duty protective covers over the rear seats, the center console, and the exterior paint directly beneath our working area. Protecting the interior is our absolute top priority, ensuring that no secondary scratches, scuffs, or upholstery damage occurs during the meticulous repair process.
Step 2: Interior Door Panel Removal
Because the Chrysler 300 vent glass is integrated into the door frame alongside the main roll-down window, accessing the lower mounting points and the division bar requires full access to the inner door. Using specialized, non-marring nylon trim tools, we expertly execute the removal of door panels. This delicate process involves extracting hidden retaining screws behind the interior door handle and armrest, unclipping the main power window switch harness, and gently popping the perimeter plastic retaining clips without snapping them. Once the panel is safely removed and stored, we peel back the factory vapor barrier with extreme care so it can be perfectly resealed later, preventing future water drafts.
Step 3: Complete Broken Glass Extraction and Vacuuming
Tempered auto glass is engineered to shatter into small, blunt chunks to prevent deep passenger lacerations, but these thousands of shards inevitably migrate everywhere. With the interior door panel off, we deploy high-powered, industrial shop vacuums fitted with specialized narrow crevice tools to meticulously extract every single shard. We spend a significant amount of time vacuuming all broken glass shards from the vehicle's interior, deep-cleaning the seats, floor carpets, and seatbelt retractors. Most importantly, we vacuum out the deep, dark recesses of the inner door metal cavity. Leaving broken glass inside the door is a rookie mistake that results in a maddening rattling sound every time you close the door or drive over a pothole, and it can eventually jam the main rolling window tracks.
Step 4: Removal of the Old Glass Frame and Residual Urethane
With the entire work area completely clear of hazardous debris, we proceed to remove what remains of the original compromised vent glass. The vent glass assembly on the LX platform utilizes a vertical division bar that separates the main window from the vent window. We carefully unbolt this track. Using professional auto glass cold knives and specialized scraping tools, we pare down any old adhesive and extract the old encapsulated frame. The removal of the old glass frame and residual factory adhesives must be done with surgical precision to prevent scratching the bare metal pinch weld, which could easily lead to aggressive, hidden rust formation down the road.
Step 5: Surface Cleaning and Primer Application
A successful, leak-proof auto glass installation relies entirely on the chemical and structural bond between the vehicle's frame and the urethane adhesive. We perform a rigorous surface cleaning of the door's mounting area using specialized, alcohol-based glass and pinch weld cleaners to completely strip away dirt, road grime, and oils. Once the metal is completely clean and dry, we apply a high-grade primer application to any exposed scratches on the metal pinch weld and directly to the encapsulating frame of the new vent glass. This specialized automotive primer serves a dual purpose: it completely inhibits rust from forming on the vehicle's body, and it creates a highly reactive chemical bonding surface that ensures the adhesive will permanently bite into both the glass and the metal frame.
Step 6: Installation of the New Glass Using High-Quality Adhesive
Once the primer has properly flashed off and cured, we prepare our premium, fast-curing automotive polyurethane adhesive. Using an electric caulking gun to ensure a perfectly consistent bead, we lay down a thick, structurally sound V-bead of this installation of the new glass using high-quality adhesive along the mounting surface. The brand-new, OEM-quality vent glass is then carefully guided into place by hand. We apply firm, even pressure to seat the glass deeply into the urethane bed, guaranteeing a watertight and airtight seal that meets factory safety specifications. The vertical division bar is then meticulously re-bolted, locking the vent glass assembly permanently into the door frame.
Step 7: Reassembly and Final Quality Inspection
With the new vent glass securely installed and the premium adhesive beginning its rapid curing process, we focus on flawlessly reassembling the door. We re-secure the factory plastic vapor barrier using automotive-grade butyl tape to prevent any future moisture leaks into the cabin. The interior door panel is carefully re-hung, ensuring every single plastic clip snaps back tightly into its original factory position. We reconnect the power window switches and test the main roll-down window multiple times to ensure it glides smoothly along the newly installed division bar without any binding or friction. Finally, we clean the new vent glass with a streak-free, foaming glass cleaner and perform a rigorous final visual inspection to verify perfect alignment and flawless aesthetic integration.
Premium Mobile Auto Glass Services Across the Greater Toronto Area (GTA)
We know that dealing with a shattered car window is a massive, unexpected inconvenience in your busy life. Driving a Chrysler 300 with a missing vent glass exposes you to freezing winter winds, unpredictable summer rainstorms, and the deafening noise of highway traffic. That is exactly why AlexWindshield brings our Master Technician expertise directly to your doorstep, whether that is your home driveway, your office parking lot, or your commercial garage.
Our fully equipped, state-of-the-art mobile service vans operate comprehensively across the Greater Toronto Area (GTA). We are proud to provide rapid-response auto glass replacement to specific, high-traffic communities, including:
- Vaughan: Navigating the busy commercial districts and suburban neighborhoods of Vaughan requires a secure, quiet vehicle. Our mobile units arrive promptly to restore your Chrysler 300.
- Richmond Hill: Whether you are parked at home or running errands in Richmond Hill, we deliver factory-perfect glass replacements without you ever having to visit a shop.
- Markham: From tech parks to residential driveways, our technicians service all of Markham, bringing premium auto glass solutions directly to your location.
You do not need to burn your vacation days, take time off work, or waste countless hours sitting in a dusty repair shop waiting room. Our dedicated mobile technicians arrive fully prepared with the exact Chrysler 300 glass, the specialized interior tools, and the premium automotive adhesives required to execute a flawless repair right where you are parked.
Trust AlexWindshield – Backed by a Comprehensive Lifetime Warranty
Your 2005-2010 Chrysler 300 is a bold modern classic, and its aggressive styling and luxurious ride deserve to be treated with the utmost respect and technical precision. Do not leave your vehicle's security, structural integrity, and weatherproofing to chance by relying on budget repair shops and subpar, aftermarket materials. Choose the proven, meticulous expertise of a true Master Technician.
At AlexWindshield, we confidently stand behind every single auto glass installation we perform. We have built our reputation as the most trusted and reliable name in mobile auto glass repair and replacement throughout the GTA. When you choose our team for your Chrysler 300 vent glass replacement, you are making a direct investment in long-term peace of mind. Every single installation is fully backed by our rock-solid Lifetime Warranty, which comprehensively covers any future water leaks, wind noises, or manufacturer defects in the glass for as long as you own the vehicle. If you demand the absolute best for your car, contact AlexWindshield today to schedule your mobile appointment and experience the absolute pinnacle of automotive glass craftsmanship.


