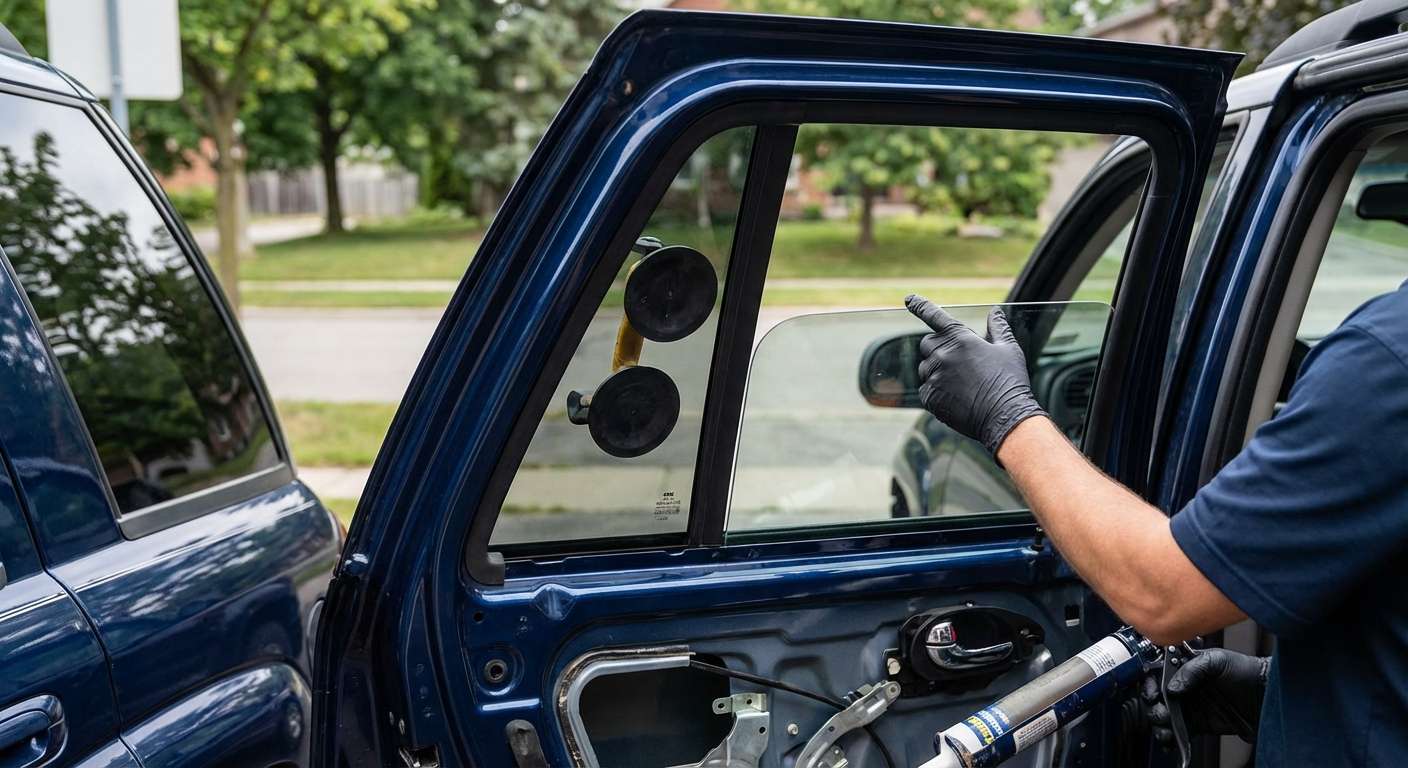
Reviving a Classic: Chevrolet Trailblazer 2002-2009 Vent Glass Replacement
The 2002-2009 Chevrolet Trailblazer redefined the mid-size SUV market with its rugged body-on-frame construction, spacious interior, and the legendary Vortec 4200 inline-six engine. As a staple for both daily commutes and weekend adventures, this vehicle has stood the test of time. However, its expansive rear door layout features a distinct triangular vent glass pane that is frequently targeted by thieves or severely damaged by road debris. Because this specific pane is integrated tightly into the rear door assembly, a shattered vent glass compromises your vehicle’s security, exposes the cabin to harsh weather, and leaves dangerous glass shards hidden deep within the door frame.
As a Master Technician at AlexWindshield, I have spent years servicing the robust GMT360 platform that underpins the Trailblazer. Replacing the vent glass on this specific generation requires much more than simply sticking a new piece of glass into a rubber seal. It demands a meticulous, multi-step teardown of the door assembly, meticulous interior cleaning, and expert application of automotive-grade sealants. We provide specialized, mobile vent glass replacement services specifically tailored for the 2002-2009 Chevrolet Trailblazer across the Greater Toronto Area (GTA), ensuring your classic SUV is restored to its original factory condition.
Why Expert Intervention is Crucial for Trailblazer Vent Glass
When the vent glass on a 2002-2009 Chevrolet Trailblazer shatters, it does not just leave a gaping hole in your vehicle; it explodes into thousands of tiny, razor-sharp tempered glass fragments. These shards scatter across the rear seats, embed themselves into the floor mats, and, most problematically, fall directly down into the internal cavity of the door shell. If you simply patch the window without a comprehensive internal teardown, those trapped shards will grind against the main window's moving parts, eventually destroying the window regulator mechanism and causing perpetual rattling.
Furthermore, local drivers face extreme weather fluctuations. A poorly sealed vent glass will quickly fail during the freezing winters and humid summers characteristic of Vaughan, Richmond Hill, and Markham. An improper seal leads to aggressive water leaks, interior cabin rust, and loud wind noise at highway speeds. At AlexWindshield, our mobile auto glass replacement process is engineered to combat these specific challenges, utilizing OEM-quality replacement glass and industry-leading chemical retention systems.
The Master Technician's Process: Step-by-Step Vent Glass Replacement
Step 1: Complete Vehicle Assessment and Interior Protection
Before any tools touch your vehicle, our first priority is the protection of your Trailblazer’s interior. The replacement process begins with a comprehensive assessment of the impact zone to ensure no peripheral damage has occurred to the door frame or the exterior paint. We then drape heavy-duty protective covers over the rear seats, the center console, and the exterior body panels beneath the door. Floor mats are removed and protective plastics are laid down to catch any rogue glass fragments during the disassembly phase.
Step 2: Precision Door Panel and Component Removal
Because the vent glass on the 2002-2009 Trailblazer is separated from the main roll-up window by a vertical division bar, the entire interior door trim must be dismantled to access the mounting points. We start by carefully removing the power window switch bezel, disconnecting the wiring harnesses, and unscrewing the hidden retaining bolts located behind the interior door handle and at the bottom edge of the panel. Using specialized, non-marring pry tools, we gently pop the plastic retaining clips surrounding the perimeter of the door card, lifting the panel away to expose the inner door mechanics. We then carefully peel back the factory vapor barrier, ensuring it remains intact for reinstallation to prevent future water intrusion.
Step 3: Comprehensive Glass Shard Vacuuming
This is one of the most critical steps in replacing tempered side glass. Once the door cavity is exposed, we deploy high-powered, industrial-grade vacuums equipped with specialized micro-crevice tools. We meticulously extract every single shard of broken glass from the interior cabin, the seat crevices, and the floor carpeting. We then turn our attention to the internal door shell. We vacuum the bottom of the door cavity, the window regulator tracks, the drainage weep holes, and the rubber weatherstripping channels. Leaving even a few pieces of glass behind can cause severe mechanical binding when you roll the main window up and down. Our thorough vacuuming process guarantees a silent, rattle-free ride.
Step 4: Division Bar Extraction and Old Glass Removal
To extract the remnants of the broken vent glass, the vertical division bar must be unbolted. We lower the main door glass to gain clearance, remove the upper and lower mounting bolts securing the division bar, and carefully tilt it out of the window channel. With the structural bar removed, we can extract the remaining broken shards still clinging to the vent glass frame. We meticulously scrape away the old adhesive, degraded rubber gaskets, and factory sealants from the pinch weld, ensuring the metal frame is completely bare and smooth.
Step 5: Frame Preparation and Surface Cleaning
A flawless seal requires a mathematically clean surface. We treat the bare metal frame and the surrounding weatherstripping with a highly specialized, alcohol-based automotive glass cleaner to strip away dirt, grease, road grime, and lingering adhesive residues. We also prepare the edges of the new OEM-quality auto glass pane, ensuring there are no microscopic contaminants that could compromise the chemical bonding process.
Step 6: Specialized Primer Application
Exposed bare metal on a door frame is highly susceptible to rust, especially with the heavy road salt used during winter months in the Greater Toronto Area (GTA). To combat this, we apply an advanced, fast-drying automotive glass primer to any scratches or exposed metal on the pinch weld. This primer serves a dual purpose: it acts as a highly effective anti-corrosion barrier, and it chemically activates the surface to ensure maximum adhesion for the urethane bonding agent.
Step 7: Applying High-Quality Adhesive
Once the primer has flashed and cured, we apply a continuous, thick bead of premium, fast-curing polyurethane adhesive to the mounting surface. At AlexWindshield, we strictly use industry-leading, high-quality adhesive systems that exceed factory safety standards. This structural urethane is engineered to remain permanently flexible, absorbing the intense vibrations of the Trailblazer's body-on-frame chassis without cracking, ensuring a completely watertight and airtight seal that will last the lifetime of the vehicle.
Step 8: Precision Installation of the New Vent Glass
With the high-quality adhesive perfectly laid down, we carefully insert the new vent glass pane into the rear door frame. We apply firm, even pressure around the perimeter of the glass to properly seat it within the urethane bead and the rubber encapsulation. We then carefully slide the vertical division bar back into its factory position, realigning the tracks for both the fixed vent glass and the moving door glass. The retaining bolts are tightened to factory torque specifications, locking the entire assembly firmly into place.
Step 9: Reassembly of Door Components
With the new vent glass securely installed, we reverse the teardown process. The factory vapor barrier is meticulously resealed to the inner door shell using acoustic sealant to prevent drafts and moisture leaks. The interior door panel is aligned with the door lock pin, pressed firmly to re-engage all plastic retaining clips, and secured with its original mounting bolts. We then reconnect all electrical harnesses for the window switches and door locks, snapping the bezels back into their original factory positions.
Step 10: Final Inspection, Testing, and Cleanup
The job is not complete until it passes our rigorous quality assurance checklist. We power on the Trailblazer and cycle the main roll-up window up and down multiple times to ensure it glides smoothly within the newly reinstalled division bar track, free of any binding or glass-grinding noises. We inspect the exterior seals around the new vent glass to guarantee perfect flushness with the vehicle's body lines. Finally, we clean all the windows with streak-free glass cleaner and perform one last sweep of the interior, leaving your SUV significantly cleaner than when we arrived.
Choose AlexWindshield for Mobile Auto Glass Services in the GTA
Dealing with a shattered vent window on your 2002-2009 Chevrolet Trailblazer is stressful enough without having to navigate traffic to reach a repair shop with a cabin exposed to the elements. That is why AlexWindshield brings the repair shop directly to your driveway, office, or parking lot. Our fleet of fully equipped mobile service vans provides prompt, professional auto glass replacement throughout the Greater Toronto Area (GTA), with dedicated daily routes covering Vaughan, Richmond Hill, and Markham.
We pride ourselves on technical mastery, uncompromising safety standards, and unparalleled customer service. We don't cut corners; we remove the panels, vacuum the hidden shards, and use the best adhesives in the industry. Because we are so confident in our precision techniques and the premium materials we use, every single auto glass replacement performed by AlexWindshield is backed by our comprehensive Lifetime Warranty. This warranty guarantees your new vent glass will be absolutely free from wind noise, water leaks, and workmanship defects for as long as you own your Trailblazer.
- Expert Technicians: Master-level expertise with classic mid-size SUVs and the Chevrolet GMT360 platform.
- Mobile Convenience: We proudly serve the entire Greater Toronto Area (GTA), including deep coverage in Vaughan, Richmond Hill, and Markham.
- Unmatched Quality: Strict use of OEM-quality glass, advanced rust-preventative primers, and premium polyurethane adhesives.
- Comprehensive Service: Full door panel removal and meticulous interior vacuuming to protect your vehicle's mechanical components.
- Peace of Mind: Backed by the industry-leading AlexWindshield Lifetime Warranty.
If your Chevrolet Trailblazer has suffered a broken vent glass, do not leave it vulnerable to theft and weather damage. Trust the local experts who understand the intricate mechanics of your vehicle. Contact AlexWindshield today to schedule your mobile auto glass replacement and get back on the road with ultimate safety and clarity.


