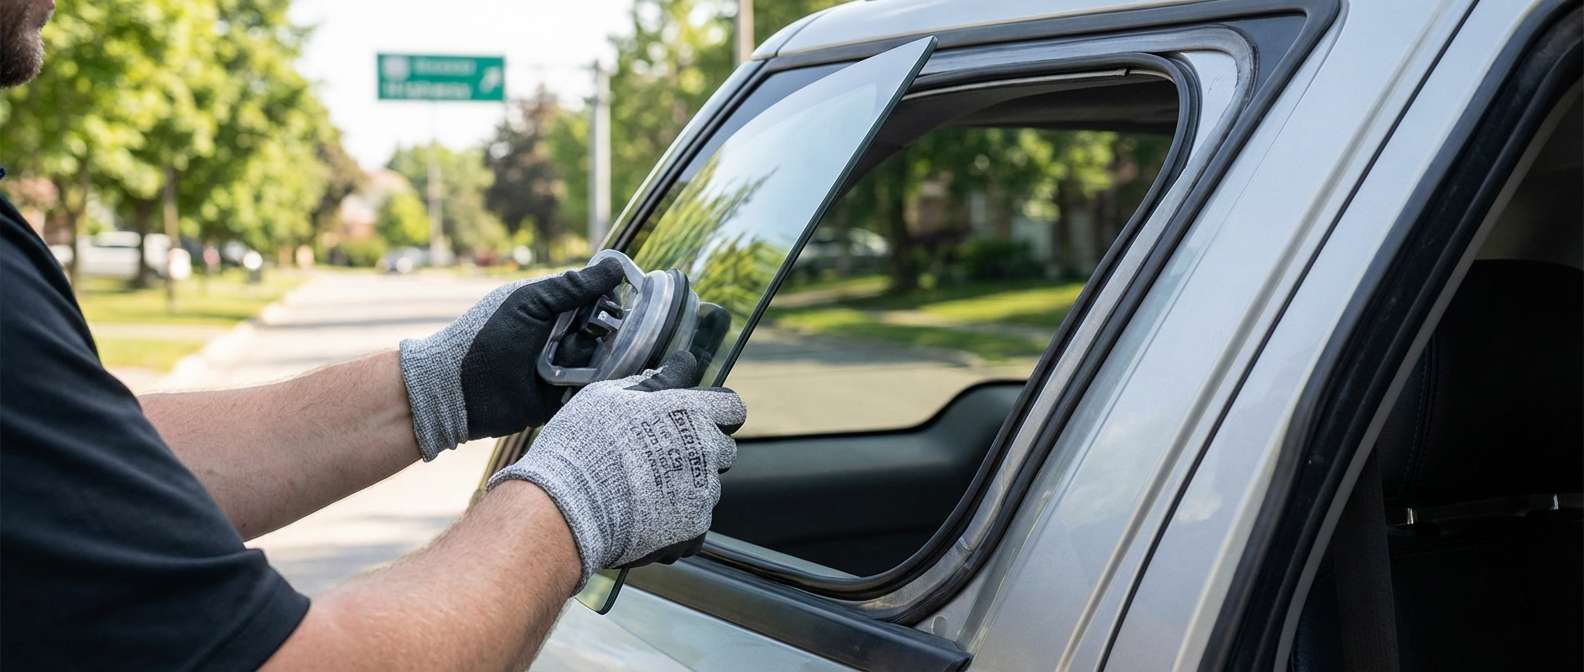
The Rugged Legacy of the 2002-2009 Chevrolet Trailblazer: Why Quarter Glass Precision Matters
The first-generation Chevrolet Trailblazer (2002-2009) remains a legendary fixture on Canadian roads, celebrated for its robust body-on-frame construction, dependable Vortec inline-six engine, and incredibly spacious family-hauling capabilities. However, its classic, expansive side-profile design leaves the rear quarter glass highly vulnerable to off-road hazards, accidental impacts, side-swipes, and unfortunately, vandalism. Because the quarter glass on this specific SUV is typically made of tempered glass, an impact does not just crack it—it shatters it completely into thousands of tiny, hazardous shards. Replacing this vital structural component is not merely a matter of pressing a new piece of glass into a frame. It requires an advanced understanding of aging GM vehicles, meticulous interior disassembly, and commercial-grade urethane bonding to restore the vehicle's structural integrity, prevent water leaks, and keep exhaust fumes out of the cabin.
As a Master Technician at AlexWindshield, I have spent years perfecting the highly technical process required for the 2002-2009 Chevrolet Trailblazer quarter glass replacement. Due to the age of these vehicles, the interior plastics are often brittle, and the pinch welds may hide early signs of rust. Our replacement protocol goes far beyond the industry standard, ensuring that every layer of your SUV is respected, restored, and sealed with factory-level precision.
Comprehensive A to Z Quarter Glass Replacement Process for Your Trailblazer
Unlike a drop-in door glass, a bonded quarter glass is a structural element of your vehicle. At AlexWindshield, we follow a rigorous, step-by-step technical methodology to ensure your new auto glass is installed flawlessly and securely.
Step 1: Pre-Installation Inspection and Interior Protection
Before any tools touch your vehicle, our technicians perform a thorough damage assessment. Shattered tempered glass often flies across the entire cabin of the Trailblazer. We begin by securing the environment to protect your vehicle's interior and exterior.
- Exterior Masking: We apply protective automotive tape around the rear quarter panel and D-pillar to ensure our cutting tools never scratch your vehicle's factory paint.
- Interior Drop Cloths: Heavy-duty protective covers are laid over the rear cargo area, the rear passenger seats, and the flooring to catch any loose debris or urethane drips.
- Safety Gear: Our technicians equip themselves with cut-resistant Kevlar gloves and safety glasses to safely handle the hazardous shattered edges still clinging to the frame.
Step 2: Extensive Glass Clean-Up and Vacuuming
When the quarter glass shatters, the shards inevitably fall deep into the cargo side compartments and seatbelt mechanisms. Leaving even a small amount of this debris can cause rattling noises or jam the seatbelt retractors, posing a major safety hazard.
- Initial Debris Removal: We carefully extract the large, jagged chunks of glass still attached to the vehicle's urethane bead.
- Industrial Vacuuming: Using high-powered shop vacuums, we meticulously clean the entire rear cabin. We vacuum the trunk bed, inside the storage cubbies, beneath the rear folding seats, and deeply into the interior body cavities where glass fragments hide.
- Door and Panel Extraction: While standard door glass replacements require door panel removal, the quarter glass requires us to clear the interior body panels of any hidden shards to guarantee a noise-free ride.
Step 3: Careful Removal of Interior Trim Panels
To safely access the urethane bonding area and the retaining nuts (if applicable to the specific trim level of your 2002-2009 Trailblazer), the interior trim must be partially or fully detached.
- C-Pillar and D-Pillar Disassembly: We carefully unclip and remove the rear upper and lower plastic pillar trims. Knowing that 2002-2009 GM plastics can become brittle over time, we use specialized, non-marring nylon pry tools to prevent cracking or snapping the retaining tabs.
- Seatbelt Anchor Relocation: If the seatbelt mounting hardware obstructs the pinch weld, it is safely unbolted and moved aside.
- Exposing the Frame: This interior removal gives us full, unobstructed access to the inner pinch weld, ensuring we can cut the old glass out without slicing into your vehicle's interior upholstery.
Step 4: Cutting Out the Old Quarter Glass Seal
With the interior protected and exposed, we must separate the remaining glass and original factory urethane from the vehicle’s steel frame.
- Cold Knife Tooling: We use a professional-grade cold knife to slice through the exterior layer of the old polyurethane adhesive.
- Wire Cutting Systems: For tighter corners near the Trailblazer's roofline, we employ an advanced braided wire cutting system. This tool slices cleanly through the tough factory urethane without applying unnecessary stress to the vehicle’s body.
- Complete Extraction: The remaining glass and outer molding are successfully removed from the vehicle frame.
Step 5: Pinch Weld Preparation and Cleaning
The foundation of a safe, leak-proof auto glass installation is a perfectly prepared pinch weld.
- Urethane Trimming: We use razor-sharp specialist scrapers to shave the old, hardened urethane down to a thin, uniform 1-2 millimeter base. This provides the ideal surface for the new adhesive to bond to.
- Contaminant Removal: The entire channel is deeply cleaned using an industrial, alcohol-based auto glass cleaner. This removes dirt, wax, road grime, and moisture that could compromise the chemical bond of the new adhesive.
Step 6: Primer Application for Rust Prevention and Adhesion
Because the 2002-2009 Chevy Trailblazer is an older vehicle, preventing rust is an absolute priority during this replacement.
- Bare Metal Scratch Treatment: If the cutting process exposes any bare metal on the pinch weld, or if minor factory rust is present, we treat it immediately.
- Black Glass Primer: We apply a high-quality, scientifically formulated black urethane primer to any exposed steel and to the bonding edge of the new quarter glass. This primer acts as a critical rust inhibitor and creates a chemical bridge that guarantees the urethane adhesive will grip with maximum strength.
Step 7: Precision Urethane Adhesive Application
The adhesive used is what keeps your glass attached in the event of an accident and prevents harsh Canadian weather from entering your cabin.
- High-Modulus Urethane: We load our power caulking guns with premium, fast-curing, OEM-quality urethane adhesive.
- V-Bead Extrusion: We extrude the urethane using a precise V-cut nozzle. This specific shape ensures that when the glass is pressed into place, the adhesive collapses evenly, creating a uniform, watertight seal without any air pockets or gaps.
Step 8: Mounting the New Quarter Glass
Handling large, curved pieces of automotive glass requires coordination and absolute precision.
- Suction Cup Placement: We attach heavy-duty, vacuum-sealed suction cups to the exterior of the new, premium quarter glass.
- Perfect Alignment: The glass is carefully lifted and guided into the frame. We align the glass with the Trailblazer's specific body lines, ensuring the gaps are perfectly symmetrical with the rear hatch and the rear door.
- Setting the Bond: Gentle, firm pressure is applied around the perimeter of the glass to set it securely into the wet urethane bead. Retention tape is temporarily applied to hold the glass perfectly in place against gravity while the curing process begins.
Step 9: Reassembly and Final Cure Time
The final stage ensures your vehicle looks exactly as it did before the damage occurred.
- Interior Reassembly: We carefully reinstall the D-pillar and C-pillar interior trim pieces, re-bolt any seatbelt anchors to factory torque specifications, and ensure all interior electronics (like rear speakers or antennas) are fully connected.
- Final Clean: We polish the new quarter glass using a streak-free foaming glass cleaner and do a final sweep of the vehicle's interior.
- Safe Drive-Away Time (SDAT): We strictly adhere to the urethane manufacturer's recommended curing times, ensuring the adhesive has cross-linked and hardened enough to meet federal safety standards before we hand you back the keys.
Expert Mobile Auto Glass Services Across the Greater Toronto Area (GTA)
We know that driving a vehicle with a shattered quarter glass is dangerous. The loud wind noise, the risk of exhaust fumes entering the cabin, and the exposure to rain or snow make it an urgent issue. That is why AlexWindshield provides unparalleled, fully equipped mobile auto glass replacement directly to your home, office, or workplace anywhere across the Greater Toronto Area (GTA).
Proudly Serving Vaughan, Richmond Hill, and Markham
Whether you are dealing with auto glass damage in a bustling commercial parking lot or your residential driveway, our mobile fleet brings the auto glass shop to you.
- Vaughan: From Woodbridge to Concord, we navigate the busy streets of Vaughan to deliver fast, reliable quarter glass replacements. Whether you are parked near Vaughan Mills or at home, our mobile service guarantees minimal disruption to your day.
- Richmond Hill: If you are commuting down Yonge Street or living in the quiet suburbs of Richmond Hill, our master technicians arrive with all the necessary tools, vacuums, and weather-protection gear to replace your Trailblazer's glass flawlessly on-site.
- Markham: Navigating auto glass damage in Markham is hassle-free with AlexWindshield. We service everything from residential neighborhoods near Unionville to the tech hubs, ensuring your SUV is secured, weatherproofed, and ready for the 407 in no time.
Choose AlexWindshield for Your Trailblazer Glass Needs
When it comes to servicing a classic SUV like the 2002-2009 Chevrolet Trailblazer, you cannot afford to trust your safety to inexperienced technicians. An improperly installed quarter glass can lead to hidden rust, severe water damage to your interior, and compromised cabin safety. You need a team that understands the specific architectural nuances of GM vehicles.
At AlexWindshield, we pride ourselves on being the most trusted experts for auto glass repair and replacement in the GTA. We utilize only the highest grade OEM and OEE glass, paired with industry-leading urethane adhesives. Our technicians are meticulously trained in every aspect of automotive glazing, from precise trim removal to structural bonding.
Most importantly, we stand firmly behind the quality of our craftsmanship. Every single quarter glass replacement we perform is backed by our comprehensive Lifetime Warranty. This warranty guarantees that your new installation will be free from air leaks, water leaks, and manufacturer defects for as long as you own your Trailblazer. Do not let a shattered window leave your vehicle vulnerable to the elements or theft. Contact AlexWindshield today to schedule your mobile appointment in Vaughan, Richmond Hill, Markham, or anywhere in the GTA, and experience the premium standard of automotive glass replacement.


