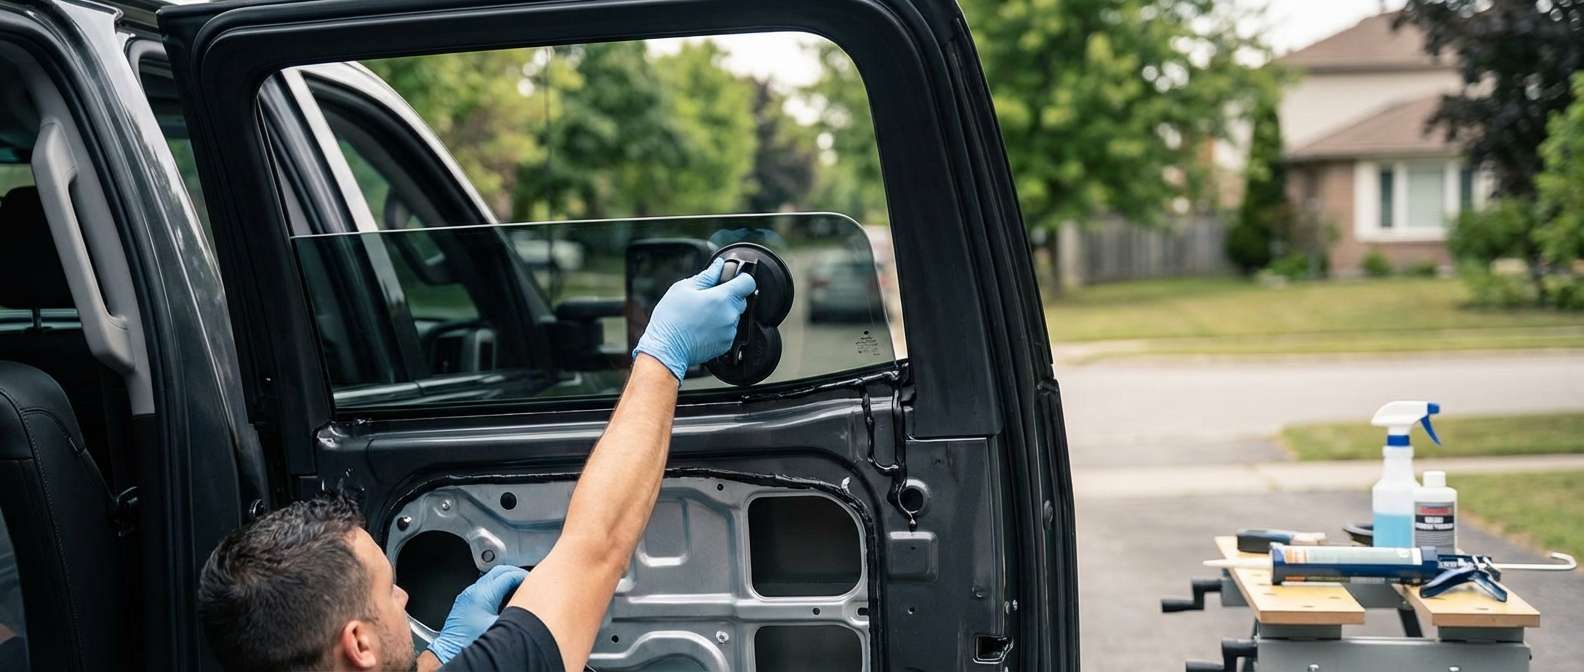
Expert Vent Glass Replacement for Chevrolet Silverado HD 2500/3500 (2015-2019)
The Chevrolet Silverado HD 2500/3500 (2015-2019) is an undisputed workhorse, highly engineered to dominate rugged job sites and conquer heavy towing routes. However, its unyielding strength does not make it immune to the hazards of the road or unfortunate acts of vandalism. The rear door vent glass—that small, stationary pane adjacent to the main roll-down window—is notoriously vulnerable. Whether struck by kicked-up gravel on a busy highway or shattered by opportunistic thieves looking for quick cabin access, a broken vent glass immediately compromises the sanctuary of your heavy-duty truck. Driving with a breached cabin not only invites harsh weather and deafening wind noise into your otherwise quiet interior, but it also disrupts the vehicle's climate control system and leaves your truck vulnerable to further security risks. Restoring the structural integrity and acoustic insulation of your Silverado requires absolute precision and specialized techniques.
Why Silverado HD Vent Glass Repair Requires Master Level Expertise
Unlike standard roll-down windows, the vent glass on the 2015-2019 Chevrolet Silverado HD crew cab and double cab models is intricately integrated into the rear door assembly. It is structurally separated from the main drop glass by a metal division bar and is often secured using a combination of heavy-duty encapsulation and urethane bonding. Furthermore, this glass is manufactured from tempered safety glass. When impacted, tempered glass is designed to shatter into thousands of granular, blunt pieces rather than dangerous, jagged shards. While this protects occupants from severe lacerations, it creates an absolute nightmare inside the cabin. Glass shards forcefully embed themselves into seat fabrics, floor mats, and plummet deep down into the complex cavity of the door itself. A professional replacement isn't simply about sticking a new piece of glass into a frame; it is about meticulous extraction, rigorous cleanup, and factory-standard reassembly.
Premium Mobile Auto Glass Services Across the Greater Toronto Area (GTA)
At AlexWindshield, we understand that time is money, especially when you depend on your Silverado HD 2500/3500 for your livelihood or daily commute. A shattered window shouldn't force you to halt your operations and sit for hours in a crowded repair shop waiting room. That is why we proudly offer fully equipped mobile auto glass services directly to your location. Whether you are managing a construction site in Vaughan, parked at a corporate office in Markham, or relaxing at your home in Richmond Hill, our master technicians bring the auto glass shop directly to you.
Our expansive service network across the Greater Toronto Area (GTA) ensures rapid response times and unparalleled convenience. We carry the specialized tools, climate-controlled adhesives, and premium replacement parts necessary to perform flawless, factory-grade heavy-duty truck glass replacements right in your driveway or worksite, rain or shine.
Detailed Step-by-Step Technical Replacement Process: A to Z
Replacing the vent glass on a 2015-2019 Chevy Silverado HD demands a precise, methodical approach. As master technicians, we adhere to strict automotive glass replacement protocols to guarantee a secure, permanent, and weatherproof fit. Here is the exact procedure we follow to transform your compromised door back to showroom condition:
Step 1: Thorough Vehicle Assessment and Interior Protection
Before any tools are utilized, we safeguard your Silverado's interior. We apply heavy-duty protective drop cloths over your leather or cloth seats, center console, and carpeting. The door's exterior paint and clear coat are protected using low-tack automotive tape and specialized fender covers to prevent any accidental scratches during the extraction process.
Step 2: Comprehensive Glass Extraction and Shard Vacuuming
Because the original vent glass is tempered, thousands of tiny glass fragments are left behind after a break. Skipping this step leads to rattling doors and potential damage to the main window regulator mechanisms. We utilize high-suction industrial vacuums equipped with micro-attachments to remove every visible shard from the cabin.
- Surface Vacuuming: We clear all glass from the seats, floor mats, and door armrests.
- Inner Door Cavity Cleaning: We carefully peel back the factory vapor barrier to access the bottom of the inner door shell, meticulously vacuuming all broken glass shards from the vehicle's interior door cavity and the window regulator tracks to ensure smooth operation of the main window.
Step 3: Door Panel and Division Bar Removal
To safely access the mounting points of the Silverado's vent glass, we must disassemble the interior door components.
- We remove the interior trim pieces, including the bezel behind the door handle and the switch panel armrest.
- Using specialized trim tools, we extract the retaining bolts (typically 7mm) and gently pop the perimeter retaining clips to release the inner door panel without breaking the fragile plastic fasteners.
- We disconnect all electrical wiring harnesses corresponding to the window switches and door locks.
- To make room for the vent glass extraction, we lower the main drop glass and carefully unbolt the metal division bar (the vertical track separating the two windows), sliding it slightly out of the way to release the tension on the vent glass frame.
Step 4: Urethane Removal and Surface Cleaning
With the frame exposed, we address the mounting area. If the factory vent glass was set with an encapsulated rubber molding bonded by urethane, we use precision cold knives and specialized wire cutting tools to slice through the old adhesive bead. We pare down the old urethane down to a thin, even layer of about 1-2 millimeters on the pinch weld. This creates the optimal bonding surface for the new adhesive. We then perform rigorous surface cleaning, wiping the entire metal frame and surrounding channel with an alcohol-based, lint-free cleaner to remove dust, grease, and any microscopic debris that could compromise the final seal.
Step 5: Frit Band Preparation and Primer Application
The structural integrity of your new glass depends heavily on chemical adhesion. Once the surface is flawlessly clean, we move to the priming stage.
- We apply a specialized glass primer to the black ceramic frit band on the edges of the new replacement vent glass. This promotes a cross-linking chemical bond between the glass and the urethane.
- Next, we execute a crucial primer application to any bare metal scratches on the truck's door frame or pinch weld. This step is completely non-negotiable, as it prevents long-term moisture penetration and subsequent rust formation inside your door frame.
Step 6: High-Quality Adhesive Application and Glass Installation
Using a battery-operated caulking gun for perfect consistency, we apply a thick, triangular bead of premium, fast-curing automotive polyurethane adhesive onto the prepped frame. We strictly utilize high-quality adhesive that meets or exceeds OEM (Original Equipment Manufacturer) crash test standards.
The new, DOT-approved tempered vent glass is then expertly maneuvered into the door channel. We slide it securely under the upper weatherstripping and press it firmly into the fresh urethane bead. The division bar is then bolted back into its original factory position, locking the vent glass in securely and re-establishing the tight track needed for the main roll-down window.
Step 7: Final Reassembly and Quality Assurance Testing
With the new glass perfectly set, we begin the meticulous reassembly phase. We reinstall the moisture vapor barrier, reconnect all electrical harnesses, and snap the interior door panel firmly back into place, securing all bolts and trim pieces. We then perform a rigorous quality check:
- We roll the main door window up and down multiple times to ensure the division bar is aligned perfectly and no glass shards are grinding in the track.
- We inspect the exterior weatherstripping and encapsulation for any aesthetic flaws or gaps.
- We clean both the interior and exterior of the newly installed glass using a foaming automotive glass cleaner, leaving it with a flawless, streak-free finish.
Why Trust AlexWindshield for Your Auto Glass Needs?
Replacing the glass on a heavy-duty truck like the Chevrolet Silverado HD 2500/3500 is not a job for amateurs. Subpar installations can lead to severe water leaks, rust degradation, whistling wind noise at highway speeds, and compromised passenger safety. When you choose AlexWindshield, you are choosing unmatched technical proficiency and absolute peace of mind.
We pride ourselves on exclusively sourcing OEM-quality glass that precisely matches the factory tint, contour, and acoustic properties of your Chevrolet. Furthermore, our dedication to customer satisfaction is backed by our comprehensive Lifetime Warranty. This industry-leading guarantee covers all of our workmanship, protecting you against any future water leaks, air noises, or manufacturer defects for as long as you own your Silverado.
Do not let a shattered vent window compromise the security, comfort, and rugged capability of your truck. Whether you are navigating the suburban streets of Richmond Hill, parked at an industrial site in Vaughan, or commuting through Markham, we are your premier local experts. Contact AlexWindshield today to schedule your mobile auto glass replacement, and let our master technicians get your heavy-duty Chevy back on the road safely, swiftly, and securely.


