Master-Level Back Glass Replacement for Chevrolet Silverado HD 2500/3500 (2015-2019)
The 2015-2019 Chevrolet Silverado HD 2500 and 3500 are unyielding workhorses, engineered to haul massive loads, navigate rugged job sites, and dominate the open highway. But when your heavy-duty truck suffers a shattered back glass, that rugged utility comes to a grinding halt. A compromised rear window does not just invite harsh Canadian weather and severe road noise into your otherwise quiet cabin; it creates a massive safety hazard, obstructing your critical rear-view visibility, which is especially dangerous when you are towing a fifth-wheel or managing a heavy payload. Unlike a front windshield, which features laminated glass designed to crack but stay intact, the rear window is constructed from tempered safety glass. Upon impact, it violently shatters into thousands of tiny, pebble-like shards that infiltrate every crevice of your truck's interior. Addressing this mess and restoring your truck's structural integrity requires the hands of a seasoned professional.
Expert Mobile Auto Glass Service Across the Greater Toronto Area (GTA)
When your Silverado HD is sidelined by a shattered back glass, driving it to a repair shop is not just inconvenient—it is a major safety risk. Loose glass shards can fly around the cabin, and the open rear cavity leaves your interior exposed to the elements. That is why AlexWindshield brings the auto glass shop directly to your driveway, job site, or office. We provide top-tier, fully mobile auto glass replacement services across the Greater Toronto Area (GTA).
Whether you are managing a fleet of work trucks in industrial Vaughan, parked at a residential property in Richmond Hill, or overseeing a construction site in Markham, our fully equipped mobile service vans arrive on-site with the precise glass and premium materials needed to get your Silverado back on the road. We understand the specific demands of GTA drivers and deliver rapid, uncompromising service directly to your location.
Understanding the Complexity of Silverado HD Back Glass
Replacing the back glass on a Chevrolet Silverado HD 2500/3500 (2015-2019) is an intricate process. Depending on your specific trim level—whether it is an LT, LTZ, or High Country—your rear window may feature complex integrated technologies. These variations require careful handling by a Master Technician:
- Integrated Rear Defrosters: The heated grid lines require precise electrical reconnection to ensure rapid defrosting during harsh GTA winters.
- Power Sliding Center Windows: Trucks equipped with a power slider possess built-in motor cables and tracks that must be meticulously realigned and tested during the installation process.
- Privacy Tint: We match the factory-grade deep tint to ensure your cabin remains cool and your tools stay hidden from prying eyes.
- Acoustic and Structural Integrity: The rear glass plays a crucial role in cabin noise reduction and overall roof crush resistance.
The AlexWindshield A-to-Z Replacement Process
As a Master Technician at AlexWindshield, I do not believe in shortcuts. A proper back glass replacement demands a surgical approach to safety, cleanliness, and structural bonding. Here is our comprehensive, step-by-step technical process for restoring the rear glass on your 2015-2019 Silverado HD.
Step 1: Vehicle Pre-Inspection and Extensive Interior Protection
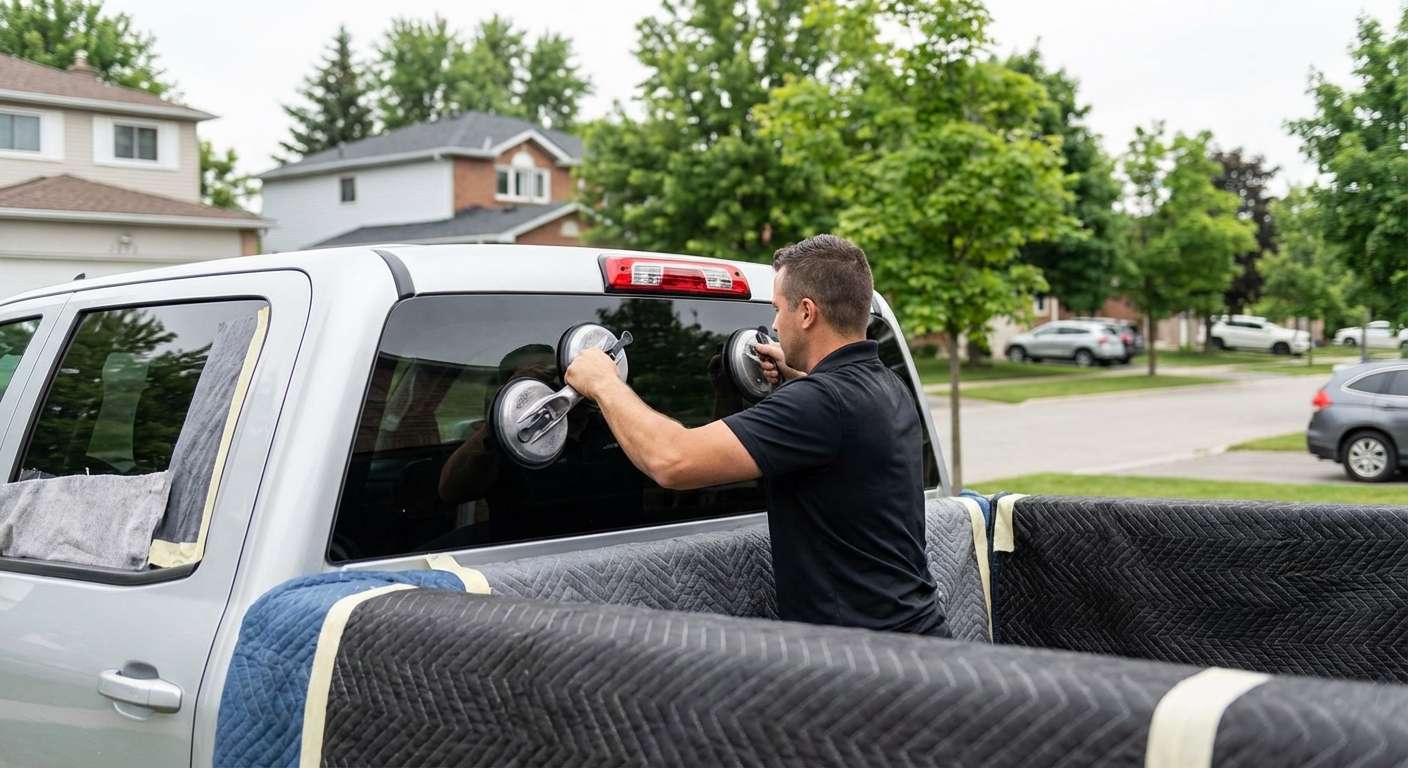
Before any tools are lifted, we perform a thorough inspection of the damage and the surrounding truck bed. Because the Silverado's back glass sits directly above the cargo box and rear seating area, we meticulously prep the vehicle. We drape heavy-duty protective blankets over the tailgate, the truck bed, and the entire rear seating area. We also apply protective automotive tape around the exterior painted roofline and C-pillars to ensure our extraction tools never scratch your vehicle's clear coat.
Step 2: Removal of Rear Cab Panels and Door Panels
To access the bonding surface and the hidden shards of glass, we must carefully disassemble the interior rear of the cabin. Using specialized non-marring trim tools, we remove the upper and lower rear interior cab panels, the headliner retainer clips, and the C-pillar trim. Because the force of a shattering rear window often blows glass forward, we also inspect and, if necessary, remove the rear door panels to ensure no glass shards have fallen into the window regulator tracks of the rear passenger doors. We meticulously set all factory clips and bolts aside for perfect reassembly.
Step 3: Comprehensive Glass Shard Vacuuming
This is one of the most critical steps in a back glass or door glass replacement. Tempered glass explodes into thousands of sharp cubes that bury themselves deep inside the seat cushions, beneath the floor mats, and inside the rear cab wall cavities. Using high-powered industrial shop vacuums fitted with specialized crevice nozzles, we extract every single shard of broken glass. We vacuum the rear seats, the floorboards, inside the exposed rear door panels, behind the cab liner, and the exterior truck bed. Leaving even a single piece of glass behind can cause future rattling or pose a cutting hazard to your passengers. We ensure the interior is immaculately clean.
Step 4: Disconnecting Electrical Components
With the trim removed and the glass cleared, we locate the factory wiring harnesses. For Silverado HD models equipped with rear defrosters, we carefully unplug the positive and negative terminal connectors. If your truck is equipped with a power sliding rear window, we disengage the power slider motor cables, ensuring the electronic harness remains completely undamaged and safely tucked away from the urethane application zone.
Step 5: Removing the Remaining Glass and Old Urethane
Even though the center of the glass has shattered, the outer perimeter of the window remains firmly glued to the truck's pinch weld. Using an advanced wire extraction tool and a precision cold knife, we slice through the original factory polyurethane adhesive from the inside out. Once the remnants of the broken back glass are safely lifted away and disposed of, we use a razor-sharp scraper to pare down the old urethane bead on the pinch weld. We leave exactly 1 to 2 millimeters of the original adhesive—a crucial technical step that provides the ultimate bonding base for the fresh urethane.
Step 6: Pinch Weld Cleaning and Primer Application
A flawless seal is only possible on an uncontaminated surface. We clean the freshly trimmed pinch weld using a specialized, alcohol-based glass cleaner to remove all dirt, grease, and microscopic debris. Next, we inspect the metal frame for any scratches that may have occurred when the original glass shattered. Using a high-quality automotive black primer, we coat any exposed bare metal to permanently prevent future rust formation. We also apply this specialized primer to the ceramic frit band on the edge of the brand-new back glass, which chemically activates the surface to accept the adhesive.
Step 7: Application of Premium Urethane Adhesive
The strength of your rear window relies entirely on the adhesive. At AlexWindshield, we use only premium, industry-leading, high-modulus polyurethane adhesive. We load the urethane into an electric caulking gun and apply a perfectly uniform, V-shaped bead along the entire perimeter of the pinch weld. The V-shape guarantees that when the glass is compressed, the adhesive spreads evenly without any air pockets, eliminating the risk of water leaks or irritating wind whistles.
Step 8: Precision Installation of the New Back Glass
Because the back glass on a Silverado 2500/3500 is large and unwieldy, we utilize heavy-duty suction cups to handle the new glass. Carefully lifting the glass over the truck bed, we align it precisely with the factory reference points on the cab. With gentle, even pressure, we set the glass into the fresh urethane bead. We immediately secure the glass with specialized retention tape that bridges the glass to the roofline, ensuring the heavy window does not slide downward while the chemical curing process begins.
Step 9: Reconnecting Electronics and Interior Reassembly
While the urethane flashes and begins to cure, we reconnect the technological components. We securely plug the defroster terminals back into the grid and reconnect the power sliding window motor harness. We then turn the truck's ignition on to rigorously test the slider's open/close function and verify the electrical current flowing to the defroster. Once the electronics are verified, we re-install the C-pillar trim, the headliner clips, the rear cab panels, and the rear door panels, snapping every factory clip perfectly back into its original position.
Step 10: Final Cleanup and Quality Assurance Inspection
Our job is not complete until your Silverado looks better than it did before the incident. We perform a secondary vacuum sweep of the interior just to be absolutely certain no hidden glass fragments migrated during reassembly. Finally, we clean the new back glass with a streak-free, ammonia-free foaming cleaner, leaving crystal clear visibility. We brief the customer on the Safe Drive-Away Time (SDAT) and provide instructions on avoiding high-pressure car washes for the next 48 hours to ensure the urethane completely solidifies.
The AlexWindshield Advantage
When you trust your heavy-duty Chevrolet Silverado to AlexWindshield, you are getting more than just a piece of glass; you are investing in top-tier automotive craftsmanship. Our dedication to superior technical standards sets us apart in the GTA auto glass industry.
- OEE Quality Glass: We source only Original Equipment Equivalent glass that matches Chevrolet's exact specifications for thickness, acoustic dampening, and solar protection.
- Advanced Adhesives: Our premium urethanes offer incredibly fast safe-drive-away times, getting your work truck back into action without delay.
- Expert Mobile Convenience: Whether you are stranded in Vaughan, at your home in Richmond Hill, or at a commercial site in Markham, we bring the shop to you at no extra cost.
- Rigorous Safety Standards: From our meticulous glass shard vacuuming to our precise primer applications, we ensure your truck is perfectly safe for you and your passengers.
Schedule Your Silverado HD Back Glass Replacement Today
Do not let a shattered rear window keep your Chevrolet Silverado HD 2500 or 3500 off the road. Open cabins invite water damage, theft, and dangerous driving conditions. Trust the certified Master Technicians at AlexWindshield to execute a flawless, factory-grade replacement right at your location. We proudly serve the entire Greater Toronto Area, delivering unmatched expertise and unparalleled convenience.
Best of all, every installation we perform is backed by our comprehensive Lifetime Warranty against leaks, wind noise, and manufacturer defects. You work hard; your truck works hard; let us handle the glass. Contact AlexWindshield today to book your mobile auto glass replacement and experience the ultimate in precision, safety, and customer care.


