The GMT900 Workhorse: Defending the Structural Integrity of Your Chevrolet Silverado 1500
The 2007-2013 generation of the Chevrolet Silverado 1500—affectionately known by enthusiasts and mechanics as the GMT900 platform—is a legendary workhorse renowned for its rugged durability, immense towing capacity, and dominant road presence. However, driving this powerhouse through busy highways or rugged construction sites means its expansive, aerodynamically sloped windshield is constantly in the line of fire. From kicked-up gravel to stray debris from commercial dump trucks, the glass on your Silverado takes a daily beating. When that crucial barrier chips and eventually cracks, it compromises not just your line of sight, but the entire structural integrity of the cabin.
Many truck owners mistakenly view a cracked windshield as a mere cosmetic annoyance. As a Master Technician, I can assure you that the windshield on your Chevrolet Silverado 1500 2007-2013 provides up to 30% of the cabin's structural roof support in the event of a rollover accident. Furthermore, it serves as the rigid backstop for passenger-side airbag deployment. Ignoring a compromised windshield is a safety hazard that no truck owner should gamble with.
Premium Mobile Auto Glass Services Across the Greater Toronto Area (GTA)
Your Silverado is built to work, and we know that downtime means lost productivity. Navigating the dense traffic of the Greater Toronto Area (GTA) with a severely cracked windshield is not only unsafe but can also result in hefty fines. That is why bringing the repair shop to your doorstep is the ultimate solution for busy truck owners.
Whether you are hauling building materials to a bustling job site in Vaughan, commuting down the 404 from Richmond Hill, or managing your daily family routine in Markham, you require prompt, reliable, and professional auto glass replacement. Our mobile service units are fully equipped to perform master-level installations right in your driveway, office parking lot, or construction site anywhere in the GTA, ensuring your Chevy truck is back on the road safely and swiftly.
A Master Technician's Guide: Step-by-Step Windshield Replacement for the 2007-2013 Silverado 1500
Replacing the windshield on a full-size pickup truck like the 2007-2013 Chevy Silverado requires precision, heavy-duty tools, and an uncompromising adherence to safety protocols. Here is our meticulous, step-by-step windshield replacement process from A to Z, guaranteeing a factory-quality seal and supreme durability.
Step 1: Comprehensive Vehicle Inspection and Interior Protection
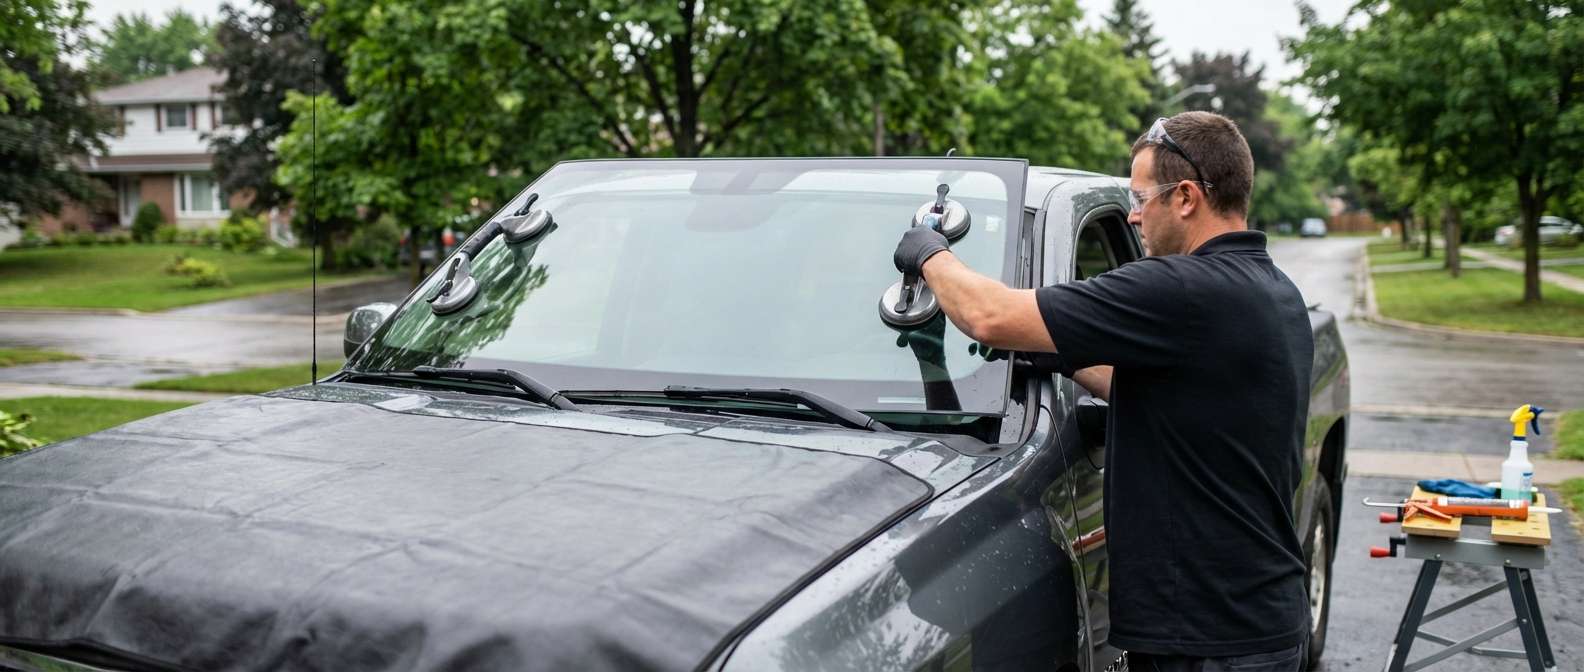
Before a single tool is lifted, we conduct a thorough pre-inspection of your Silverado. We check for pre-existing scratches on the bodywork, assess the condition of the pinch weld, and test any electronic components attached to the glass. Next comes mandatory interior protection. We meticulously drape heavy-duty protective covers over your truck's hood, fenders, steering wheel, dashboard, and custom leather or cloth seats. This ensures that absolutely no debris, dirt, or chemical residue touches the interior or exterior paint of your prized vehicle.
Step 2: Removing the Wiper Arms, Cowl, and Exterior Trim
The 2007-2013 Silverado 1500 features a specific cowl and wiper assembly that must be carefully dismantled. We start by unbolting the heavy-duty wiper arms and safely storing them. Next, we carefully unclip and remove the plastic cowl panel at the base of the windshield. We also remove the rubber weather stripping and side moldings. Special care is taken not to snap the aging plastic retaining clips, as vehicles from this era often have brittle plastic components due to years of UV exposure.
Step 3: Extracting the Damaged Windshield
With the perimeter cleared, we move to the extraction phase. Using specialized auto glass cut-out tools—such as a cold knife, an Equalizer Express power tool, or an advanced wire-cutting system—we expertly slice through the original factory urethane bead that holds the massive piece of glass in place. We cut from both the inside and the outside, ensuring we do not scratch the delicate pinch weld (the metal frame the glass sits on). Once the urethane is fully severed, two technicians use heavy-duty suction cups to safely lift the heavy, damaged windshield away from the Silverado's frame.
Step 4: Pinch Weld Preparation and Surface Cleaning
This is arguably the most critical step for ensuring a leak-proof seal. Leaving too much old adhesive, or worse, cutting down to bare metal and ignoring it, will lead to severe rust and future leaks. We utilize specialized scraper blades to trim the old urethane down to a thin, uniform layer of approximately 1 to 2 millimeters. This thin base layer provides an excellent bonding surface for the new adhesive. We then vacuum away any loose debris, dust, or microscopic glass shards. Following this, we vigorously clean the entire pinch weld and the edges of the new replacement glass with a specialized, alcohol-based auto glass cleaner to eliminate any grease or fingerprints.
Step 5: Applying High-Performance Primer and Urethane Adhesive
If any bare metal was exposed on the pinch weld during the removal process, we apply a specialized anti-rust primer to seal the metal and prevent oxidation—a common killer of older trucks in the salt-heavy GTA winters. Next, we apply a glass prep primer to the frit band (the black painted edge) of the new windshield. Once the primer flashes (dries), we load our power caulking gun with premium, OEM-grade, fast-curing polyurethane adhesive. We apply a thick, triangular bead of this high-quality adhesive around the entire perimeter of the pinch weld. The triangular shape is vital; it ensures the urethane compresses perfectly when the glass is seated, eliminating air pockets and preventing water leaks.
Step 6: Precision Installation of the New Auto Glass
Because the windshield on a Chevrolet Silverado 1500 is incredibly large and heavy, we use dual-technician lifting techniques or advanced robotic setting arms to position the new glass. We carefully align the glass with the Silverado's roofline and lower it precisely onto the fresh urethane bead. We gently press the perimeter to ensure the urethane compresses to the exact factory depth. We then secure the glass with specialized retention tape to prevent any shifting while the urethane begins its chemical curing process. Finally, we reinstall the side moldings, the plastic cowl panel, and perfectly align and bolt down the wiper arms.
Step 7: Mandatory ADAS Camera Calibration (Crucial Safety Step)
While the earlier years of the GMT900 platform were traditional in their electronics, the later years in this bracket—especially the fully-loaded 2012 and 2013 LTZ or high-country equivalent models—began integrating more sophisticated technology. Furthermore, modern safety protocols dictate that if your specific Silverado is equipped with a windshield-mounted rearview mirror housing rain sensors, auto-dimming sensors, or early Advanced Driver Assistance Systems (ADAS) such as forward collision alerts, a mandatory ADAS camera calibration process must be performed.
When a new windshield is installed, the precise angle and clarity of the glass can alter the camera's perspective by just a few millimeters. In the world of ADAS, a millimeter of misalignment translates to blinding the vehicle's computer, potentially causing safety systems to brake too late or miscalculate distances. Using state-of-the-art optical targeting systems and computer diagnostic scanners, our Master Technicians tap into your Silverado's OBD-II port. We run a highly complex static or dynamic calibration sequence, realigning the digital pitch and yaw of the forward-facing cameras to exact OEM specifications. This mandatory step guarantees that your truck's electronic safety net is fully operational before you drive away.
Why High-Quality Urethane Drive-Away Time Matters
We do not just install the glass and hand you the keys. The structural integrity of your Silverado relies on the chemical curing of the urethane adhesive. We use industry-leading, fast-cure adhesives that boast a Safe Drive-Away Time (SDAT) of as little as 30 to 60 minutes. We will clearly instruct you on exactly how long the vehicle must sit before it can be safely driven, ensuring that in the highly unlikely event of a collision on your way home, the windshield will hold strong and allow the passenger airbags to deploy correctly.
The AlexWindshield Difference: Quality, Convenience, and Trust
Your 2007-2013 Chevrolet Silverado 1500 deserves the absolute best care to keep it performing safely on Ontario roads. Choosing the right technician is just as important as choosing the right glass.
- Premium Materials: We use only OEM-equivalent (Original Equipment Manufacturer) glass that meets or exceeds all strict Department of Transportation (DOT) safety standards, ensuring perfect optical clarity and acoustic dampening.
- Master Technicians: Our installers are rigorously trained and certified, bringing decades of combined experience directly to your vehicle.
- Ultimate Convenience: Our mobile units are fully equipped to perform flawless installations at your home or workplace in Vaughan, Richmond Hill, Markham, and throughout the entire GTA.
- Hassle-Free Insurance Processing: We work directly with all major insurance providers in Ontario, handling the paperwork so you do not have to.
Your Trusted Partner in Mobile Auto Glass Services
Do not let a compromised windshield threaten your safety, your passengers, or the structural integrity of your Chevy truck. Trust the experts at AlexWindshield to deliver unparalleled craftsmanship directly to your door.
As the premier provider of mobile auto glass services in the GTA, AlexWindshield proudly stands behind every installation with a comprehensive Lifetime Warranty covering leaks, workmanship, and manufacturer defects for as long as you own the vehicle. We are dedicated to providing seamless, safe, and superior auto glass solutions. Contact AlexWindshield today to schedule your Silverado 1500 windshield replacement and experience the ultimate standard in auto glass repair.


