The Acoustic Innovation: Restoring the Integrity of Your 2013-2015 Chevrolet Malibu
The eighth-generation Chevrolet Malibu (2013-2015) redefined expectations for the modern midsize sedan by prioritizing a whisper-quiet, refined cabin environment. A cornerstone of this aerodynamic evolution was the implementation of specialized acoustic laminated auto glass. Beyond simply deflecting wind and road debris, the windshield on the 2013, 2014, and 2015 Chevy Malibu acts as a critical structural pillar for the vehicle's roof, aids in precise passenger airbag deployment, and houses the sophisticated forward-facing cameras associated with GM's Advanced Safety Packages. When a rock strike or stress fracture compromises this glass, you are not just losing visibility; you are losing a fundamental layer of your vehicle's safety engineering. Restoring this critical component requires far more than simply swapping out a piece of glass—it demands absolute technical precision.
Premium Mobile Auto Glass Service Across the Greater Toronto Area (GTA)
Driving with a compromised windshield through the bustling highways of Southern Ontario is a significant safety hazard. Extreme seasonal temperature fluctuations, combined with winter road salt, can cause a minor star-break chip to violently spiderweb across your line of sight in a matter of seconds. As your dedicated auto glass specialists, we bring our master-level expertise directly to your driveway or workplace. Our comprehensive mobile service fleet provides top-tier auto glass solutions across the Greater Toronto Area (GTA), with dedicated, rapid-response availability specifically targeting Vaughan, Richmond Hill, and Markham. You do not need to disrupt your busy schedule or risk driving a structurally compromised vehicle to a shop; our master technicians bring the entire auto glass facility to you.
Master Technician’s Step-by-Step Windshield Replacement Process
Replacing the windshield on a 2013-2015 Chevrolet Malibu is an intricate procedure that dictates the safety of you and your passengers. As master technicians, we adhere to strict federal safety standards and utilize a flawless, step-by-step methodology to ensure factory-level restoration.
Step 1: Thorough Pre-Inspection and Complete Interior Protection
Before any tools touch your vehicle, we conduct a comprehensive pre-installation inspection. We scan the vehicle's onboard diagnostics (OBD-II) to ensure there are no pre-existing fault codes related to the advanced driver assistance systems (ADAS). Following the diagnostic sweep, we meticulously protect your Malibu. We apply automotive-grade protective tape to the A-pillars and roofline to prevent accidental scratches. Inside the cabin, heavy-duty drop cloths and specialized dashboard covers are draped over the steering wheel, instrumental panel, and premium seating to shield your interior from debris, dust, and specialized chemical primers.
Step 2: Disassembly of Exterior Components and Cowl Panel
To access the bottom perimeter of the windshield, our technicians carefully remove the exterior accessories. For the 2013-2015 Malibu, this involves utilizing a specialized mechanical puller to safely detach the windshield wiper arms without stripping the splines. Next, we carefully unclip and extract the plastic cowl panel (the trim resting at the base of the glass) and disconnect the heated windshield washer fluid lines if your specific trim level is equipped with them. Inside the cabin, we expertly dismount the rearview mirror and disconnect the wiring harness for the forward-facing safety camera and rain sensors.
Step 3: Precision Extraction of the Damaged Windshield
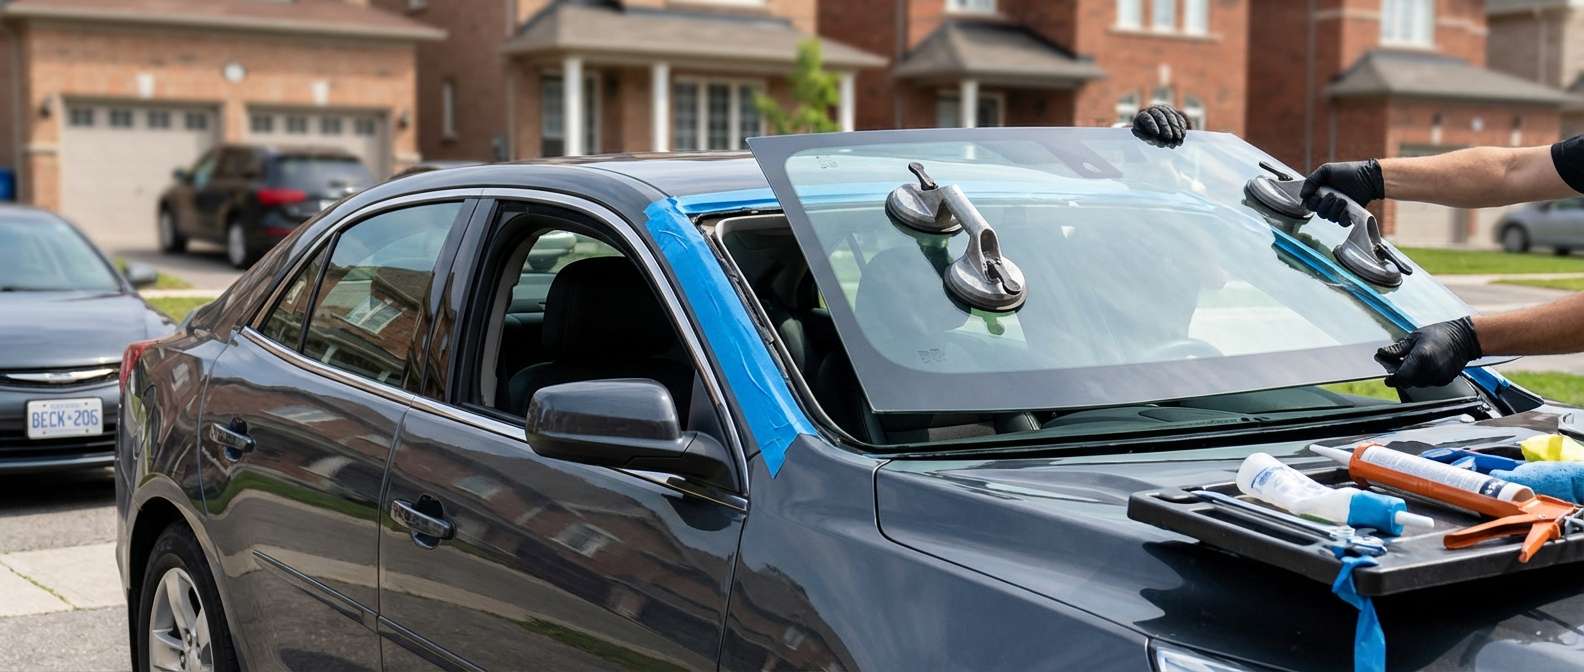
Removing the old, shattered glass requires exceptional finesse to avoid damaging the vehicle’s high-strength steel frame. We utilize advanced fiber-line cutting systems or a specialized cold knife to slice through the original, hardened factory urethane adhesive. By avoiding outdated metal wire cutting techniques, we eliminate the risk of scraping the structural pinch weld. The damaged glass is then safely lifted away using heavy-duty vacuum suction cups.
Step 4: Pinch Weld Preparation and Contaminant Cleaning
The secret to a windshield that never leaks and provides maximum rollover protection lies in the preparation of the pinch weld (the metal frame where the glass sits). Once the old glass is removed, we use precise scraping tools to trim down the existing urethane bed to a uniform thickness of exactly 1 to 2 millimeters. This thin layer of old adhesive acts as the perfect molecular base for the new urethane. We then use a specialized, alcohol-based chemical cleaner to meticulously wipe down the entire channel, removing all dust, moisture, and micro-debris that could compromise the final bond.
Step 5: Advanced Chemical Primer Application
If any microscopic scratches occurred on the bare metal during the extraction phase, we immediately treat them with a high-performance, anti-corrosive metal primer to guarantee rust will never form beneath your new windshield. Next, we apply a specific glass primer to the frit band (the black painted border) of your brand-new, exact-fit acoustic windshield. This primer acts as a chemical catalyst, ensuring the incoming urethane adhesive aggressively bites into the glass structure.
Step 6: High-Viscosity Urethane Adhesive Application
We strictly utilize premium, OEM-grade polyurethane adhesive for all our installations. Using a battery-operated, commercial-grade caulking gun, we extrude a perfectly uniform, continuous "V-bead" of high-viscosity urethane around the perimeter of the pinch weld. The V-shape is scientifically designed to collapse perfectly when the glass is set, preventing air bubbles, eliminating the risk of water leaks, and maximizing the surface area of the structural bond.
Step 7: Precision Setting and Alignment of the New Glass
Timing is critical during this phase. With the adhesive applied, two technicians—or one master technician utilizing an advanced setting tool with specialized suction cups—carefully "deck" the new windshield into place. The glass is gently pressed into the V-bead of urethane. We perfectly align the glass to the factory reference points, ensuring the gaps along the roofline and A-pillars are perfectly symmetrical, guaranteeing a wind-noise-free drive.
Step 8: Mandatory ADAS Camera Calibration (Crucial Safety Step)
This is arguably the most critical step in the modern auto glass replacement process. The 2013-2015 Chevrolet Malibu was offered with advanced active safety features, notably the Lane Departure Warning and Forward Collision Alert systems. The camera powering these life-saving technologies is mounted directly to a bracket on the windshield. Even a variance of a single millimeter in the pitch or yaw of the new glass can throw this camera entirely out of alignment, causing the safety systems to malfunction or brake at the wrong time.
Once the new windshield is successfully set, we perform a mandatory ADAS camera calibration. Hooking up state-of-the-art diagnostic computers to your Malibu’s OBD-II port, we run a sophisticated, dynamic recalibration protocol. This aligns the digital view of the camera with the physical trajectory of the vehicle. We guarantee that your Lane Departure Warning and Forward Collision Alert systems are restored to exact factory safety parameters before the vehicle is handed back to you.
Step 9: Final Reassembly and Safe Drive-Away Time (SDAT)
With the windshield installed and the camera calibrated, we meticulously reassemble the cowl panel, reinstall and torque the wiper arms to factory spec, and reconnect the rearview mirror assembly. We clean the new glass with premium, streak-free auto glass foam and inspect the cabin to ensure everything is pristine. Finally, we calculate the Safe Drive-Away Time (SDAT) based on the current ambient temperature and humidity in the GTA, ensuring the urethane has chemically cured enough to meet Federal Motor Vehicle Safety Standards for airbag deployment and rollover strength.
Essential Post-Installation Care for Your Chevy Malibu
To ensure the maximum longevity of your newly installed windshield, we advise all our clients to follow these strict post-installation guidelines:
- Respect the Drive-Away Time: Do not drive the vehicle until the technician explicitly states the minimum SDAT has been reached.
- Leave the Retention Tape Intact: If specialized retention tape was used along the roofline, leave it in place for at least 24 hours to support the glass while the urethane undergoes its primary chemical cure.
- Keep Windows Slightly Cracked: When closing the car doors for the first 24 hours, leave a side window cracked by an inch. This prevents a sudden spike in cabin air pressure from pushing against the freshly set windshield.
- Avoid High-Pressure Car Washes: Do not subject the vehicle to commercial, high-pressure, or automatic car washes for a minimum of 48 to 72 hours. Gentle hand washing is permissible.
- Avoid Potholes and Aggressive Driving: The Greater Toronto Area is notorious for rough roads. Drive carefully over speed bumps and avoid deep potholes to prevent structural chassis twisting while the adhesive achieves its maximum cure over the first few days.
Trust AlexWindshield for Your Mobile Auto Glass Needs
Your 2013-2015 Chevrolet Malibu is a marvel of safety and acoustic engineering, and it deserves nothing less than elite, uncompromising service. Do not trust your vehicle's structural integrity and ADAS safety systems to amateur shops. As the premier choice for auto glass solutions, AlexWindshield prides itself on delivering unmatched precision, convenience, and safety directly to your door.
Operating extensively throughout the Greater Toronto Area (GTA), with a special focus on serving our communities in Vaughan, Richmond Hill, and Markham, we make professional windshield replacement entirely effortless. Because we stand behind the absolute quality of our materials and the meticulous execution of our master technicians, every full windshield replacement we perform is backed by an industry-leading Lifetime Warranty against leaks, air whistles, and manufacturer glass defects. Contact AlexWindshield today to restore the clarity, quietness, and uncompromising safety of your Chevrolet Malibu.


