The 2013-2015 Chevrolet Malibu: Restoring Your Sedan's Acoustic Harmony and Security
The eighth-generation 2013-2015 Chevrolet Malibu was highly celebrated for its aerodynamic styling and whisper-quiet cabin. General Motors engineered this specific model with premium acoustic materials to block out road noise and create a refined driving experience. However, when your Malibu suffers a shattered vent glass—often the result of a targeted break-in or a harsh road debris impact—that serene environment is instantly compromised. Not only does a broken vent glass expose your vehicle to the unpredictable Canadian elements, but it also creates a severe security vulnerability. As a Master Technician at AlexWindshield, I understand the precise engineering of the 2013-2015 Malibu. We don't just patch up the damage; we execute a flawless, factory-standard Chevrolet Malibu vent glass replacement to restore your vehicle's safety, aesthetics, and structural integrity.
Why Immediate Vent Glass Replacement is Crucial for Your Chevy Malibu
Many drivers mistakenly believe that because the vent glass is the smallest window on the vehicle—typically located on the rear doors, separated from the main roll-down window by a division bar—its replacement can be delayed. This is a dangerous misconception. The vent glass plays a critical structural role in guiding the main window's run channel.
When this tempered glass shatters, it leaves your interior exposed to rain, snow, and moisture, which can rapidly destroy the Malibu's electronic door lock actuators and premium upholstery. Furthermore, thieves specifically target the rear door vent glass to reach in and unlock the vehicle without setting off older vibration alarms. Prompt replacement using high-quality adhesive and OEM-standard glass is mandatory to secure your investment.
Premier Mobile Auto Glass Services Across the Greater Toronto Area (GTA)
Dealing with a shattered window is stressful enough without having to drive a compromised vehicle across town. AlexWindshield operates a fully equipped fleet providing exceptional mobile auto glass services directly to your driveway, workplace, or emergency location. We proudly serve the entire Greater Toronto Area (GTA), with dedicated, rapid-response routes specifically highlighting Vaughan, Richmond Hill, and Markham. Whether you are parked outside a busy office in Markham, at home in Vaughan, or running errands in Richmond Hill, our mobile technicians bring the auto glass shop to you, ensuring your Chevrolet Malibu is secured quickly and professionally.
Master Technician's Guide: Step-by-Step Chevrolet Malibu Vent Glass Replacement
At AlexWindshield, we believe in complete transparency. Replacing the vent glass on a 2013-2015 Chevrolet Malibu is a highly technical procedure that requires far more than simply gluing a new piece of glass into place. Because automotive vent glass is made of tempered safety glass, it explodes into thousands of tiny, sharp shards upon impact. Here is our rigorous, A-to-Z technical process to ensure a perfect installation.
Step 1: Vehicle Preparation and Interior Protection
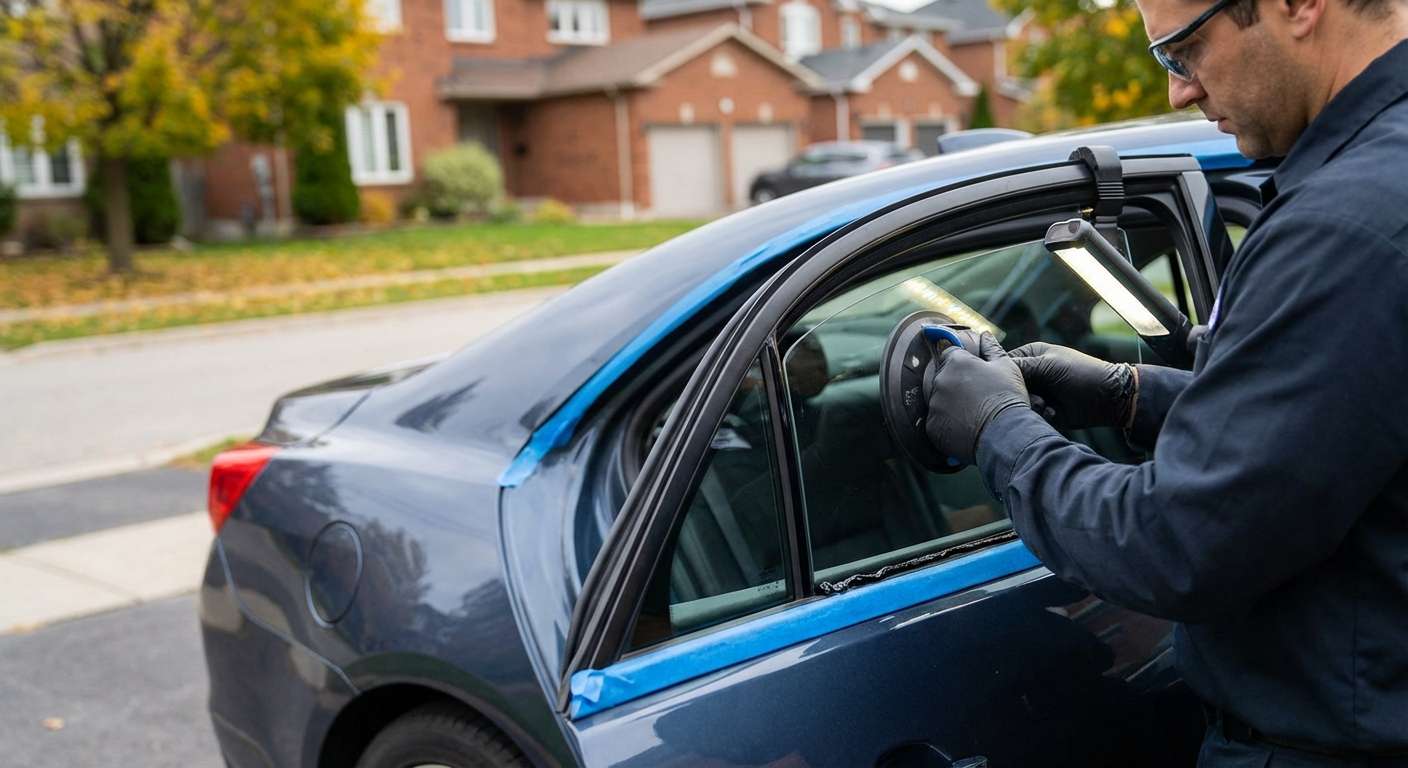
Before any mechanical work begins, we meticulously protect your Malibu's interior. We drape heavy-duty protective covers over the seats, center console, and floorboards. We apply automotive-grade masking tape to the exterior door frame to prevent our tools from scratching your vehicle's clear coat. Safety is paramount, so our technicians equip themselves with cut-resistant Kevlar gloves and safety glasses.
Step 2: Door Panel Removal and Hardware Dismantling
To properly access the lower mounting points of the vent glass and the internal door cavity, we must perform a complete removal of door panels. Using non-marring trim tools, we carefully pry off the interior door trim, disconnect the power window switches, and remove the hidden Torx retaining screws. Once the interior panel is safely stored, we carefully peel back the factory vapor barrier. Next, we unbolt and lower the main window glass, and remove the vertical division bar (the metal track separating the moving window from the fixed vent glass), which is typically held in place by 10mm bolts hidden under the weatherstripping.
Step 3: Extensive Vacuuming of Broken Glass Shards
This is arguably the most critical step for the comfort and safety of the vehicle's occupants. Tempered glass shatters outward and downward. We use high-powered, industrial shop vacuums equipped with specialized crevice tools to perform an exhaustive sweep. We focus heavily on vacuuming all broken glass shards from the vehicle's interior, deep inside the door cavity, the window regulator tracks, the run channels, and beneath the seats. Leaving even a single shard inside the door can cause irritating rattles or scratch the main roll-down window in the future.
Step 4: Removal of the Old Glass Frame and Adhesive
With the division bar removed and the door cavity completely clear of debris, we address the perimeter of the vent glass opening. We extract the encapsulated rubber frame or the remnants of the broken glass. Using specialized cold knives and ultra-sharp scraper blades, we meticulously cut back the old polyurethane adhesive bead from the door's pinch weld, leveling it down to a base layer of about 1-2 millimeters to ensure a perfectly flat bonding surface for the new glass.
Step 5: Rigorous Surface Cleaning
A flawless bond requires absolute chemical purity. We clean the pinch weld, the surrounding door frame, and the edges of the brand-new OEM-equivalent vent glass using specialized, alcohol-based auto glass cleaners. This step removes all dust, grease, fingerprints, and lingering glass dust, ensuring no contaminants interfere with the chemical bonding process.
Step 6: Primer Application for Ultimate Rust Prevention and Bonding
To guarantee the structural integrity of the installation, we apply an advanced automotive black body primer application. The primer is meticulously brushed onto any microscopic scratches on the metal pinch weld to prevent future rust and corrosion. We also apply a glass-prep primer to the ceramic frit band of the new vent glass. This primer acts as a vital chemical bridge, activating the surface to aggressively accept the urethane.
Step 7: Precision Application of High-Quality Adhesive
Using an electric caulking gun for absolute consistency, our Master Technicians apply a thick, triangular bead of premium, fast-curing polyurethane high-quality adhesive directly onto the pinch weld. The triangular shape of the bead is an industry secret that ensures maximum surface contact and eliminates the risk of air gaps or water leaks once the glass is compressed.
Step 8: Setting the New Vent Glass
Timing is critical. Before the urethane begins to skin over, we carefully guide the new Chevrolet Malibu vent glass into the exact factory position. Gentle, even pressure is applied to compress the adhesive bead, creating a watertight, airtight seal. We then meticulously reinstall the vertical division bar, torquing the bolts to factory specifications to lock the vent glass securely in place.
Step 9: Reassembly and Final Quality Assurance
With the vent glass securely bonded, we begin the reassembly process. The main window is guided back into the run channel and bolted to the regulator. We test the main window's operation multiple times to ensure it rolls up and down smoothly without binding against the newly installed division bar. The vapor barrier is resealed, and the door panel is snapped and bolted back into place. Finally, we clean all the windows, perform one last interior vacuum, and conduct a strict visual inspection of the vehicle.
Why AlexWindshield is the GTA's Top Choice for Auto Glass
Your vehicle's safety is non-negotiable. At AlexWindshield, our Master Technicians combine years of mechanical expertise with the absolute best materials on the market. We understand that a Chevrolet Malibu requires specific handling, precise torque specifications, and an intricate knowledge of GM's door assembly. When you choose us, you are guaranteed:
- OEM-Equivalent Quality Glass: We source top-tier glass that matches your Malibu's original acoustic and tint specifications perfectly.
- Advanced Adhesives: We use industry-leading urethanes that boast rapid safe-drive-away times, getting you back on the road securely and quickly.
- Unmatched Local Convenience: From Vaughan to Richmond Hill and deep into Markham, our mobile units eliminate the hassle of towing or driving a damaged car.
- Meticulous Cleanup: We treat your car like our own. You will never find leftover glass shards hidden in your seats or door panels.
Trust the Experts: The AlexWindshield Lifetime Warranty
When the unexpected happens to your 2013-2015 Chevrolet Malibu, don't settle for sub-par repairs that put your safety and vehicle interior at risk. Rely on the proven expertise of the Master Technicians at AlexWindshield. We stand proudly behind our craftsmanship, which is why every single vent glass replacement we perform comes backed by our comprehensive Lifetime Warranty. This warranty covers you against any wind noise, water leaks, or manufacturer defects for as long as you own the vehicle.
If you are located in the Greater Toronto Area (GTA), particularly in Vaughan, Richmond Hill, or Markham, and need immediate, professional auto glass service, we are ready to assist. Contact AlexWindshield today to schedule your mobile mobile vent glass replacement and experience the ultimate standard in auto glass repair.


