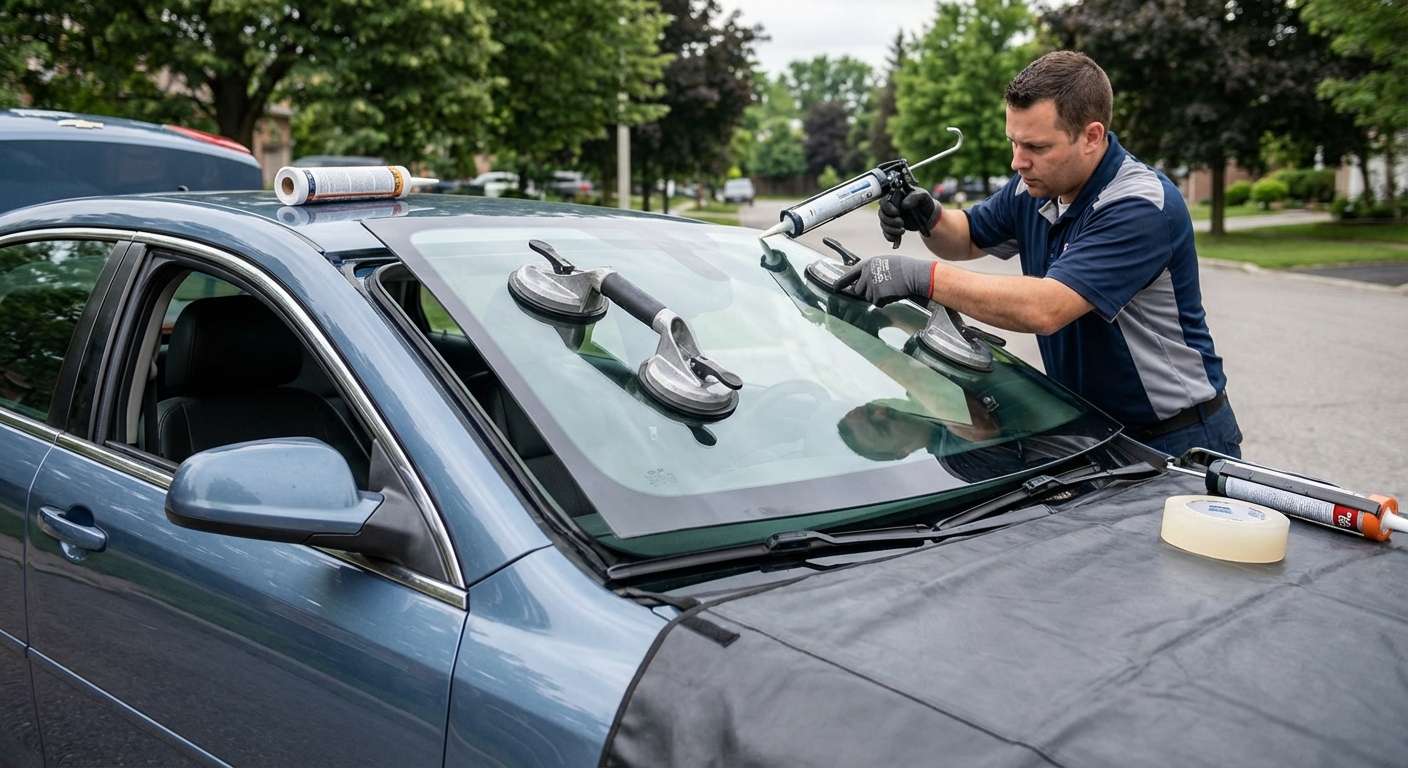
The Epsilon Platform Legacy: Windshield Replacement for Your 2004-2008 Chevrolet Malibu
The 2004-2008 Chevrolet Malibu, marking the critically acclaimed sixth generation of this iconic American nameplate, brought General Motors' highly rigid Epsilon platform to the forefront of the mid-size sedan market. Whether you drive the efficient LS, the well-appointed LT, or the exceptionally versatile Malibu Maxx, this generation is universally celebrated for its balanced handling, durable construction, and commuter-friendly reliability. However, the advanced structural integrity of this robust sedan relies heavily on a perfectly intact windshield. In the event of a front-end collision or a rollover incident, the windshield provides up to 45% of the cabin's structural roof support. Furthermore, it serves as the critical backboard for the passenger-side airbag deployment. When your 2004-2008 Chevy Malibu suffers a cracked, chipped, or severely compromised windshield, it requires much more than a quick fix; it demands the meticulous precision of a master technician to restore its factory-level safety and structural rigidity.
Comprehensive Mobile Auto Glass Service Across the GTA
At AlexWindshield, we understand that finding the time to drop your vehicle off at a traditional repair shop for a professional glass replacement can be a major disruption to your busy schedule. That is precisely why we bring our master-level technician expertise directly to your driveway, office parking lot, or home garage. Our premium mobile auto glass services are widely available across the Greater Toronto Area (GTA). We are incredibly proud to offer rapid, reliable dispatch to our core service zones, specifically providing top-tier auto glass solutions in Vaughan, Richmond Hill, and Markham. Wherever you are located in these thriving regions, our fully equipped, state-of-the-art mobile service vans ensure your Chevrolet Malibu windshield replacement is executed flawlessly, securely, and conveniently without you ever needing to navigate GTA traffic to visit a shop.
The Master Technician Process: Step-by-Step 2004-2008 Malibu Windshield Replacement
Replacing the windshield on a sixth-generation Chevy Malibu is not merely about pulling out old glass and slapping in a new one; it is a highly technical procedure that requires exact chemical bonding, precise structural alignment, and meticulous surface preparation. As master technicians, we follow a strict, unyielding protocol to guarantee your safety. Below is our definitive, A-to-Z process for a flawless windshield installation.
Step 1: Pre-Replacement Inspection and Interior Protection
Before any sharp tools or chemicals touch your vehicle, we conduct a comprehensive pre-replacement diagnostic inspection. We examine the 2004-2008 Malibu’s cowl panel, roofline, A-pillars, and dashboard for any pre-existing damage, rust, or degradation. Because protecting your vehicle is our absolute highest priority, we meticulously drape custom, heavy-duty protective covers over the hood, fenders, and steering wheel. Inside the cabin, we place thick protective drop cloths over the dashboard, center console, and front seats. This ensures that absolutely no debris, dust, or black urethane adhesive accidentally touches or stains your vehicle’s interior materials.
Step 2: Removal of Wiper Arms, Cowl, and Exterior Trim
To access the hidden lower edge of the windshield, our technicians must carefully detach the exterior components. We remove the windshield wiper arms utilizing a specialized, tension-based wiper puller to prevent stripping the delicate splines on the wiper transmission. Next, we remove the plastic cowl panel that sits at the base of the glass. On the 2004-2008 Malibu models, the plastic cowl clips can become notoriously brittle due to years of UV exposure and temperature fluctuations. We utilize precision, non-marring trim removal tools to extract these clips gently without breakage. Any side moldings or rubber weather-stripping are also carefully detached and set aside in a secure location.
Step 3: Precision Cutting of the Old Urethane Bead
The factory windshield is permanently bonded to the vehicle’s steel pinch weld using an incredibly high-strength urethane adhesive. To break this industrial bond safely, we utilize an advanced engineered wire-cutting system or a master-grade powered cold knife. The high-tensile braided cutting wire is carefully threaded through the thick urethane layer from the inside of the cabin to the outside. By methodically and smoothly pulling the wire around the entire perimeter of the glass, we slice through the tough adhesive without ever allowing metal tools to scratch the painted steel of the pinch weld. Protecting this paint is a critical step to prevent future rust formation, which can destroy a vehicle's frame over time.
Step 4: Extracting the Damaged Glass
Once the urethane seal is completely broken around all four sides, we attach heavy-duty, dual-pad vacuum suction cups to the exterior surface of the old, broken windshield. With coordinated, balanced lifting, the damaged glass is safely hoisted away from the Malibu and transferred to our service vehicle. AlexWindshield proudly ensures that all extracted auto glass is properly disposed of and routed to environmentally friendly recycling facilities.
Step 5: Pinch Weld Preparation and Contaminant Cleaning
This is arguably the most crucial step for guaranteeing a safe, permanent installation. We meticulously trim down the remaining old urethane bead on the pinch weld, leaving a perfectly flat, thin layer of approximately 1 to 2 millimeters. This technique, known as the "close-cut" method, provides an optimal, chemically active base for the new adhesive to grip onto. We then use a specialized, alcohol-based automotive glass cleaner and lint-free wipes to aggressively clean the entire pinch weld area. We remove all traces of dirt, road grime, moisture, loose leaves, and fine debris. If any bare metal was inadvertently exposed during the lifespan of the vehicle or the removal process, it is immediately treated with an anti-corrosion metal primer.
Step 6: Application of Advanced Glass Primer
To guarantee a flawless, unbreakable chemical bond, we apply an industry-leading black glass primer to the glass’s frit band (the black painted ceramic edge on the inside of the new windshield). This highly specialized primer acts as a chemical bridge, promoting intense adhesion between the glass and the urethane while simultaneously protecting the urethane underneath from degrading under harsh ultraviolet (UV) rays. We enforce a strict, manufacturer-mandated "flash-off" waiting period, allowing the primer to dry and outgas completely before any wet adhesive is applied.
Step 7: Laying the High-Quality Urethane Adhesive
Using a high-powered, battery-operated electric caulking gun, we lay down a continuous, perfectly shaped triangular V-bead of premium, fast-curing automotive urethane adhesive directly onto the prepared pinch weld. The precise V-bead shape ensures that when the glass is pressed into place, the adhesive spreads evenly and vertically, completely eliminating the risk of microscopic air gaps, annoying wind noise, or interior water leaks. We strictly use top-tier, OEM-equivalent adhesives that meet or exceed rigorous federal motor vehicle safety standards, guaranteeing exceptional structural hold.
Step 8: Setting the New Windshield and Reassembly
The new, premium-quality windshield—precisely matched to the exact specifications, tint, and acoustic properties of the 2004-2008 Chevrolet Malibu—is lifted using our vacuum suction cups and hovered over the frame. Using the vehicle's factory alignment pins and our master technician’s expert eye, the glass is gently and precisely set into the wet urethane bed. We apply light, even pressure around the entire perimeter to seat the glass securely and firmly into the adhesive. After the glass is set perfectly flush, we meticulously reassemble the plastic cowl panel, reattach the wiper arms to their exact factory sweeping positions, and reinstall the side moldings for a factory-fresh finish.
Mandatory ADAS Camera Calibration and Modern Sensor Alignment
Modern automotive safety relies heavily on Advanced Driver Assistance Systems (ADAS). While the base models of the 2004-2008 Chevrolet Malibu predate some of today’s highly advanced lane-departure and autonomous braking systems, many models from this era, as well as modern owner upgrades, feature critical windshield-mounted technology. This can include auto-dimming rearview mirrors, rain-sensing wiper modules, automatic headlight sensors, or aftermarket forward-collision dash cameras that adhere directly to the glass.
At AlexWindshield, we enforce the industry's strictest safety protocols. If your vehicle falls into the category of utilizing any forward-facing safety camera system or sensor module attached to the glass, we perform a mandatory ADAS camera calibration immediately following the windshield installation. Our comprehensive calibration process includes:
- System Diagnostics: Connecting specialized, high-end diagnostic computers to your Malibu’s OBD-II port to read current camera alignments and clear any fault codes.
- Target Alignment: Setting up highly specific, laser-aligned physical target boards at exact manufacturer-specified distances in front of the vehicle.
- Dynamic and Static Calibration: Communicating directly with the vehicle’s camera modules to recalibrate the pitch, yaw, and roll of the lens to millimeter perfection.
- Road Testing: Ensuring that all sensors recognize lane markers, detect light changes, and respond precisely to environmental factors.
Even a one-degree misalignment in a safety camera can result in a sensor failing to detect an obstacle or miscalculating braking distances, putting you and your passengers at extreme risk. By making this exact calibration a mandatory step for equipped vehicles, we guarantee that your safety features function flawlessly, exactly as the manufacturer intended.
Post-Installation Cleanup and Safe Drive-Away Time
Before handing the keys back to you, we treat your vehicle to a premium detail. We clean the new windshield inside and out to a brilliant, streak-free shine. We double-check all wiper functions, rubber seals, and exterior trim pieces to ensure everything is locked tightly into place. We then inform you of your specific Safe Drive-Away Time (SDAT). Because we use advanced, fast-curing urethane, your 2004-2008 Chevrolet Malibu will typically be structurally safe to drive within 30 to 60 minutes after the final installation step is complete. We advise our clients to keep at least one window slightly cracked for the first 24 hours to prevent door-slamming air pressure from disrupting the curing urethane seal, and we highly recommend avoiding high-pressure automatic car washes for at least 48 hours.
Why Trust AlexWindshield for Your Auto Glass Needs?
When it comes to maintaining the safety, visual clarity, and structural integrity of your Chevy Malibu, you need a dedicated partner who prioritizes uncompromising quality above all else. AlexWindshield is universally recognized as the premier expert for mobile auto glass services throughout the Greater Toronto Area. Whether you are relaxing at home in Vaughan, hard at work in Richmond Hill, or running daily errands in Markham, we deliver unparalleled automotive craftsmanship right to your specific location.
To provide you with total peace of mind, we back every single windshield replacement with our ironclad, industry-leading Lifetime Warranty. This comprehensive warranty protects your investment by covering:
- Water Leaks: Absolute protection against rain, snow melt, and car wash moisture intrusion.
- Air Whistling & Wind Noise: Guaranteeing a silent, airtight cabin experience at highway speeds.
- Manufacturer Glass Defects: Ensuring your new glass remains completely free from visual optical distortion or stress cracks.
- Molding Retention: Guaranteeing that all reattached trim and weather-stripping stays firmly in place regardless of the weather.
Our certified master technicians treat your vehicle with the utmost respect, executing a flawlessly clean, precise, and definitively safe installation every single time. Do not let a cracked windshield compromise your structural safety, blind your field of vision, or ruin your driving experience. Choose the unmatched expertise, maximum convenience, and supreme reliability of AlexWindshield for your 2004-2008 Chevrolet Malibu today.


