Restoring the Vision of a Modern Flagship: Chevrolet Impala 2014-2020 Windshield Replacement
The tenth-generation Chevrolet Impala (2014-2020) completely redefined Chevy’s flagship sedan, trading in its fleet-car reputation for a striking, swept-back profile, aggressive body lines, and a whisper-quiet cabin. Central to this dramatic transformation is its expansive, aerodynamically sloped windshield. Far more than just a piece of glass to keep the wind out, the 2014-2020 Impala windshield is a highly engineered structural component. It features an advanced acoustic interlayer to mute road noise and serves as the precise mounting point for sophisticated safety sensors. When this crucial component sustains irreversible damage, a generic, rushed replacement simply will not suffice. It demands the meticulous precision of a Master Technician.
At AlexWindshield, we understand the exact engineering tolerances of the tenth-generation Impala. We don't just replace auto glass; we restore your vehicle's structural integrity, acoustic comfort, and advanced safety features to strict factory specifications.
Premier Mobile Auto Glass Service Across the Greater Toronto Area (GTA)
Navigating the busy highways of the Greater Toronto Area (GTA) with a compromised field of vision is a significant safety hazard. You shouldn't have to risk driving an unsafe vehicle to a shop. As a senior auto glass specialist, I bring our state-of-the-art mobile replacement shop directly to your driveway, workplace, or fleet lot. Whether you are commuting through the bustling streets of Vaughan, running errands in Richmond Hill, or working in the tech hubs of Markham, our premium mobile service ensures your Chevrolet Impala receives dealership-level care without disrupting your daily schedule.
Understanding Your 2014-2020 Chevrolet Impala Windshield Features
Before we begin the technical replacement process, it is vital to identify the specific technological features embedded in your Impala's windshield. Depending on your trim level (LS, LT, or Premier), your glass may house several advanced components:
- Acoustic Interlayer (Soundproofing): A specialized layer of vinyl sandwiched between the glass panes to dampen engine noise and wind resistance, ensuring the Impala's signature quiet ride.
- Rain Sensors: An optical sensor mounted to the windshield bracket that detects moisture and automatically adjusts wiper speed.
- Heads-Up Display (HUD): A specialized polarized wedge in the glass required for models equipped with HUD to prevent a double-image reflection on the windshield.
- Advanced Driver Assistance Systems (ADAS): The forward-facing camera mounted behind the rearview mirror, responsible for the Impala's Forward Collision Alert and Lane Departure Warning.
Master Technician’s Step-by-Step Windshield Replacement Process
At AlexWindshield, we strictly adhere to the Auto Glass Safety Council (AGSC) standards. Here is the comprehensive, step-by-step technical process we employ to replace the windshield on your 2014-2020 Chevrolet Impala.
Step 1: Pre-Installation Inspection and Interior Protection
The process begins with a rigorous pre-inspection of the vehicle. We test the existing electronics, including the wipers, rain sensors, and ADAS camera, to ensure everything is communicating properly with the vehicle's computer prior to the glass removal. Next, we meticulously protect the interior. We place heavy-duty drop cloths over the Impala's dashboard, steering wheel, and front seats. This vital step prevents any accidental urethane drips and catches any microscopic glass shards that could embed into your leather or premium cloth interior.
Step 2: Removal of Wipers, Cowl, and Exterior Trims
To access the bottom edge of the glass, we precisely unbolt and remove the windshield wiper arms. We then carefully extract the plastic cowl panel (the trim at the base of the windshield) using specialized non-marring pry tools to prevent snapping any fragile retaining clips. For the 2014-2020 Impala, the side moldings and A-pillar trims are also carefully detached, exposing the entire perimeter of the damaged auto glass.
Step 3: Precision Removal of the Damaged Windshield
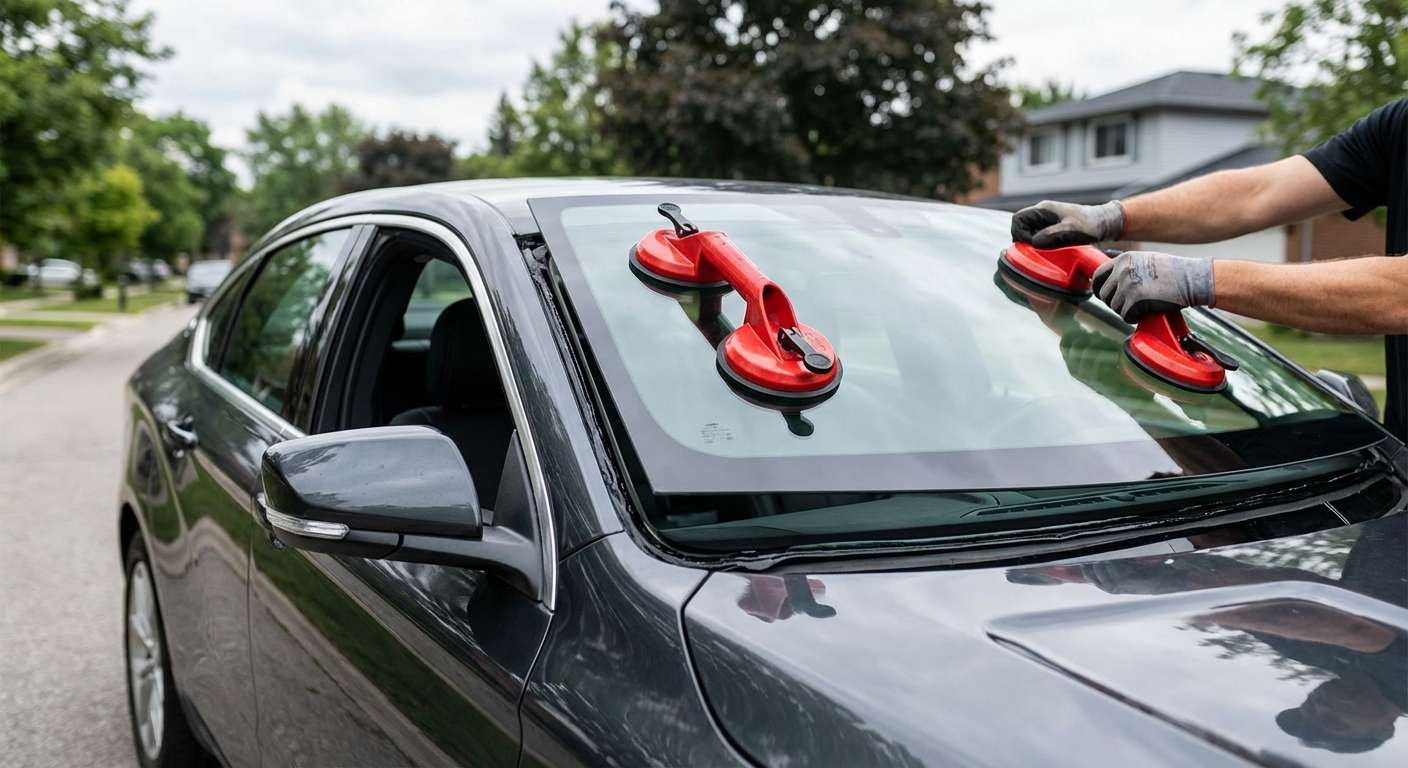
Removing the glass requires immense precision to avoid scratching the vehicle's frame (pinch weld). Instead of relying on outdated, aggressive power tools, we utilize a highly advanced fiber line cutting system. A high-tensile cutting wire is threaded through the old adhesive bead and anchored to a ratcheting pulley system on the glass. As we crank the pulley, the wire slices smoothly through the factory polyurethane seal from the inside out, completely eliminating the risk of damaging the Impala's exterior paint, interior headliner, or dashboard. Once the seal is broken, we use heavy-duty suction cups to safely lift the old windshield away from the vehicle.
Step 4: Pinch Weld Preparation and Cleaning
This is arguably the most critical step for a safe installation. We use specialized scraping blades to trim the old polyurethane adhesive down to a thin, even layer of exactly 1 to 2 millimeters. This "cured" bed acts as the perfect base for the new adhesive to bond with. Once trimmed, the entire pinch weld channel is vacuumed to remove dust, debris, and dirt. We then wipe down the perimeter with a high-grade chemical glass cleaner and an adhesion promoter to ensure a sterile bonding surface.
Step 5: Primer Application and Urethane Extrusion
If any bare metal was exposed during the removal process, we immediately treat it with a specialized anti-corrosion black primer to prevent future rust formations that could compromise the glass seal. After prepping the vehicle, we clean the frit band (the black painted edge) of the brand-new OEM-equivalent windshield and apply a glass-specific primer. Finally, using a high-powered electric caulking gun, we extrude a continuous, seamless "V-bead" of high-modulus, non-conductive polyurethane adhesive around the perimeter of the pinch weld. This specific shape ensures the urethane stands tall and compresses perfectly without any air gaps.
Step 6: Setting the New Windshield
Because the 2014-2020 Impala windshield is large and heavy, we utilize a two-man setting technique or a specialized mechanical setting arm. The new glass is carefully hovered over the vehicle and lowered perfectly into the urethane bed. We apply precise, even pressure around the edges to ensure the glass sits at the exact depth required to remain flush with the vehicle's roofline and A-pillars, eliminating the risk of wind noise or water leaks. We then reassemble the cowl, wiper arms, and exterior trims.
The Crucial Step: Mandatory ADAS Camera Calibration
For Chevrolet Impalas equipped with the forward-facing camera, simply dropping in a new windshield is only half the job. The camera lens looks through a specific bracket mounted on the new glass. Even a microscopic shift of a millimeter in the camera's resting angle can translate to a massive blind spot or delayed reaction hundreds of feet down the road.
Therefore, ADAS camera calibration is completely mandatory following a windshield replacement. At AlexWindshield, our Master Technicians utilize top-tier diagnostic scan tools and specialized optical target boards. We connect our computers directly to your Impala's OBD-II port to initiate the manufacturer's recalibration protocol. Depending on the exact model year and software, we perform either a static calibration (using precise geometric targets placed at specific distances from the vehicle) or a dynamic calibration (driving the vehicle on clearly marked GTA highways at a set speed while the camera self-learns). This ensures that your Lane Keep Assist and Forward Collision Alert systems trigger exactly when they are supposed to, keeping you and your family safe.
Post-Installation Care Guidelines
Once the installation and calibration are complete, the polyurethane adhesive requires time to cure. We strictly enforce a Safe Drive Away Time (SDAT), typically between 30 to 60 minutes, before the vehicle can be operated safely. To ensure the longevity of your new Impala windshield, we provide the following instructions:
- Leave the retention tape on: If we applied specialized holding tape to the top edge of the glass, leave it perfectly intact for the first 24 hours to prevent the glass from slipping while the adhesive fully cures.
- Avoid high-pressure car washes: Do not take your vehicle through an automatic or high-pressure car wash for at least 48 to 72 hours. The intense water pressure can rupture the outer seal of the curing urethane.
- Keep a window slightly cracked: When closing the doors of your Impala for the first 24 hours, keep one window rolled down an inch. This prevents a sudden buildup of cabin air pressure from pushing the newly set windshield outward.
Trust the Experts at AlexWindshield
Your Chevrolet Impala deserves nothing less than premium craftsmanship. Do not compromise on your safety with subpar materials or inexperienced technicians who skip vital steps like ADAS calibration. As the leading experts in auto glass repair and replacement, AlexWindshield is dedicated to providing superior service to drivers across the Greater Toronto Area.
Whether you are parked at your office in Markham, relaxing at home in Vaughan, or visiting friends in Richmond Hill, our mobile units are fully equipped to bring dealership-quality service directly to you. We stand firmly behind the quality of our materials and our meticulous labor process, which is why every windshield replacement we perform comes backed by our comprehensive Lifetime Warranty against leaks, wind noise, and manufacturer defects.
Restore the sleek look and unparalleled safety of your 2014-2020 Chevrolet Impala today. Contact AlexWindshield to schedule your professional mobile windshield replacement and experience the ultimate standard in auto glass care.


