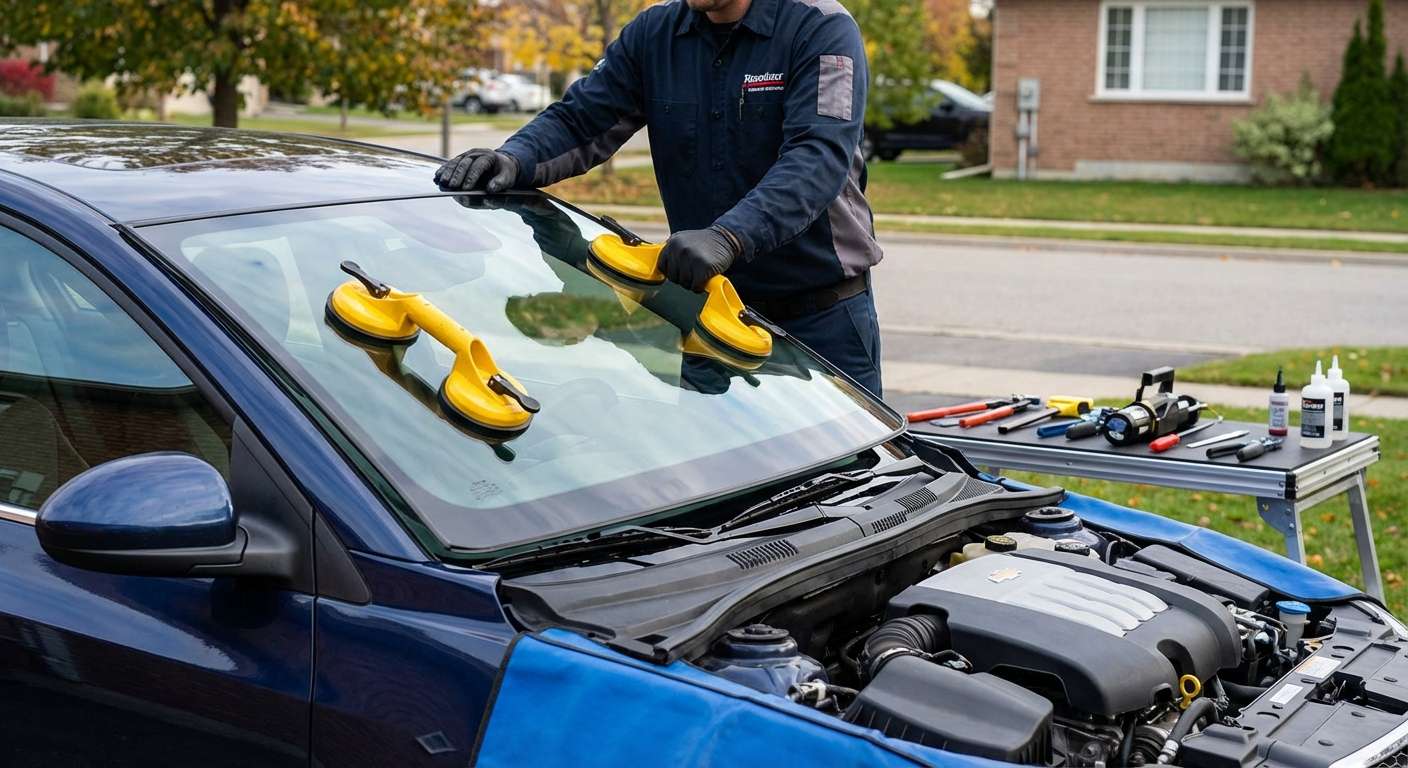
Master-Level Windshield Replacement for the 2011-2015 Chevrolet Cruze
The 2011-2015 Chevrolet Cruze completely redefined driver expectations within the compact sedan segment by introducing a vault-like, whisper-quiet cabin experience previously reserved for premium luxury vehicles. This exceptional acoustic insulation and structural rigidity rely heavily on the precise engineering of its factory windshield. When a stray rock on the highway compromises that glass, restoring your vehicle requires far more than a generic, rushed installation. As a Master Technician at AlexWindshield, I understand that replacing the windshield on this specific generation of the Chevy Cruze demands structural precision, specialized acoustic considerations, and a meticulous, step-by-step technical execution to return your vehicle to its factory-safe condition.
Why the 2011-2015 Chevy Cruze Demands Specialized Auto Glass Expertise
The windshield of your Chevrolet Cruze is not merely a transparent shield against the wind and weather; it is an active, critical component of the vehicle's structural integrity. In the event of a rollover accident, the windshield supports up to 60% of the vehicle's roof weight. Furthermore, the passenger-side airbag utilizes the interior of the windshield as a backstop to deploy correctly. If the glass is improperly installed, the concussive force of an airbag deployment can blow the windshield entirely out of the frame, resulting in catastrophic safety failures.
When servicing the 2011-2015 models, we also must account for specific trim variations. Higher trims (such as the LTZ) and later models in this generational run introduced specialized acoustic interlayers to reduce road noise, as well as advanced driver-assistance systems. Using inferior aftermarket glass or cutting corners during the urethane bonding process can lead to severe wind noise, water leaks, and malfunctioning safety sensors.
Premium Mobile Auto Glass Service Across the Greater Toronto Area (GTA)
Driving conditions across the Greater Toronto Area (GTA) can be incredibly harsh on your vehicle's glass. From drastic temperature fluctuations during Canadian winters to constant construction debris on major highways like the 401 and the DVP, windshield damage is an unfortunate reality. AlexWindshield eliminates the stress of driving a compromised vehicle to a physical shop by bringing our master-level service directly to your driveway or workplace.
We proudly offer comprehensive, rapid-response mobile windshield replacement across the entire GTA, with a specialized focus on serving the thriving communities of Vaughan, Richmond Hill, and Markham. Whether you are parked at a corporate office in Markham, at your home in Richmond Hill, or running errands in Vaughan, our fully equipped mobile service vehicles arrive with everything needed to execute a flawless, factory-grade installation on-site.
Our Master Technician Step-by-Step Replacement Process
At AlexWindshield, we strictly adhere to Automotive Glass Replacement Safety Standards (AGRSS). The windshield replacement process for a 2011-2015 Chevrolet Cruze is an exacting, chemical, and mechanical procedure. Here is our detailed A-to-Z process:
Step 1: Thorough Pre-Inspection and Interior Protection
Before any tools are utilized, we perform a comprehensive pre-inspection of your Cruze. We check the operation of the wipers, inspect the dashboard for pre-existing damage, and verify the correct glass part number. To ensure pristine cleanliness, we meticulously protect your vehicle. We drape heavy-duty protective covers over the fenders and hood, apply a specialized masking wrap over the steering wheel and front seats, and lay protective towels across the interior dashboard to catch any potential debris.
Step 2: Precision Removal of the Cowl, Wipers, and Trim
The 2011-2015 Cruze features a specific plastic cowl assembly that routes water away from the engine bay. We carefully remove the 15mm retaining nuts securing the wiper arms and safely extract the arms using a specialized puller to avoid stressing the wiper transmission. Next, we carefully disengage the delicate plastic retaining clips of the exterior cowl panel, ensuring no clips are broken, and remove the side weather-stripping moldings to fully expose the perimeter of the damaged glass.
Step 3: Safe Extraction of the Damaged Glass
To remove the broken windshield, we utilize an advanced fiber-line cutting system rather than an antiquated cold knife. We thread a high-tensile cutting line through the existing polyurethane bead from the inside out. By mechanically winching this line around the perimeter of the glass, we slice through the old adhesive with zero risk of scratching the vehicle's delicate metal pinch weld. Once the adhesive is completely severed, we use heavy-duty suction cups to safely lift the damaged windshield away from the vehicle.
Step 4: Pinch Weld Preparation and Decontamination
The integrity of the new installation relies entirely on the quality of the bonding surface. The metal frame where the glass sits, known as the pinch weld, is meticulously prepared. We use specialized skiving blades to trim the remaining original urethane down to a consistent 1-2 millimeter base. This thin layer of original urethane provides the ultimate bonding foundation for the new adhesive. We then vacuum the channel and chemically clean the area to remove all dust, road grime, and moisture.
Step 5: Advanced Primer Application
Chemical bonding requires a perfect environment. We apply an advanced, fast-drying black glass primer to the ceramic frit band on the inside edge of the new windshield. This primer achieves two vital functions: it chemically activates the glass surface to accept the urethane, and it blocks harmful UV rays from penetrating the glass and degrading the adhesive over time. Any minor bare metal scratches on the vehicle's pinch weld discovered during the removal process are also treated with a specialized metal primer to prevent future rust formation.
Step 6: High-Quality Urethane Adhesive Application
We exclusively utilize OEM-grade, high-modulus, non-conductive (HMNC) urethane adhesive. Using a heavy-duty electric caulking gun, we apply the urethane directly to the prepared pinch weld. Our Master Technicians utilize a highly specific "V-bead" extrusion profile. The triangular shape of the V-bead guarantees that when the glass is compressed, the adhesive spreads perfectly and evenly, eliminating the risk of air pockets, water leaks, or wind whistling.
Step 7: Precision Installation of the New Windshield
Handling the new, pristine auto glass requires utmost care. Using our specialized suction cup lifting mechanisms, two technicians carefully lower the new windshield into the exact center of the opening. We use alignment pins and visual markers to perfectly "deck" the glass into the wet urethane. Gentle, even pressure is applied around the perimeter to compress the V-bead, ensuring a flawless, watertight, and airtight seal.
Step 8: Reassembly and Clean-Up
While the highly advanced urethane begins its rapid curing process, we reassemble the vehicle. The exterior cowl is re-secured, the side moldings are snapped back into place, and the wiper arms are re-installed and precisely aligned to their factory resting positions. Finally, we use professional-grade, streak-free glass cleaners to detail the new windshield inside and out, and we meticulously vacuum any trace debris from the vehicle's interior.
Mandatory ADAS Camera Calibration for Advanced Safety
In the later production years of the 2011-2015 generation, Chevrolet introduced advanced driver-assistance systems (ADAS) to the Cruze, specifically on the LTZ trims and models equipped with the Enhanced Safety Package. If your Cruze is equipped with a forward-facing camera mounted behind the rearview mirror—powering features like Forward Collision Alert and Lane Departure Warning—ADAS camera calibration is strictly mandatory following a windshield replacement.
Even a microscopic shift in the angle of the new windshield glass can throw the camera's sightline off by several feet at highway speeds, potentially causing the safety systems to fail when you need them most. At AlexWindshield, our mobile units are equipped with state-of-the-art optical targeting systems and diagnostic software. We perform exact, OEM-compliant calibration on-site, ensuring your Cruze's computer recognizes the precise pitch and yaw of the new glass, guaranteeing your safety systems react with split-second factory accuracy.
Choose AlexWindshield: The GTA's Trusted Auto Glass Experts
When you trust your Chevrolet Cruze to our technicians, you are investing in peace of mind, unparalleled safety, and longevity. We separate ourselves from the competition through uncompromising standards and a dedication to absolute perfection. Our service includes:
- Premium Glass Selection: We source only top-tier, DOT-certified auto glass that perfectly matches the acoustic and structural specifications of the original 2011-2015 Chevrolet Cruze factory glass.
- Unmatched Mobile Convenience: Rapid deployment across the Greater Toronto Area, bringing our fully equipped shop directly to you in Vaughan, Richmond Hill, Markham, and beyond.
- Safe Drive-Away Times: We use industry-leading rapid-cure urethanes, allowing you to safely drive your vehicle shortly after the installation is complete, regardless of Canadian weather conditions.
- Comprehensive Insurance Assistance: We work directly with all major auto insurance networks, handling the complicated claims paperwork on your behalf to minimize your out-of-pocket expenses.
Your safety and satisfaction are the foundations of our business. That is why every single windshield replacement we perform comes backed by the exclusive AlexWindshield Lifetime Warranty. This comprehensive guarantee covers you against any leaks, whistling, or manufacturer defects in the glass for as long as you own the vehicle. Do not compromise on your safety or the structural integrity of your Chevy Cruze. Contact AlexWindshield today for industry-leading mobile auto glass services across the GTA, and experience the unparalleled difference of master-level craftsmanship.


